
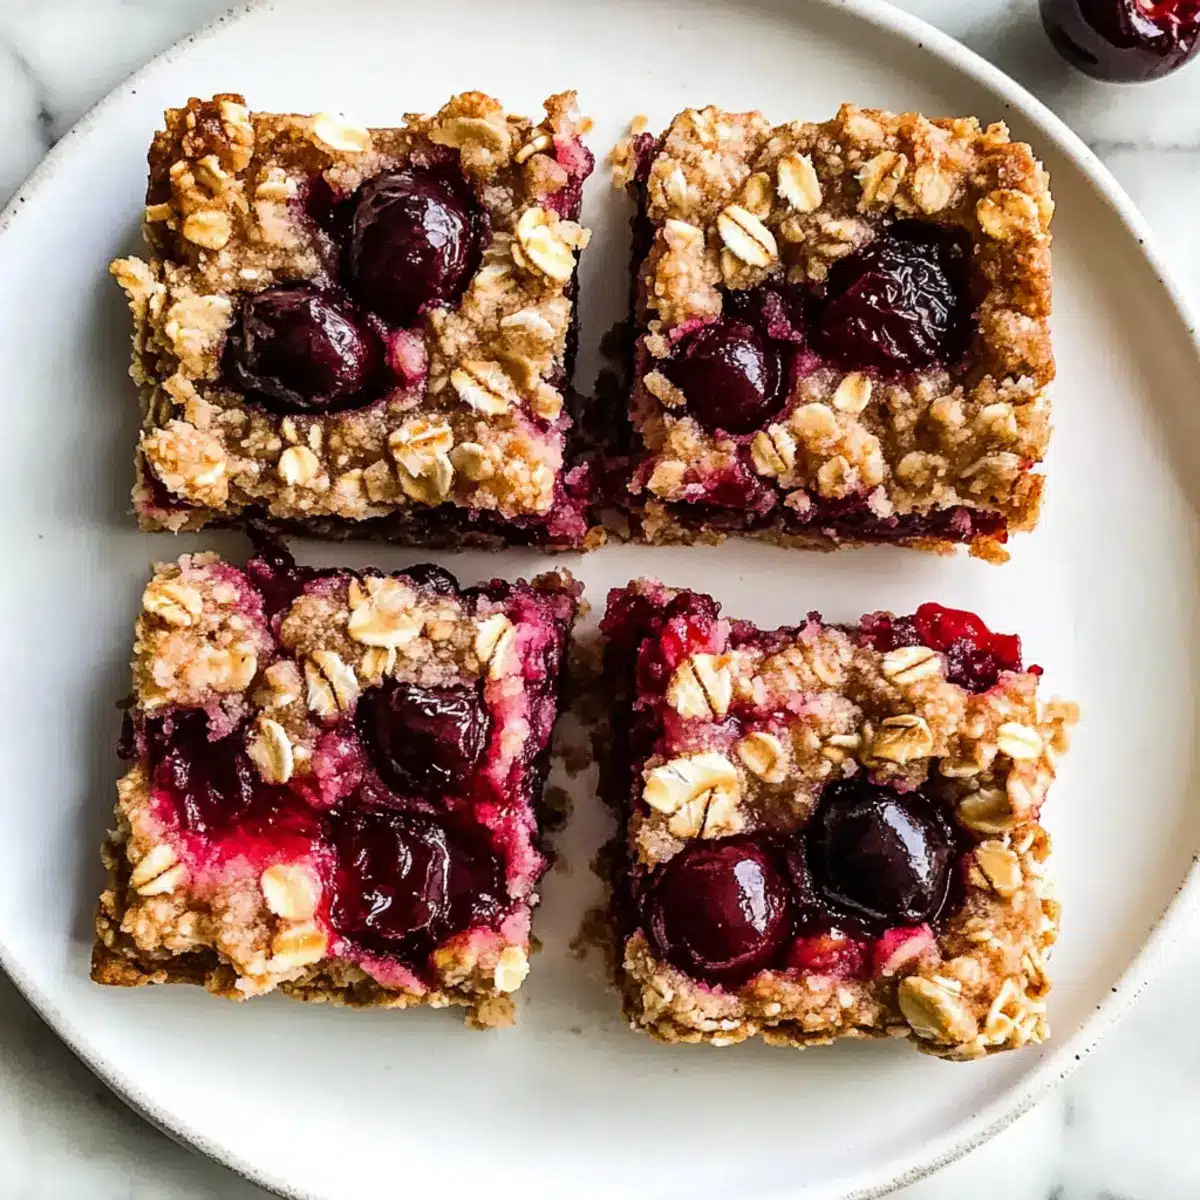
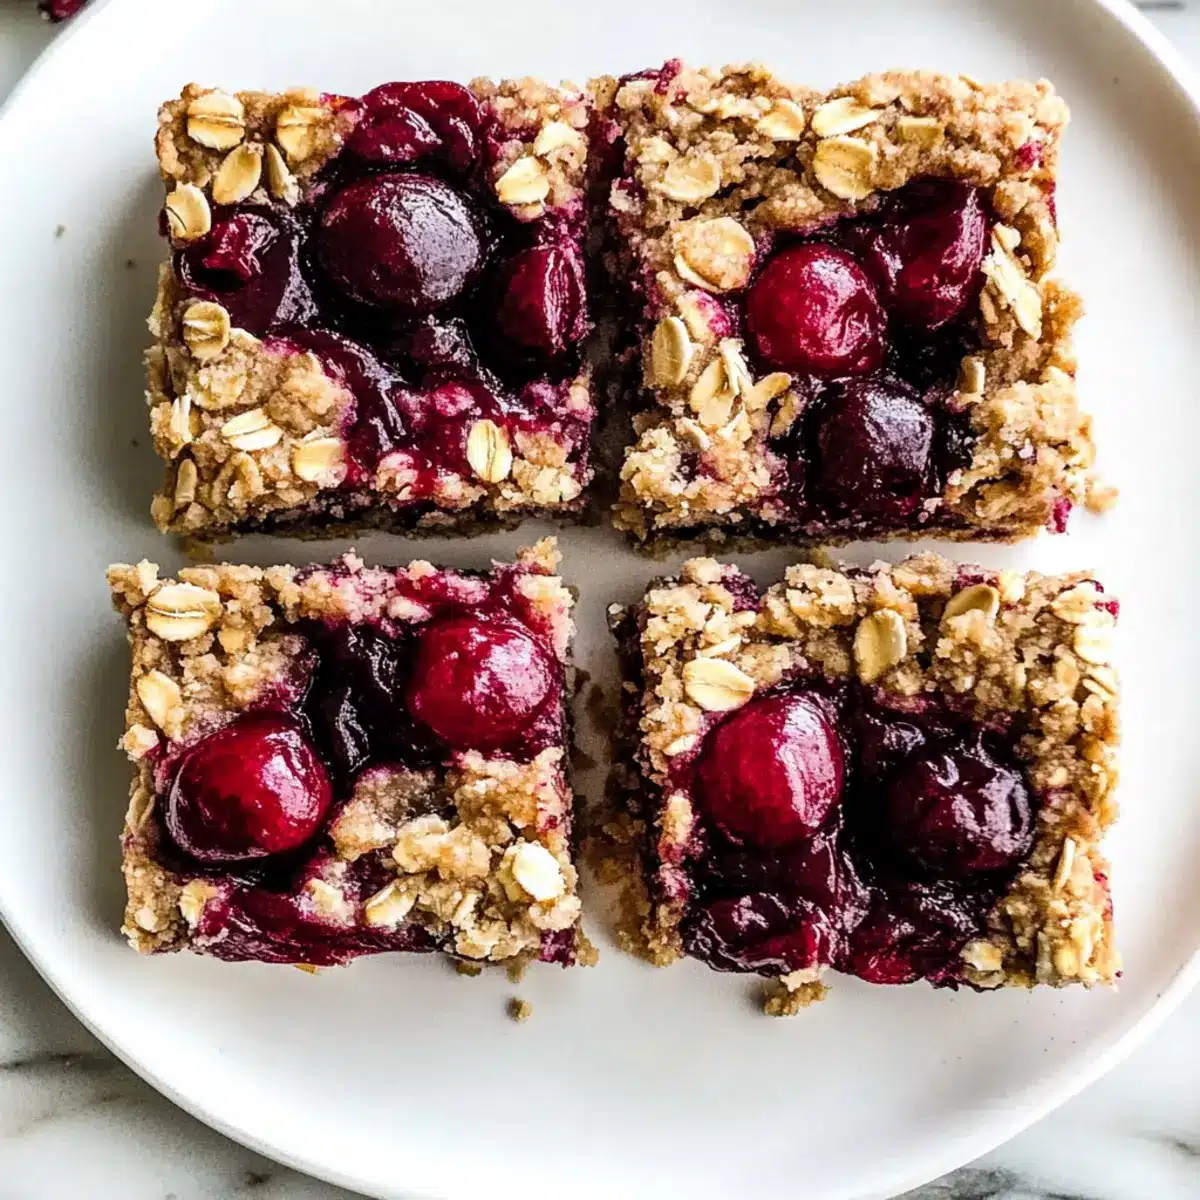
As I pulled the warm Cherry Breakfast Bars from the oven, the scent of sweet Northwest cherries mingled with the inviting aroma of baked oats, instantly whisking me away to lazy summer mornings. These delightful bars are not only a perfect way to use the season’s freshest cherries; they also come together in a quick 15 minutes, making them a lifesaver for busy days or spontaneous brunch get-togethers. With their crispy oat crust paired with a luscious cherry filling, these bars promise to be a satisfying breakfast or snack option everyone will love. So, are you ready to fill your kitchen with incredible scents and create a delicious treat that wins hearts as easily as it fills bellies?
Why are Cherry Breakfast Bars a must-try?
Simplicity: You only need 15 minutes of prep time to whip up these delightful bars, making them perfect for even the busiest mornings.
Bursting with Flavor: The use of fresh Northwest cherries provides a juicy sweetness that makes each bite irresistible.
Versatile Options: Experiment with various fruits and nuts; blueberries or apples make fantastic substitutes, adding a personal twist!
Nutritious Snack: Each bar has around 257 calories, offering a balanced mix of nutrients to kickstart your day or curb afternoon cravings.
Crowd-Pleaser: Whether you enjoy them for breakfast or as a snack, these bars are sure to impress family and friends, just like my Mini Cherry Pies do!
Cherry Breakfast Bars Ingredients
• Discover the delightful components of your new favorite snack!
For the Crust and Topping
• Rolled oats – Adds structure and heartiness to the bars; substitute with gluten-free oats for a gluten-free version.
• Flour – Provides a base for the crust and topping; whole wheat flour can boost nutritional benefits.
• Light brown sugar – Contributes the necessary sweetness and moisture; can be swapped for coconut sugar for a low glycemic option.
• Chopped almonds – Offers crunch and flavor; feel free to replace with walnuts or omit for nut-free bars.
• Baking soda – Helps the crust to rise slightly; make sure it’s fresh for the best results.
• Salt – Enhances flavor; it’s optional if you’re aiming for a lower sodium diet.
• Coconut oil (melted) – Acts as a binding fat for the ingredients; can be replaced with unsalted butter or vegan butter for a different taste.
For the Cherry Filling
• Northwest sweet cherries – The star ingredient, bringing natural sweetness; frozen cherries can work but may require longer baking time.
• Lemon juice – Balances out the sweetness and elevates the cherry flavor.
• Maple syrup – Adds a depth of flavor; honey can be a tasty alternative if you prefer.
• Cornstarch – Thickens the cherry filling; arrowroot powder works as a gluten-free substitute.
These Cherry Breakfast Bars ingredients create a delicious, wholesome treat you’ll want to share with everyone!
Step‑by‑Step Instructions for Cherry Breakfast Bars
Step 1: Preheat and Prepare
Begin by preheating your oven to 350°F (175°C). While the oven warms up, grab an 8-inch square baking dish and line it with parchment paper, making sure to grease the paper with melted coconut oil. This will prevent the Cherry Breakfast Bars from sticking and ensure easy removal once baked.
Step 2: Mix the Dry Ingredients
In a large mixing bowl, combine rolled oats, flour, light brown sugar, chopped almonds, baking soda, and salt. Stir these ingredients together until they are uniform and well incorporated. Once mixed, pour the melted coconut oil over the dry mixture and stir until everything is evenly coated, creating a crumbly texture.
Step 3: Prepare the Cherry Filling
In a separate bowl, combine the pitted and chopped Northwest sweet cherries, lemon juice, maple syrup, and cornstarch. Gently mix these ingredients until the cherries are fully coated, allowing the juices to blend with the other components. This cherry filling will add a burst of flavor to your bars.
Step 4: Form the Base Layer
Set aside 1 cup of the oat mixture for topping later. Press the remaining oat mixture firmly into the bottom of your prepared baking dish to create a solid base. Aim for an even layer, ensuring it reaches the corners for a cohesive bottom layer that will hold the Cherry Breakfast Bars together.
Step 5: Add the Cherry Filling
Pour the prepared cherry filling over the pressed oat base, spreading it evenly with a spatula to ensure every bar gets a delicious bite of cherries. This is the highlight of your Cherry Breakfast Bars, so take your time to distribute them nicely for balanced flavor throughout.
Step 6: Top and Bake
Crumble the reserved oat mixture over the cherry filling, creating a rustic topping. Spread it evenly to cover the cherries, allowing some of the filling to peek through for visual appeal. Place the baking dish in the preheated oven and bake for 30 minutes or until the top is golden brown and slightly crisp.
Step 7: Cool and Slice
Once baked, remove the Cherry Breakfast Bars from the oven and let them cool completely in the pan. This step is crucial for achieving the perfect texture. Once cooled, lift the bars out of the pan using the parchment paper and slice them into squares for serving. Enjoy your delicious homemade treat!
Cherry Breakfast Bars Variations
Ready to personalize your Cherry Breakfast Bars? Let your creativity shine and enhance these delightful treats with a few simple swaps and twists!
- Gluten-Free: Use gluten-free oats and almond flour instead of regular flour for a gluten-free version that’s just as delicious.
- Different Fruits: Swap Northwest cherries for seasonal fruits like blueberries, raspberries, or even diced apples for a fruity variation that’s sure to please!
- Chocolate Delight: Add chocolate chips to the oat mixture for a rich twist. Chocolate and cherries make for a heavenly combination that’s hard to resist!
- Nut-Free Option: Omit the chopped almonds and replace them with seeds like sunflower or pumpkin for a nut-free treat that doesn’t skimp on crunch.
- Spice it Up: Incorporate a teaspoon of cinnamon or nutmeg into the oat mixture for a warm, aromatic flavor that packs a punch!
- Cut the Sugar: Replace maple syrup with mashed ripe bananas to naturally sweeten your bars while reducing added sugars.
- Rich Flavor: Use brown butter instead of coconut oil for a nutty flavor that’s perfect for enhancing the depth of these breakfast bars.
These variations not only keep your breakfast exciting but also allow you to explore flavors that make your heart sing. If you’re in the mood for something different, you might enjoy my Banana Oatmeal Bars or my delightful Soft Baked Maple Donut Bars. Choose your favorites and enjoy!
What to Serve with Cherry Breakfast Bars
Indulge in a delightful morning experience by pairing these cherry breakfast bars with complementary flavors and textures that enhance your meal.
-
Greek Yogurt: A dollop of creamy Greek yogurt enriches the bars, adding a tangy balance to the sweet cherry filling.
-
Fresh Berries: Adding a side of mixed fresh berries provides a pop of color and refreshing juiciness that enhances your enjoyment.
-
Nut Butter Drizzle: A light drizzle of almond or peanut butter adds richness and a nutty flavor, creating an irresistible treat that’s protein-packed.
-
Herbal Tea: Pair with a fragrant cup of herbal tea, such as chamomile or mint, which blankets your palate with warmth and complements the cherry notes beautifully.
-
Smoothie: Whip up a refreshing green smoothie loaded with spinach and banana to introduce a creamy blend that rounds out your breakfast with added nutrition.
-
Honey Drizzle: A touch of honey on top adds a beautiful sweetness that pairs exquisitely with the tartness of the cherries, making each bite even more satisfying.
How to Store and Freeze Cherry Breakfast Bars
Fridge: Store the cherry breakfast bars in an airtight container in the fridge for up to 3 days to keep them fresh and tasty.
Freezer: For longer storage, wrap the bars individually in plastic wrap or foil and place them in a freezer-safe bag. They can be frozen for up to 3 months.
Thawing: To enjoy frozen bars, simply take them out and thaw at room temperature for a couple of hours, or microwave for 15-20 seconds until warmed and soft.
Reheating: If you prefer them warm, reheat in a preheated oven at 350°F for about 10 minutes, or pop them in the microwave for a quick and cozy snack.
Expert Tips for Cherry Breakfast Bars
-
Cool Completely: Make sure to let the bars cool completely before cutting. This helps them set properly and avoids sogginess.
-
Fresh Ingredients: Use fresh Northwest sweet cherries for the best flavor. If using frozen, allow for extra baking time, keeping an eye on texture.
-
Avoid Soggy Bottoms: Ensure the oat mixture is pressed down well but not too tightly in the baking dish. A gentle press allows for a better texture.
-
Spice It Up: Don’t hesitate to add warmth! A dash of cinnamon or a splash of vanilla extract elevates the flavor of your Cherry Breakfast Bars beautifully.
-
Nut-Free Version: If allergies are a concern, omit chopped almonds or substitute with sunflower seeds, still retaining delicious crunch and flavor.
-
Experiment with Fruit: Feel free to swap cherries for other seasonal fruits to create variations—apples or blueberries are delightful alternatives for these breakfast bars.
Make Ahead Options
These Cherry Breakfast Bars are a fantastic option for meal prep! You can prepare the oat crust and topping up to 24 hours in advance by mixing the dry ingredients and storing them in an airtight container in the fridge. Additionally, you can make the cherry filling (with the chopped cherries, lemon juice, maple syrup, and cornstarch) and refrigerate it for up to 3 days. When you’re ready to bake, simply combine the crust and filling as instructed, spread them in your baking dish, and bake. This way, you save precious time on busy mornings while still enjoying wholesome, homemade Cherry Breakfast Bars that taste just as delicious as fresh!
Cherry Breakfast Bars Recipe FAQs
How do I choose the best cherries for my bars?
Absolutely! When selecting cherries, look for bright red Northwest sweet cherries that are plump and firm. Avoid any cherries with dark spots or softness, as those can indicate overripeness. If you’re using frozen cherries, let them thaw and drain excess moisture before incorporating them into the filling for better results.
How should I store my Cherry Breakfast Bars?
To keep your Cherry Breakfast Bars fresh, store them in an airtight container in the fridge for up to 3 days. Make sure they are completely cool before sealing. To retain their flavor and texture, I often recommend reheating them briefly in the oven or microwave before serving.
Can I freeze Cherry Breakfast Bars for later?
Very! To freeze your Cherry Breakfast Bars, wrap them individually in plastic wrap or foil and place them in a freezer-safe bag. They’ll stay good for up to 3 months! When you’re ready to enjoy them, just thaw at room temperature for a couple of hours or pop them in the microwave for a quick warm-up.
What should I do if my bars turn out too soggy?
If your Cherry Breakfast Bars are soggy, they might not have cooled properly. Make sure to allow them to cool completely in the pan—this helps them set. If you used frozen cherries, they could also release more moisture. In the future, try draining excess liquid from thawed cherries before adding them to the filling.
Are Cherry Breakfast Bars suitable for people with nut allergies?
Yes, they can be! If you’re preparing these Cherry Breakfast Bars for someone with nut allergies, simply omit the chopped almonds. You can swap them for sunflower seeds or just leave them out entirely. The bars will still be delicious and satisfying without them.
Can I use other fruits instead of cherries?
The more the merrier! Feel free to experiment with other seasonal fruits like blueberries, raspberries, or even apples. Simply replace the cherries with your fruit of choice, adjusting the sweetness if needed to ensure a balanced flavor in your Cherry Breakfast Bars Recipe FAQs.
Cherry Breakfast Bars – Your New Favorite Morning Treat!
Ingredients
Equipment
Method
- Preheat your oven to 350°F (175°C) and line an 8-inch square baking dish with parchment paper, greasing it with melted coconut oil.
- In a large mixing bowl, combine the rolled oats, flour, light brown sugar, chopped almonds, baking soda, and salt. Stir to mix evenly.
- Pour the melted coconut oil over the dry mixture and stir until everything is evenly coated, creating a crumbly texture.
- In a separate bowl, combine the pitted and chopped Northwest sweet cherries, lemon juice, maple syrup, and cornstarch, mixing gently.
- Set aside 1 cup of the oat mixture for topping. Press the remaining oat mixture into the bottom of the prepared baking dish.
- Pour the cherry filling over the pressed oat base, spreading it evenly with a spatula.
- Crumble the reserved oat mixture over the cherry filling and bake for 30 minutes until the top is golden brown.
- Let cool completely in the pan, then lift out using the parchment paper and slice into squares.
Leave a Reply