
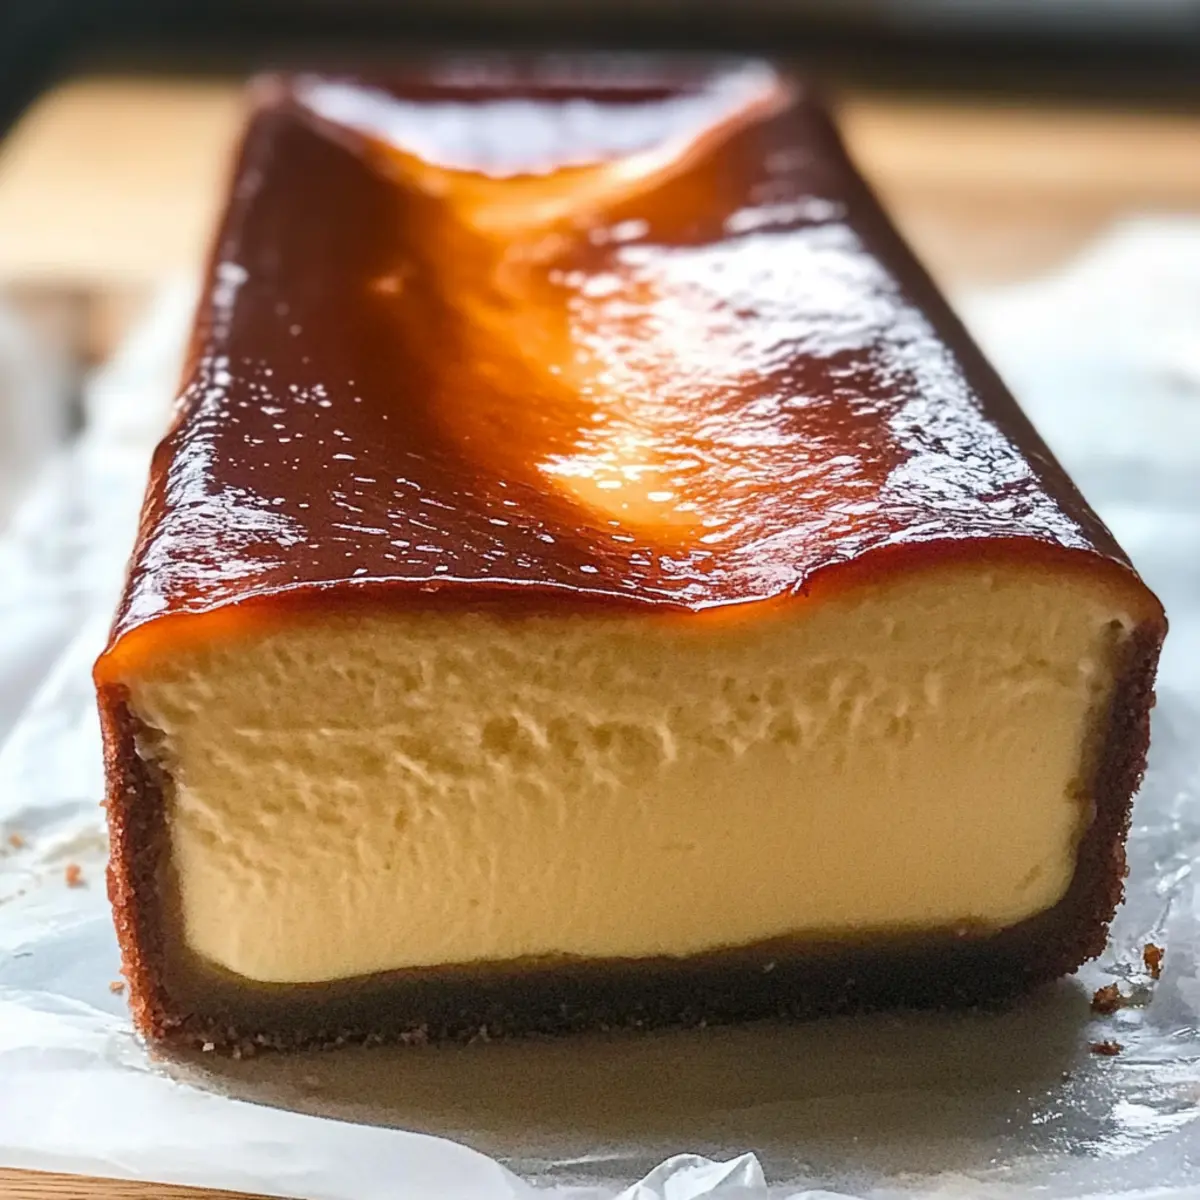
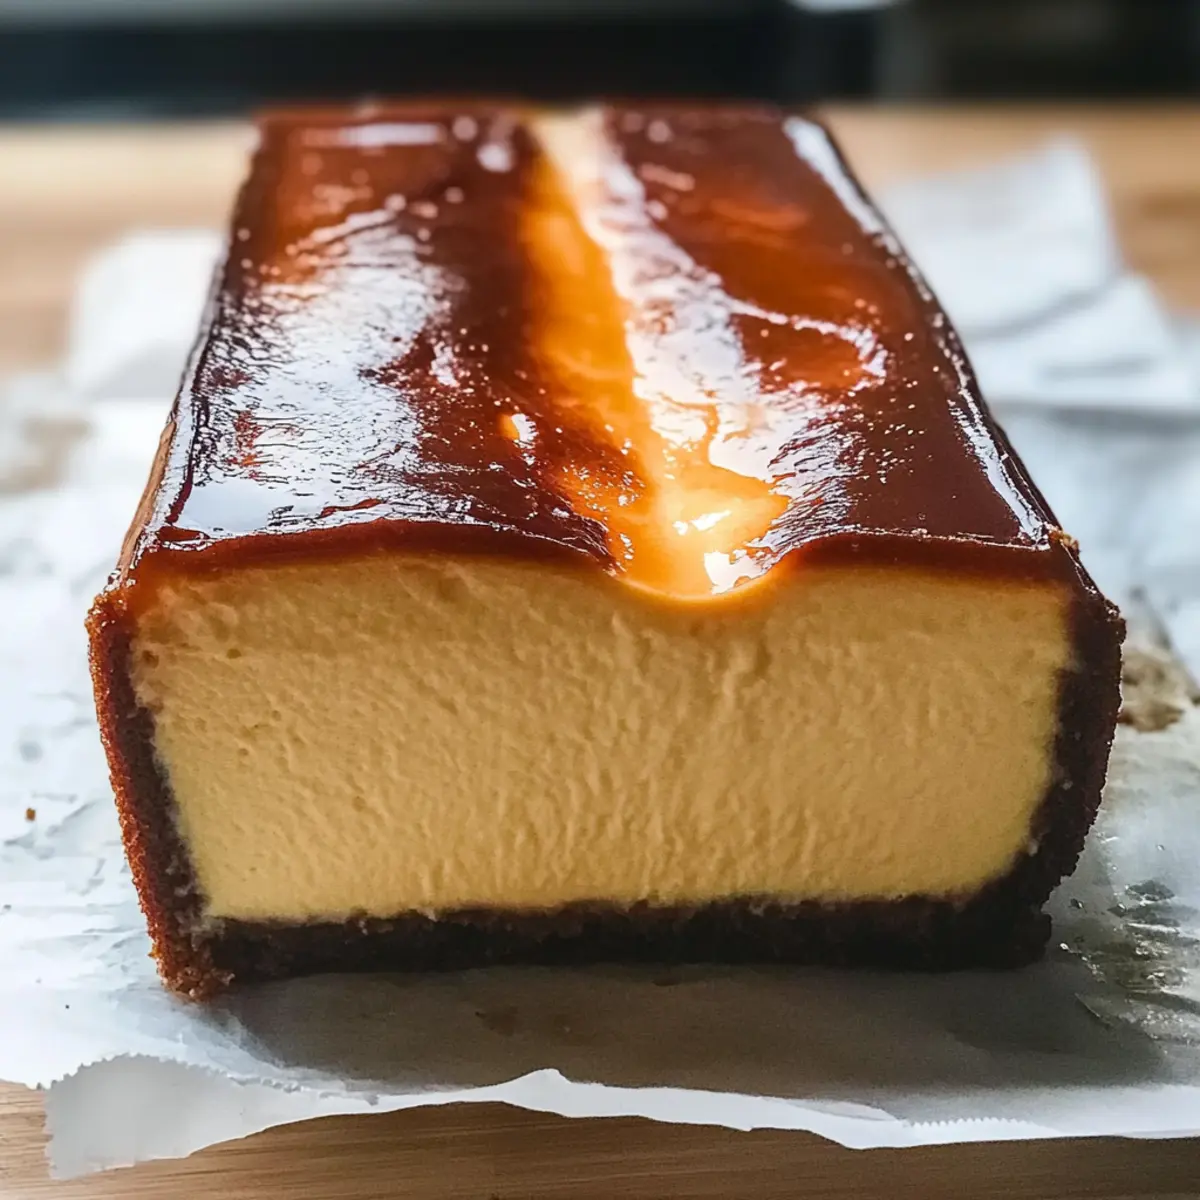
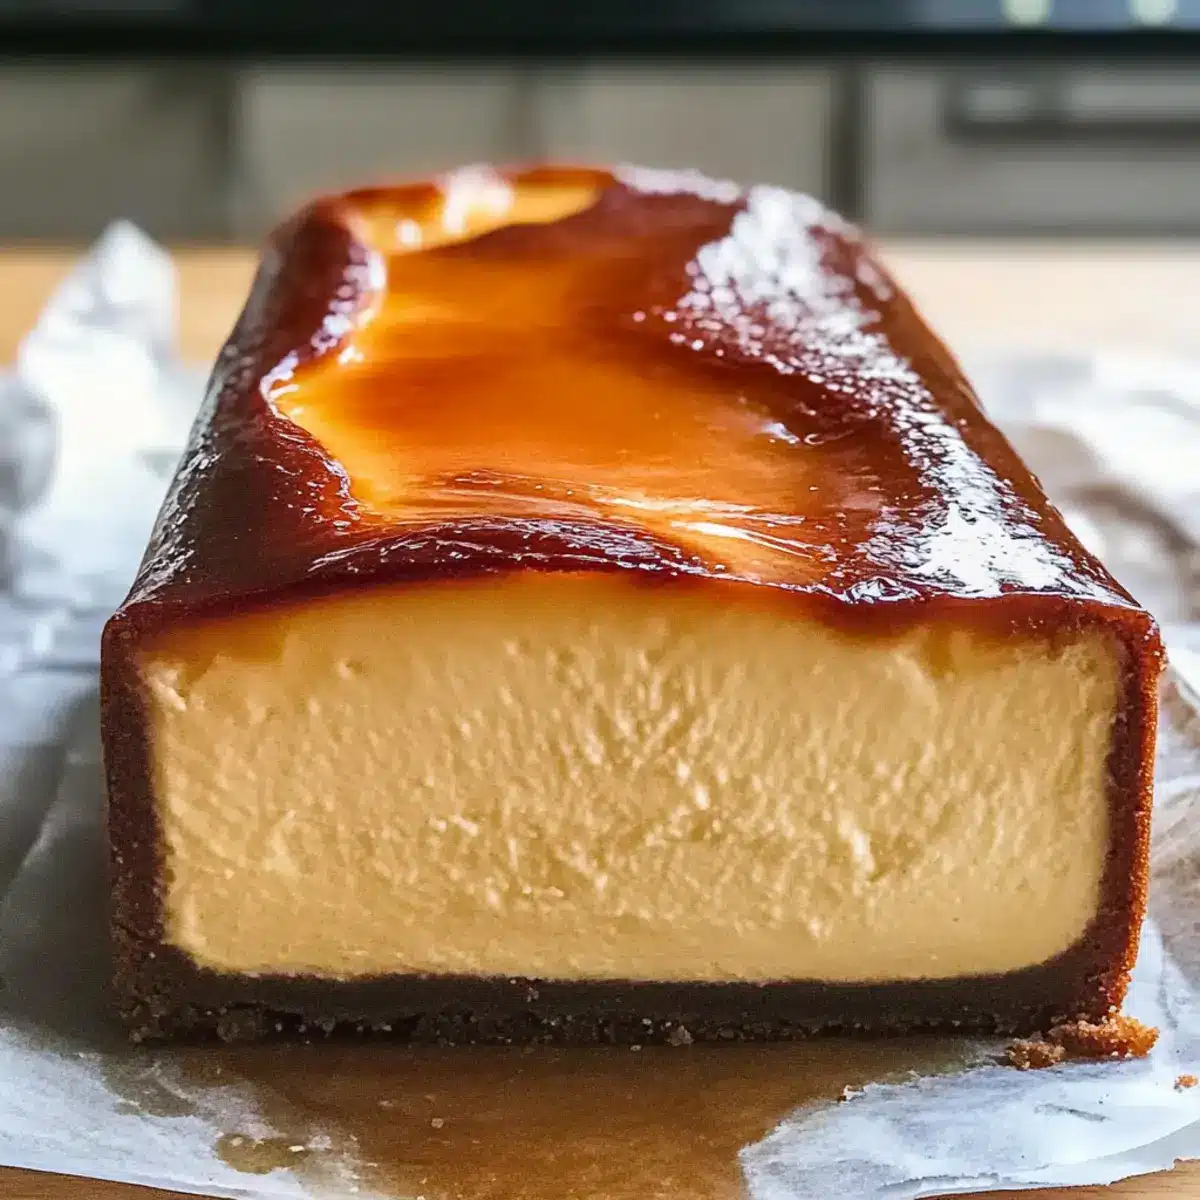
As the aroma of baking cheesecake fills the kitchen, my anticipation rises; it’s not just any dessert, but an Easy Creamy Burnt Basque Cheesecake in a Loaf Pan that’s about to be unveiled. This luscious creation, with its custard-like texture and beautifully caramelized top, offers a delightful twist on tradition, making it the perfect centerpiece for both cozy weeknight dinners and special family gatherings. The beauty of this recipe lies in its simplicity—no fuss, no excess leftovers, just a rich and satisfying indulgence that can be whipped up in no time. Are you ready to indulge in a slice of creamy goodness that will leave everyone wanting more?

Why is This Cheesecake a Must-Try?
Simplicity at Its Best: You don’t need to be a pastry chef to create this stunning dessert; it’s all about easy steps and minimal cleanup.
Creamy Richness: The silky custard texture combined with a caramelized top delivers an indulgent experience that melts in your mouth.
Loaf Pan Convenience: Unlike traditional round cheesecakes, this loaf pan version is perfect for small-batch indulgence, allowing you to savor your dessert without the excess.
Versatile Flavor Enhancements: Feel free to customize it with your favorite mix-ins or toppings—consider pairing it with a seasonal fruit compote or whipped coconut cream for an elevated experience.
Crowd Appeal: Whether it’s a weeknight family gathering or a dinner party, this cheesecake is sure to impress your guests and leave them craving another slice.
For additional dessert inspiration, you might also enjoy making a Fruity Pebbles Cheesecake or a refreshing Orange Creamsicle Cheesecake.
Burnt Basque Cheesecake Ingredients
For the Cheesecake
• Cream Cheese – Provides rich, creamy base; use softened for smoother texture.
• Sugar – Sweetens the cheesecake, balancing flavors; opt for granulated sugar for best results.
• Eggs – Binds ingredients and supports structure; use large eggs at room temperature for easier mixing.
• Heavy Cream – Adds richness and smoothness; substitute with coconut cream for a dairy-free version.
• Vanilla Extract – Enhances flavor with warmth; use pure extract for the most authentic taste.
• Salt – Balances sweetness and enhances overall flavors, ensuring a delightful indulgence.
• All-Purpose Flour – Aids in setting the cheesecake; can substitute with gluten-free flour for dietary needs.
This easy, creamy Burnt Basque Cheesecake in a Loaf Pan is just waiting to be made!
Step‑by‑Step Instructions for Burnt Basque Cheesecake in a Loaf Pan
Step 1: Preheat the Oven
Begin by preheating your oven to 400°F (200°C). This high temperature is essential for developing that signature burnt top. As the oven warms, you’ll create a perfect baking environment, ensuring your cheesecake’s exterior caramelizes beautifully while the interior remains creamy and custard-like.
Step 2: Prepare the Loaf Pan
While the oven heats, line a loaf pan with parchment paper, allowing some overhang on the sides. This will help you easily lift the cheesecake out after baking. Make sure the parchment completely covers the bottom and sides, avoiding any sticking so you can serve your Burnt Basque Cheesecake effortlessly.
Step 3: Mix the Cream Cheese and Sugar
In a large mixing bowl, combine the softened cream cheese and granulated sugar. Using an electric mixer on medium speed, beat these until the mixture is smooth and fluffy, usually about 2-3 minutes. The goal is to eliminate any lumps, resulting in a creamy base for your cheesecake, setting the stage for a rich flavor.
Step 4: Incorporate the Eggs
Next, add the large eggs to the cream cheese mixture one at a time, mixing thoroughly after each addition. This ensures that each egg is fully integrated, maintaining a silky batter. After incorporating all the eggs, you should see a luscious, smooth consistency, ready for the next ingredients.
Step 5: Add Cream and Flavorings
Pour in the heavy cream, vanilla extract, and a pinch of salt into the mixture. Continue to mix on low speed until everything is well blended, about 1-2 minutes. The heavy cream adds a delightful richness, enhancing the creamy profile of your Burnt Basque Cheesecake, while the vanilla provides a warm, comforting touch.
Step 6: Fold in the Flour
Sift the all-purpose flour over the batter and gently fold it in using a spatula. Be careful not to overmix; just combine until you see no dry flour. This step is crucial for achieving the right texture, ensuring your cheesecake sets properly while still remaining ultra-creamy once baked.
Step 7: Pour into the Loaf Pan
Gently pour your batter into the prepared loaf pan, taking care to distribute it evenly. Tap the pan lightly on the counter to release any air bubbles, which can cause cracks. This will help ensure your Burnt Basque Cheesecake achieves a smooth top and a beautiful appearance once baked.
Step 8: Bake to Perfection
Place your loaf pan in the preheated oven and bake for 40-45 minutes. Keep an eye on the cheesecake during the last few minutes—look for a deeply golden, almost burnt top with a center that jiggles slightly when shaken. This indicates it’s done, providing the perfect custard-like texture inside.
Step 9: Cool and Refrigerate
Once baked, remove the cheesecake from the oven and allow it to cool at room temperature for about an hour. After that, transfer it to the refrigerator and chill for at least 4 hours, or overnight for best results. This cooling time is essential for enhancing flavors and achieving that desirable creamy texture for your Burnt Basque Cheesecake.
Burnt Basque Cheesecake Variations & Substitutions
Customize your cheesecake and make it truly your own with these delightful variations!
-
Dairy-Free: Substitute heavy cream with coconut cream for a creamy and delicious alternative. This switch brings a subtle tropical twist that enhances the overall flavor.
-
Gluten-Free: Use a gluten-free flour blend instead of all-purpose flour to ensure everyone can enjoy this rich dessert. The cheesecake will still maintain its creamy texture and caramelized top.
-
Flavor Boost: Add a teaspoon of lemon or orange zest to the batter for a refreshing zing. This brightens the flavor profile beautifully, perfectly complementing the cheesecake’s richness.
-
Swirls of Flavor: Create a decadent swirl by folding in some melted chocolate or caramel sauce before baking. This twist adds an exciting layer of flavor to your cheesecake every time you slice it.
-
Nutty Crunch: For a delightful textural contrast, sprinkle some chopped nuts on top right before serving. Toasted almonds or walnuts provide a lovely crunch and nutty flavor that elevates the dish.
-
Spicy Kick: If you’re a fan of a bit of heat, add a pinch of cayenne pepper or a dash of cinnamon for layers of flavor. This unexpected addition can create a warm, comforting finish that’s hard to resist.
-
Fruity Compote: Top your cheesecake with a seasonal fruit compote, such as berry or stone fruit, for a fresh and bright contrast to the creamy cheesecake. This addition creates a lovely balance of flavors and enhances the presentation.
If you’re craving more delightful desserts, don’t miss the chance to whip up a lovely Crisp Mini Cheesecakes or indulge in an amazing Orange Creamsicle Cheesecake. Each recipe offers a unique flavor experience sure to satisfy your sweet tooth!
Make Ahead Options
These Easy Creamy Burnt Basque Cheesecake in a Loaf Pan are perfect for meal prep enthusiasts! You can prepare the batter up to 24 hours in advance by mixing all the ingredients and storing it tightly covered in the refrigerator. For even more convenience, you can bake the cheesecake up to 3 days ahead of time; just ensure it is completely cool before wrapping it gently with plastic wrap and refrigerating. This resting time will deepen the flavors, and when ready to serve, simply slice and enjoy chilled. As a critical tip, avoid freezing, as it may compromise the creamy texture—trust me, it’ll be just as delicious and perfect for any occasion!
Expert Tips for Burnt Basque Cheesecake
• Soften Your Cream Cheese: Ensure cream cheese is at room temperature for a lump-free mixture—this is key for a smooth, creamy Burnt Basque Cheesecake.
• Resting is Vital: Do not skip the cooling and refrigeration time; allowing your cheesecake to settle overnight intensifies flavor and improves texture.
• Watch Your Oven Temperature: Every oven is different; aim for that signature golden top while ensuring the center remains slightly jiggly for perfect custard consistency.
• Use Parchment Paper: Lining your loaf pan with parchment helps in easy removal and maintains the cheesecake’s shape, ensuring you serve flawless slices every time.
• Tailor Your Flavor: Feel free to mix in citrus zest or chocolate chips; personalizing your Burnt Basque Cheesecake can elevate it to a whole new level of deliciousness.
What to Serve with Easy Creamy Burnt Basque Cheesecake in a Loaf Pan
As you slice into the velvety goodness of this cheesecake, consider these delightful accompaniments to elevate your dessert experience.
-
Whipped Coconut Cream: A luscious topping that adds a tropical twist, beautifully contrasting the richness of the cheesecake.
-
Berry Compote: The tartness of fresh berries complements the sweet, creamy cheesecake, adding a burst of flavor and vibrant color to your plate.
-
Toasted Almonds: Crunchy and nutty, toasted almonds add a delightful texture, enhancing your dessert experience while cutting through the creaminess.
-
Espresso or Coffee: A warm, robust drink to pair with each slice, balancing the sweetness and creating a cozy atmosphere for your dessert time.
-
Citrus Zest: A sprinkle of orange or lemon zest brightens up each bite and infuses an invigorating freshness that pairs harmoniously with the cheesecake.
-
Chocolate Drizzle: A decadent chocolate drizzle brings an indulgent touch that marries well with the creamy texture, creating a sweet contrast that chocolate lovers will adore.
For a truly unforgettable finish, why not serve your cheesecake alongside a scoop of vanilla bean ice cream, melting into the warm sweetness of the burnt top?
How to Store and Freeze Burnt Basque Cheesecake in a Loaf Pan
Fridge: Store your Burnt Basque Cheesecake in an airtight container or tightly wrapped with plastic wrap for up to 3 days. This will keep it fresh and ready to enjoy.
Freezer: For longer storage, freeze the cheesecake tightly wrapped in plastic and foil for up to 2 months. To defrost, place it in the fridge overnight before serving.
Reheating: If you prefer it warmed, gently heat individual slices in the microwave for 10-15 seconds until just slightly warm. Enjoy the creamy texture again!
Make-Ahead: You can prepare the cheesecake in advance—just be sure to store it properly in the fridge overnight for optimal flavor and texture before serving.
Burnt Basque Cheesecake in a Loaf Pan Recipe FAQs
How do I select ripe ingredients for the cheesecake?
Absolutely! For the best results, ensure your cream cheese is softened to room temperature, which helps in achieving a silky smooth texture. Use fresh eggs from a reputable source—they should be large, free-range, and ideally at room temperature. If you’re using heavy cream, opt for a high-fat content (around 36%) to enhance creaminess.
What is the best method to store leftover cheesecake?
Very! After enjoying your Burnt Basque Cheesecake, store any leftovers in an airtight container or tightly wrapped in plastic wrap in the refrigerator for up to 3 days. This helps maintain its creamy texture and delicious flavor. Ensure it’s completely cooled before storing for optimal freshness.
Can I freeze my Burnt Basque Cheesecake?
Absolutely! To freeze your cheesecake, wrap it tightly in plastic wrap, then in aluminum foil for added protection, and pop it in the freezer for up to 2 months. When you’re ready to enjoy, simply transfer it to the refrigerator to defrost overnight. This method preserves its rich flavor and creamy texture.
What if my cheesecake is overcooked or undercooked?
Very! If your cheesecake turns out overcooked and dry, next time aim for a baking time of 40-45 minutes, and remember to pull it out when the center still jiggles slightly. Conversely, if it’s undercooked, return it to the oven for additional 5-10 minute intervals until properly set, but keep an eye on that beautiful caramelized top!
Is this cheesecake safe for those with allergies?
Absolutely! This recipe contains common allergens like dairy and gluten. For a dairy-free version, substitute heavy cream with coconut cream and use a dairy-free cream cheese option. If you have gluten issues, replace the all-purpose flour with a 1:1 gluten-free blend. Always check product labels for potential cross-contamination based on individual dietary needs.
How can I customize my Burnt Basque Cheesecake?
The more the merrier! Feel free to add lemon or orange zest into the batter for a burst of citrus flavor, or fold in chocolate chips for a sweet surprise. Top with a fruit compote or whipped coconut cream right before serving for an extra layer of deliciousness. Enjoy experimenting!
Creamy Burnt Basque Cheesecake in a Loaf Pan Made Easy
Ingredients
Equipment
Method
- Preheat your oven to 400°F (200°C).
- Line a loaf pan with parchment paper.
- In a large mixing bowl, combine the softened cream cheese and granulated sugar, mixing until smooth and fluffy.
- Add the eggs one at a time to the cream cheese mixture, mixing thoroughly after each addition.
- Pour in the heavy cream, vanilla extract, and salt, mixing until well blended.
- Sift the flour over the batter and gently fold it in.
- Pour your batter into the prepared loaf pan, distributing it evenly.
- Bake for 40-45 minutes until the top is golden and the center jiggles slightly.
- Cool at room temperature for about an hour, then refrigerate for at least 4 hours.
Leave a Reply