
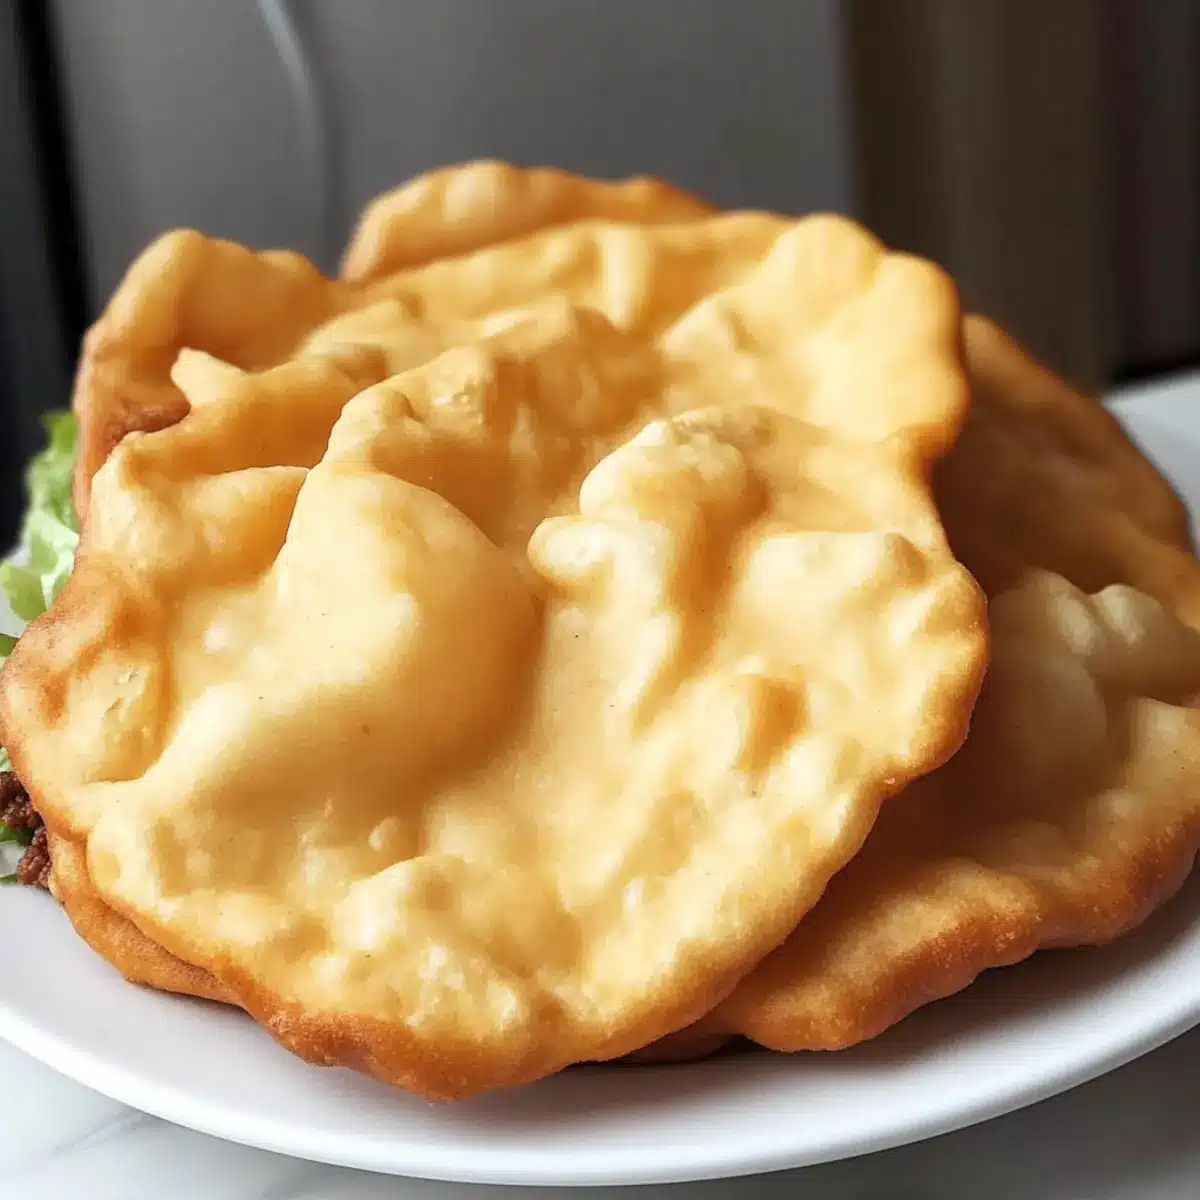
As I watched my kids devour dinner, I couldn’t help but smile at the pure joy that came from fluffy, warm Indian Fry Bread tucked into their hands. This versatile recipe celebrates a beloved staple of Native American cuisine, perfect for crafting hearty Navajo Tacos or indulging in sweet toppings. With just a handful of simple ingredients and a quick frying technique, you’re just moments away from creating a phenomenal dish that doubles as comfort food and a cultural experience. Whether it’s a busy weeknight or a special gathering, this easy-to-follow recipe guarantees satisfaction with minimal effort. Are you ready to explore flavors that fill your kitchen with warmth and laughter? Let’s dive in!
Why is Fry Bread So Amazing?
Simplicity: This recipe uses just a few pantry staples, making it accessible for anyone to whip up quickly.
Taste Explosion: Crispy outside, fluffy inside, fry bread is a delightful canvas for savory tacos or sweet drizzles of honey.
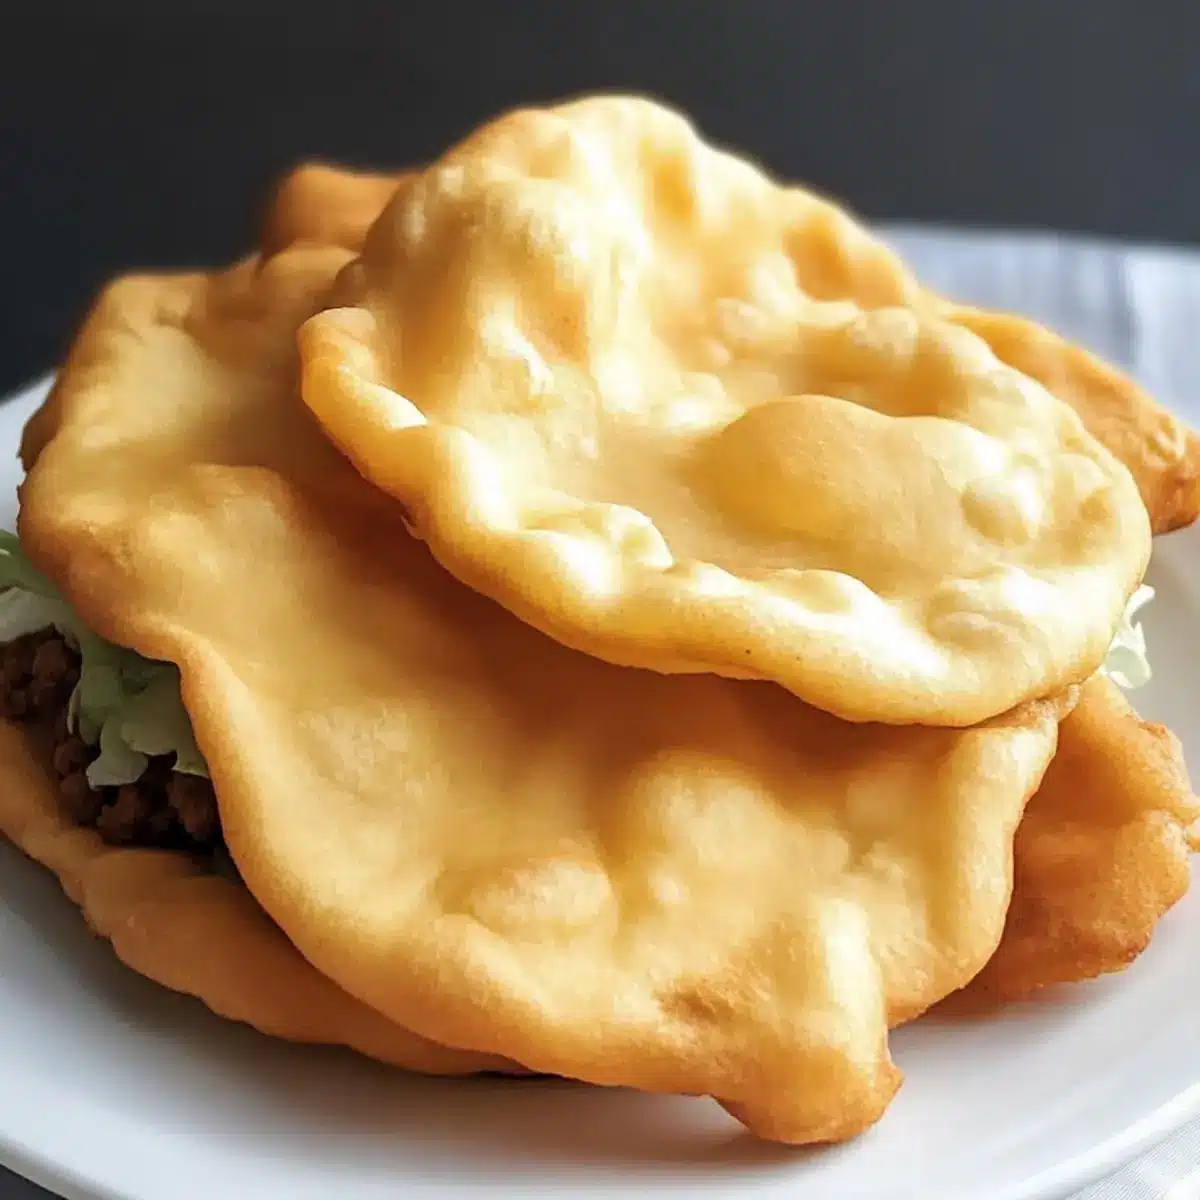
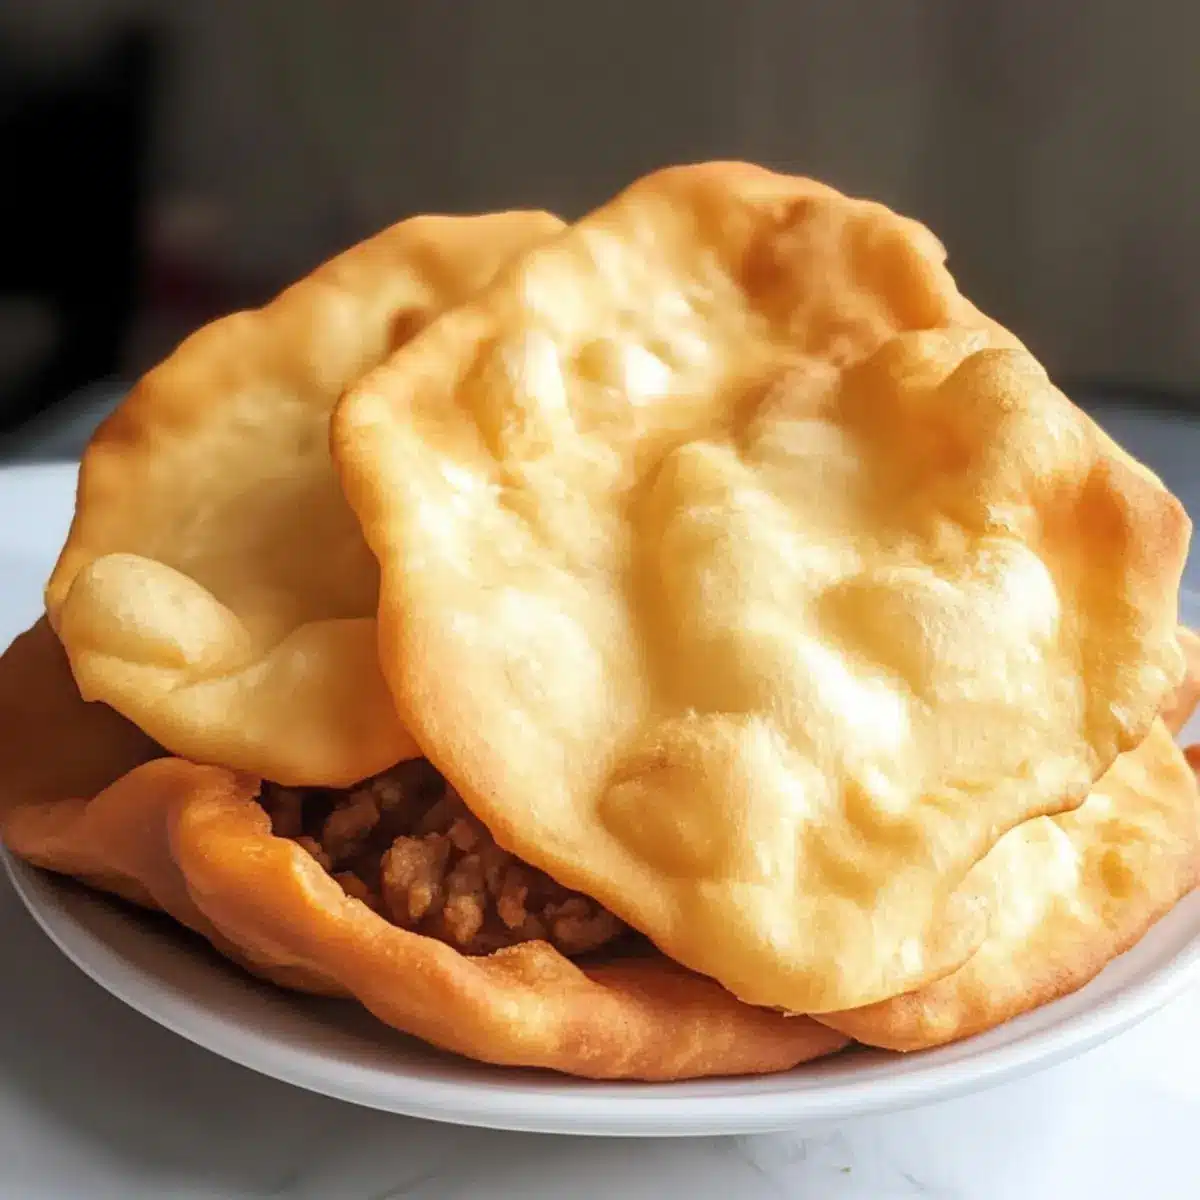
Versatile: Whether you top it with ground beef and veggies for dinner or sprinkle powdered sugar for breakfast, the options are endless!
Cultural Connection: Creating Indian Fry Bread offers a unique opportunity to explore and appreciate Native American culinary traditions, connecting your family to rich history.
Crowd-Pleaser: Kids and adults alike love it, making it a go-to for family dinners or gatherings.
Why not pair your fry bread with some tasty accompaniments, like a classic Air Fryer Apple for dessert? Enjoy the experience!
Indian Fry Bread Ingredients
• Ready to whip up some magic in the kitchen? Here are the simple ingredients you’ll need!
For the Dough
- All-Purpose Flour – Provides structure and a chewy texture; gluten-free flour can be substituted for a gluten-free version.
- Salt – Enhances flavor; omit if making a sweet variation.
- Baking Powder – Acts as a leavening agent for a lighter texture; do not substitute if a crispy texture is desired.
- Shortening/Oil/Lard (optional) – Adds moisture and richness to the dough; you can also use butter or omit for a lighter version.
- Water – Hydrates the dough and binds the dry ingredients; start with 3/4 cup and adjust as needed.
For Frying
- Frying Oil (vegetable/canola/coconut/avocado) – Used for frying, creating a crispy exterior; ensure the oil is heated to 350°F for proper frying.
With these ingredients on hand, you’ll be well on your way to enjoying delicious Indian Fry Bread, perfect for tacos or sweet treats!
Step‑by‑Step Instructions for Indian Fry Bread
Step 1: Prepare Dough
In a large mixing bowl, whisk together 2 cups of all-purpose flour, 1 teaspoon of salt, and 1 tablespoon of baking powder. If you choose to use shortening, incorporate 2 tablespoons into the dry ingredients using a fork or your fingers until crumbly. Gradually add in 3/4 cup of warm water, mixing until a slightly sticky dough forms. Ensure the dough is cohesive yet soft to the touch.
Step 2: Knead
Turn the dough out onto a lightly floured surface. Knead the dough for 3-4 minutes until it becomes smooth and elastic. Avoid over-kneading to maintain a tender texture. Once ready, cover the dough with a cloth and allow it to rest for 30 minutes to 2 hours, giving it time to relax and rise slightly for better frying.
Step 3: Heat Oil
In a deep, heavy-bottomed pot, pour in enough frying oil to reach a depth of about 1 inch. Heat the oil over medium heat until it reaches 350°F (176°C). You can test the oil by dropping a small piece of dough into it; it should sizzle and rise to the surface. Proper oil temperature is key to achieving that crispy Indian Fry Bread everyone loves.
Step 4: Shape Dough
After resting, divide the dough into 6-8 equal pieces. Take each piece and roll it out on a floured surface into circles about 1/4 inch thick, similar in thickness to a tortilla. Aim for an even thickness to ensure uniform cooking. Enjoy the fun of shaping the dough, allowing your creativity to shine through!
Step 5: Fry Bread
Carefully place each rolled circle of dough into the hot oil, frying for 2-3 minutes or until golden brown on one side. Use tongs to gently flip the fry bread, allowing the other side to fry for an additional 2-3 minutes. The bread should puff up and have a beautiful golden brown color when perfectly cooked.
Step 6: Serve
Once fried to perfection, remove the bread from the oil using tongs and place it on a plate lined with paper towels to drain excess oil. Serve warm with your favorite taco fillings or for a delightful sweet treat, drizzle with honey and sprinkle powdered sugar. The Indian Fry Bread brings a delicious twist to any meal!
What to Serve with Traditional Indian Fry Bread
Creating a delightful meal around this versatile fry bread opens up a world of flavors and textures.
- Hearty Taco Fillings: Ground beef, refried beans, or grilled chicken add robust taste and protein, turning your fry bread into a satisfying meal.
- Fresh Garden Salad: A crisp salad with vibrant greens and a zesty vinaigrette balances the warmth of fry bread, providing a refreshing contrast.
Pairing your fry bread with a crunchy salad invites a delightful balance to your bites, enhancing the overall experience.
- Sautéed Vegetables: Colorful bell peppers, zucchini, and onions, lightly sautéed, offer a flavorful, healthful addition that complements the fry bread beautifully.
- Savory Dips: Creamy guacamole or tangy salsa provide extra flavors and exciting textures that enhance your fry bread’s versatility.
Don’t forget a chilled, fruity spritzer or signature cocktail; they’ll brighten every bite and elevate your meal with delightful sips.
How to Store and Freeze Indian Fry Bread
- Room Temperature: Store leftover fry bread in a ziplock bag at room temperature for up to 3 days. This keeps it soft and ready for enjoying!
- Fridge: If you prefer, you can refrigerate fry bread in an airtight container for up to 5 days, although it may lose some crispiness.
- Freezer: For longer storage, freeze fry bread in a ziplock bag or wrap individually in plastic wrap for up to 2-3 months.
- Reheating: To reheat, place frozen fry bread directly in the oven at 350°F (175°C) for 10-15 minutes, or pan-fry on low heat for a few minutes each side for that delightful crispiness.
Expert Tips for Indian Fry Bread
-
Perfect Temperature: Ensure oil reaches 350°F before frying to create that irresistible crispy texture. Use a thermometer if needed!
-
Don’t Overwork Dough: Knead just until smooth; over-kneading can lead to tougher bread. A slightly sticky dough yields the best Indian Fry Bread.
-
Uniform Thickness: Roll dough into even circles to ensure even frying. Thin spots may burn, while thick areas won’t cook through properly.
-
Adjust Water Gradually: Start with 3/4 cup of water and add more as necessary. The right hydration makes for a perfect dough consistency.
-
Storage Solutions: Enjoy fry bread fresh, but store extras in a ziplock bag at room temperature for a few days, or freeze for longer enjoyment!
Make Ahead Options
These Indian Fry Bread are perfect for meal prep enthusiasts! You can prepare the dough up to 24 hours in advance, allowing the flavors to meld beautifully. Simply follow the first two steps—mixing and kneading the dough—and then cover it tightly with plastic wrap and refrigerate. This helps maintain its quality while keeping it convenient for busy weeknights. Additionally, you can shape the rolled-out dough circles and freeze them for up to 3 months; just ensure to separate each piece with parchment paper. When you’re ready, fry them directly from frozen, adding an extra minute to the cooking time for crispy, golden results. Enjoy delicious homemade Indian Fry Bread with minimal effort!
Indian Fry Bread Variations & Substitutions
Feel free to get creative as you whip up your Indian Fry Bread—there are so many ways to customize this beloved dish!
- Gluten-Free: Substitute all-purpose flour with a gluten-free blend for a delightful alternative that everyone can enjoy.
- Sweet Spice: Add cinnamon or nutmeg to the dough for a warm, fragrant twist that makes your fry bread perfect for breakfast.
- Savory Infusion: Mix in minced garlic or fresh herbs, like rosemary or chives, for a deliciously fragrant touch that pairs beautifully with toppings.
- Syrup Drizzle: Instead of honey, try a maple syrup drizzle for a unique, sweet flavor that will have your taste buds dancing!
- Veggie Lovers: Top your fry bread with grilled veggies and feta cheese for a fresh and flavorful vegetarian alternative.
- Special Heat: Add a pinch of cayenne pepper to the dough to give your fry bread a subtle kick that will surprise and delight!
- Baked Option: For a lighter version, brush the dough with oil and bake at 425°F until golden brown—still tasty without frying!
- Fruit Toppings: Experiment with fruit preserves, sliced strawberries, or peaches as a refreshing, sweet topping for those sunny mornings.
As you let your imagination run wild, why not explore serving your fry bread with something sweet like an addictive Air Fryer Apple dessert? The combination will surely bring warmth and joy to your table!

Indian Fry Bread Recipe FAQs
What type of flour works best for Indian Fry Bread?
Absolutely! All-purpose flour is ideal for making Indian Fry Bread as it provides the right structure and chewiness. If you’re looking for a gluten-free option, you can substitute it with a gluten-free flour blend. Just ensure it is a mix that contains xanthan gum for the best results.
How long can I store leftover fry bread?
You can store leftover fry bread in a ziplock bag at room temperature for up to 3 days. It’s best enjoyed fresh, but if you need to keep it longer, consider freezing it!
Can I freeze Indian Fry Bread and how?
Yes, you can freeze Indian Fry Bread! After it has cooled completely, wrap each piece tightly in plastic wrap and place them in a ziplock bag, making sure to push out any air. This way, they can be stored for up to 2-3 months. When you’re ready to enjoy them, simply reheat in the oven at 350°F (175°C) for 10-15 minutes, or pan-fry them for that crispy texture!
What should I do if my dough feels too wet?
If your dough is too sticky or wet after kneading, don’t worry! Add a little bit of flour—about a tablespoon at a time—while kneading until it reaches a slightly sticky, manageable consistency. Remember, every flour can absorb water differently, so adjust as needed.
Is Indian Fry Bread safe for people with allergies?
Be cautious with flour and any additional toppings if someone has gluten allergies. For dairy allergies, you can use dairy-free alternatives for toppings such as almond butter or coconut whipped cream. Always check ingredient labels for any pre-packaged items!
Can I use self-rising flour to make Indian Fry Bread?
Yes, you can use self-rising flour, but make sure to omit the salt and baking powder from the recipe. The self-rising flour already contains these, and not adjusting the other ingredients will help keep your fry bread puffing beautifully!
Crispy Indian Fry Bread: Perfect for Tacos or Sweet Treats
Ingredients
Equipment
Method
- In a large mixing bowl, whisk together flour, salt, and baking powder. Incorporate shortening if using, then gradually add water to form a slightly sticky dough.
- Turn the dough onto a floured surface and knead for 3-4 minutes until smooth. Cover and rest for 30 minutes to 2 hours.
- In a pot, heat oil to 350°F (176°C). Test temperature with a small piece of dough.
- Divide dough into 6-8 pieces and roll each into circles about 1/4 inch thick.
- Fry each circle in hot oil for 2-3 minutes until golden brown. Flip and fry the other side.
- Remove from oil and drain on paper towels. Serve warm with taco fillings or drizzled with honey.
Leave a Reply