
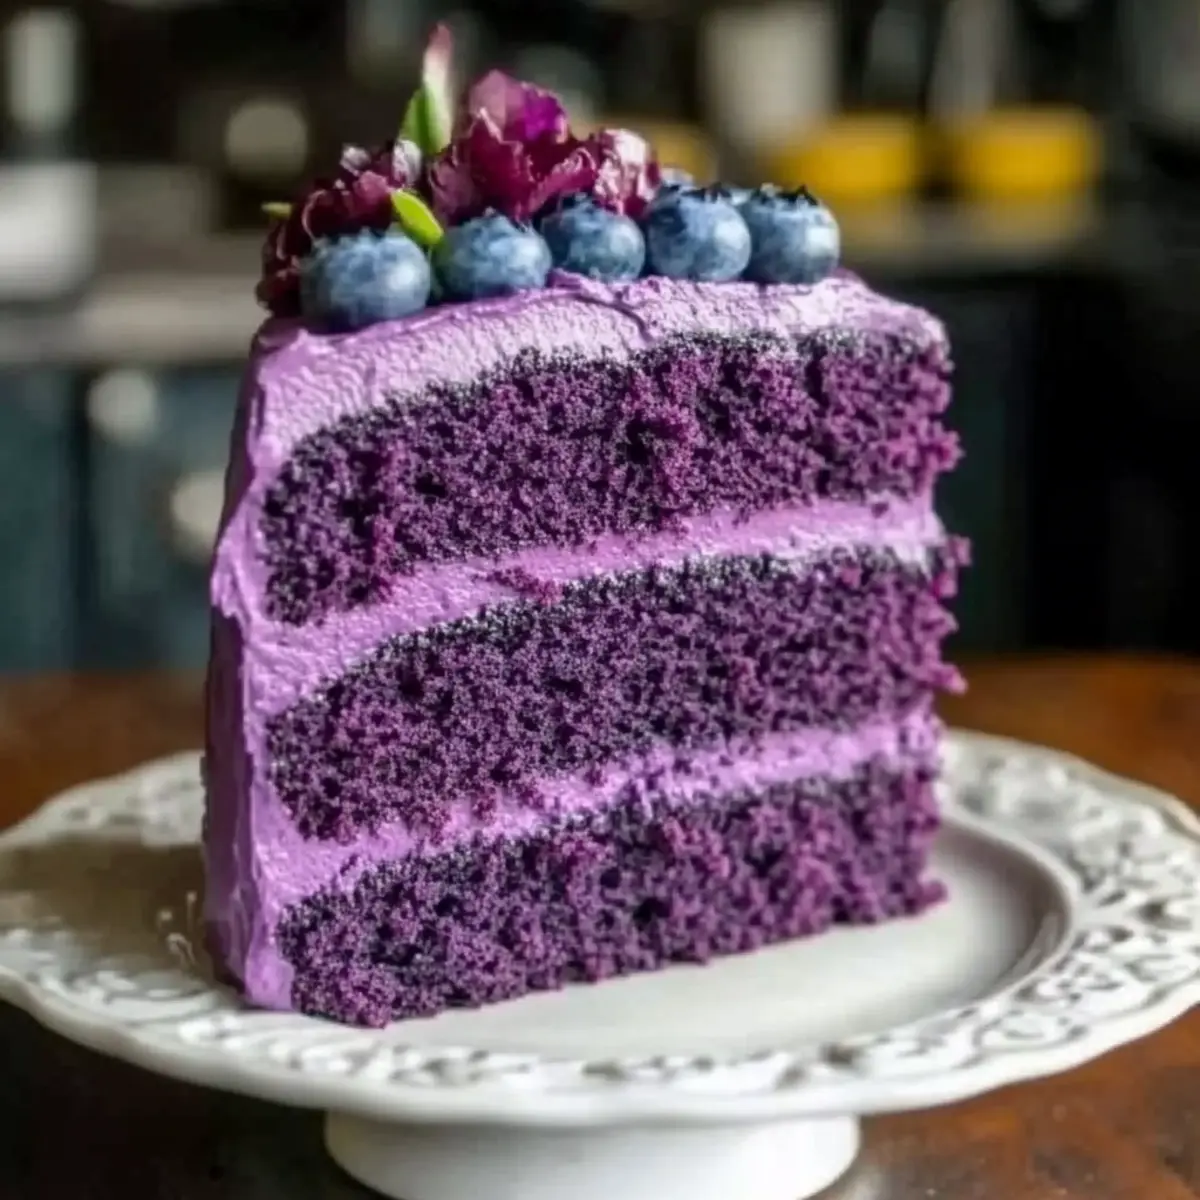
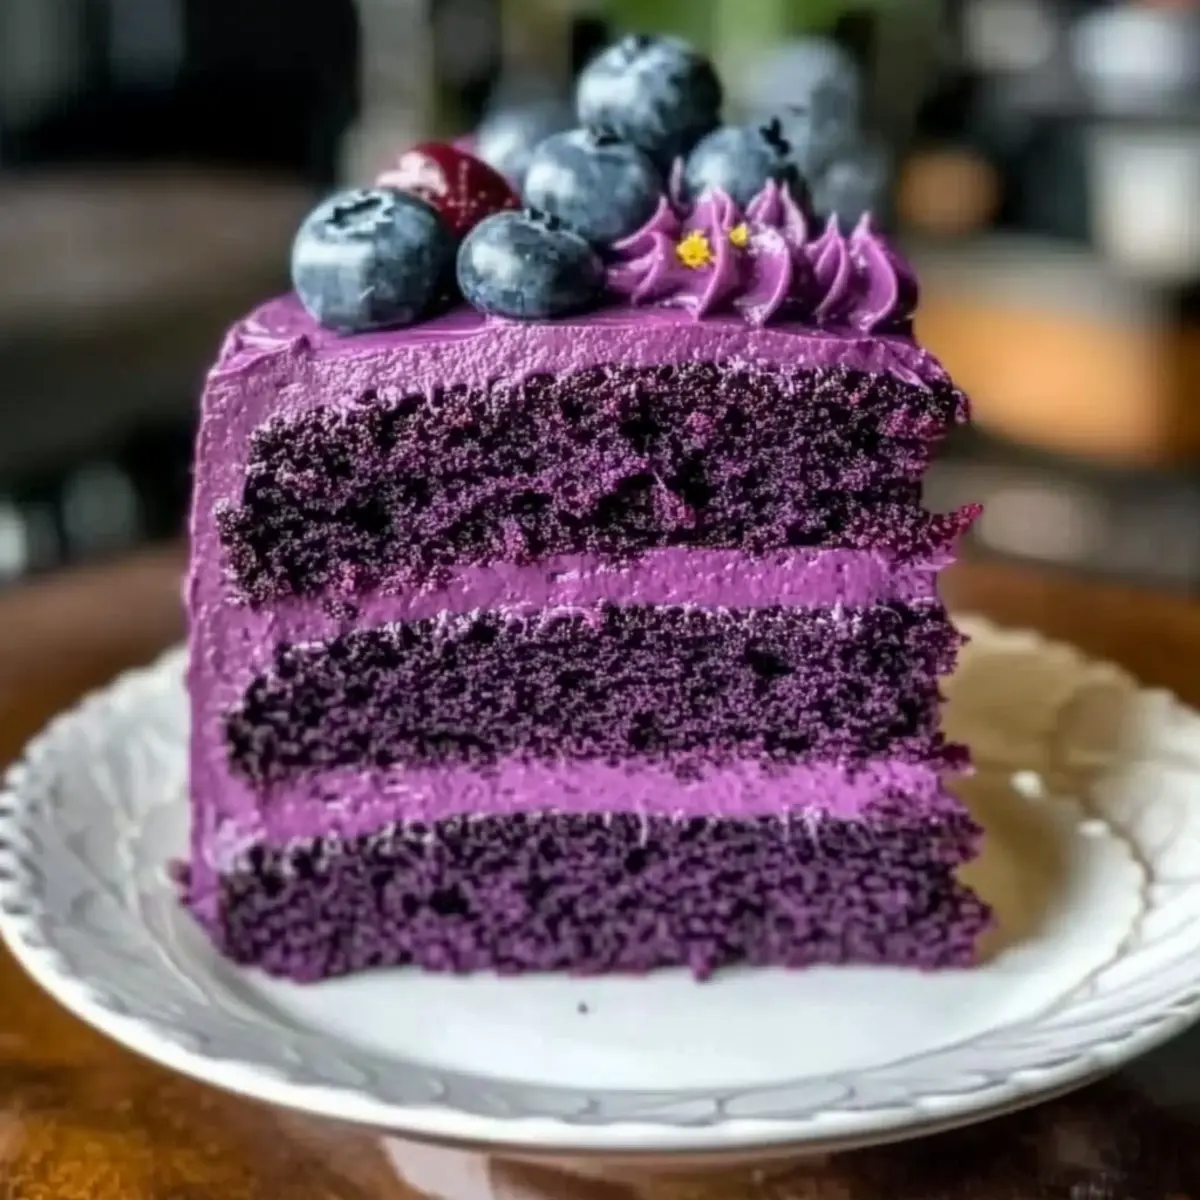
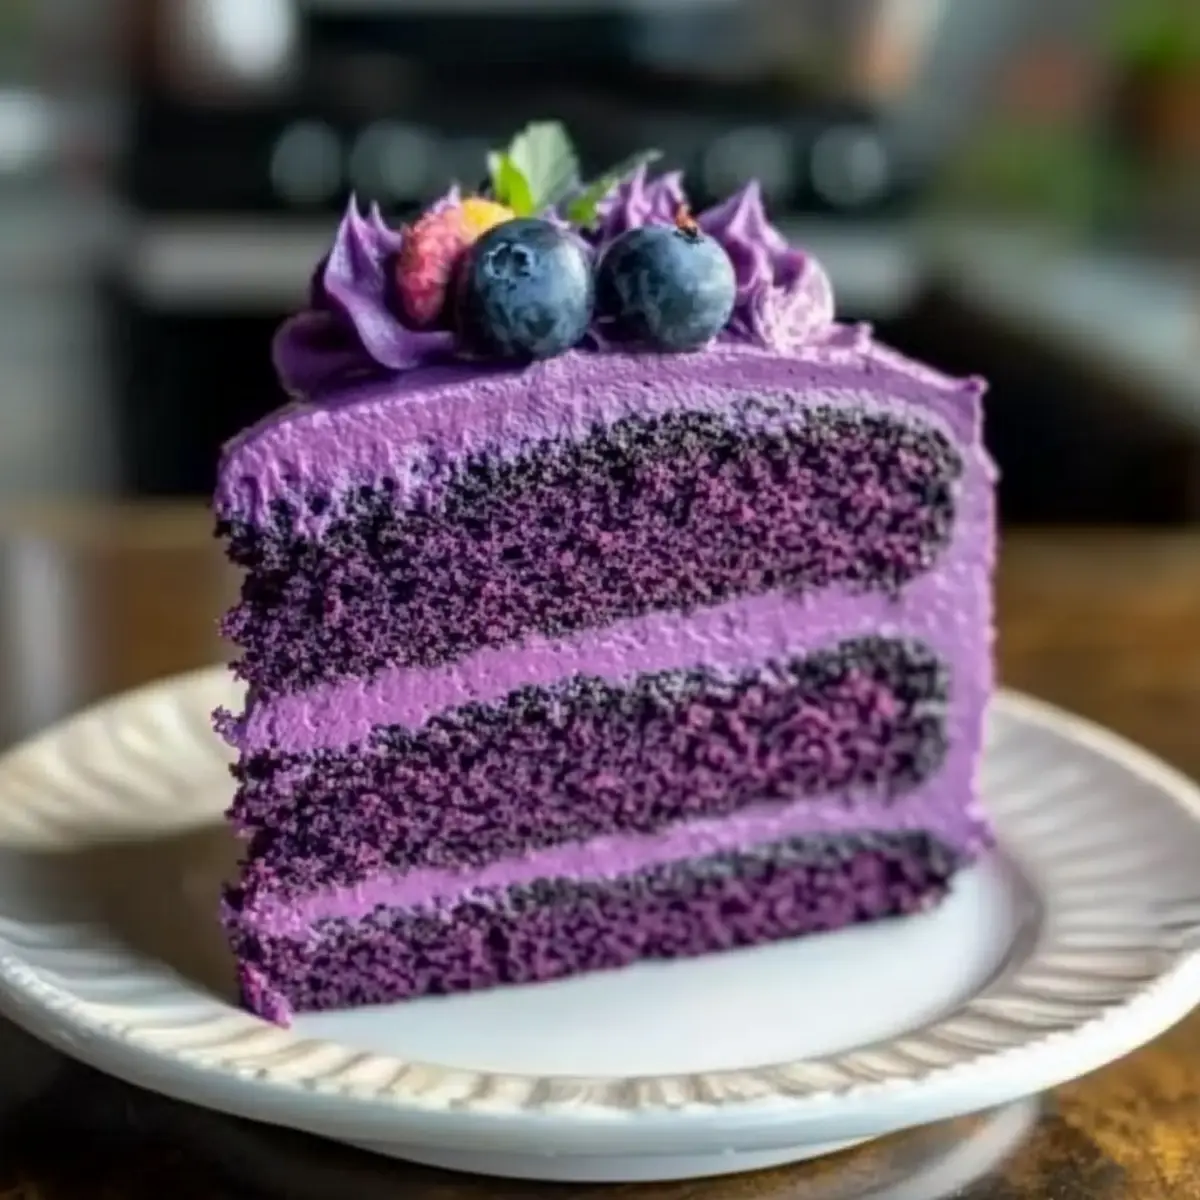
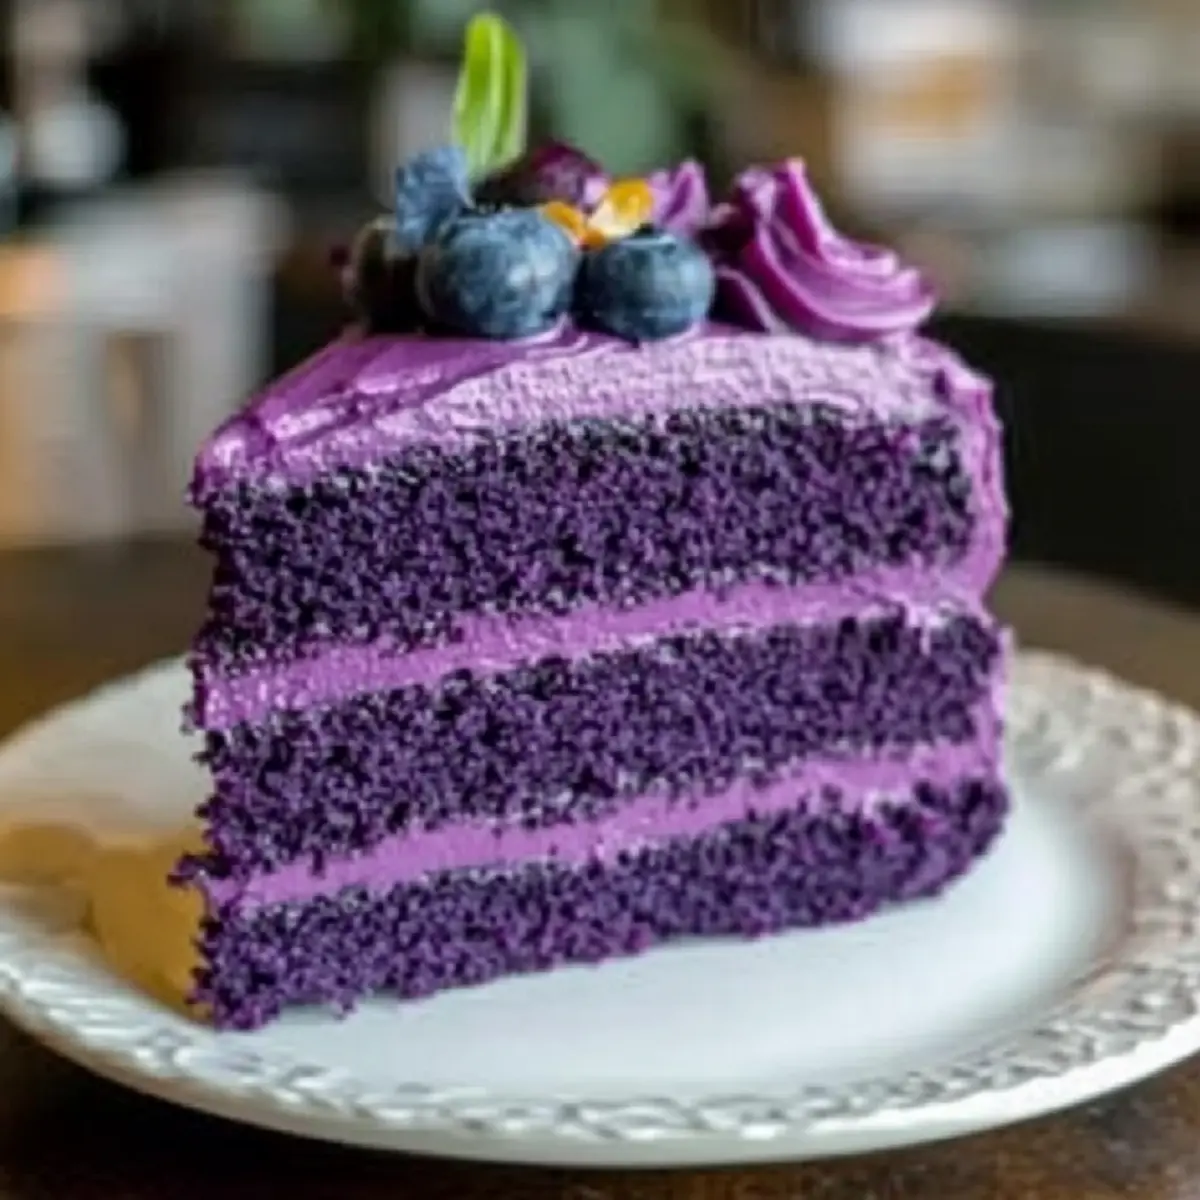
As I stood in my kitchen surrounded by bowls of vibrant purple batter, I couldn’t help but feel a wave of excitement wash over me. The Royal Purple Velvet Cake is a showstopper, and it’s not just the color that captivates. This American dessert combines a moist, velvety texture with the rich flavor of cocoa and vanilla, making it perfect for celebrations or any time you want to impress your guests. One of the best perks? It’s surprisingly easy to make! Whether you’re a seasoned baker or just looking to escape the fast-food rut, this cake will not only delight your taste buds but also be a feast for the eyes. Are you ready to create a masterpiece that will leave everyone begging for seconds? Let’s dive into the recipe!
Why is Royal Purple Velvet Cake special?
Visually Stunning: The vibrant purple hue is sure to catch everyone’s eye, making it the centerpiece of any gathering.
Melt-in-Your-Mouth Texture: This cake’s velvety consistency combined with creamy vanilla frosting creates a delightful contrast that’s simply irresistible.
Easy to Make: Don’t be intimidated! This cake is straightforward, making it achievable even for novice bakers tired of fast food.
Versatile Flavors: The mix of cocoa and vanilla gives a delightful depth, perfect for any occasion. Sprinkle in some edible flowers, or enjoy alongside a cup of coffee—it’s a treat for all!
If you love colorful desserts, don’t miss checking out our delightful Fruity Pebbles Cheesecake or the comforting flavors of Pumpkin Cupcakes Deliciously.
Royal Purple Velvet Cake Ingredients
For the Cake
- All-purpose flour – Provides the cake’s structure; can substitute with gluten-free flour for a different twist.
- Cocoa powder – Adds a rich chocolate flavor; dark cocoa powder works well for a bolder cake.
- Granulated sugar – Sweetens the cake perfectly while aiding in browning.
- Unsalted butter – Ensures moisture and richness; margarine is a great dairy-free alternative.
- Large eggs – Essential for binding and adding moisture to the cake.
- Vanilla extract – Elevates the flavor profile with warmth and sweetness.
- Buttermilk – Keeps the cake tender and moist; a mix of milk and vinegar can substitute for buttermilk.
- Purple liquid food coloring – Gives the cake its iconic royal hue; gel food coloring can provide a more vibrant result.
- Baking soda – Helps the cake rise and stay fluffy.
- White vinegar – Reacts with baking soda to aerate the batter, adding lightness.
For the Frosting
- Cream cheese – Provides a tangy richness that complements the sweetness of the cake.
- Unsalted butter – Adds another layer of creaminess to the frosting; keep it softened for easy mixing.
- Powdered sugar – Sweetens and thickens the frosting; add gradually to prevent a sugar cloud.
- Vanilla extract – Enhances the frosting with a delightful aroma and flavor.
Enjoy making your Royal Purple Velvet Cake that will surely wow your guests with its color and taste!
Step‑by‑Step Instructions for Royal Purple Velvet Cake
Step 1: Preheat and Prepare Pans
Begin by preheating your oven to 350°F (175°C). While it warms up, take two 9-inch round cake pans and grease them thoroughly with butter or cooking spray. Dust the insides with flour, shaking out any excess. This preparation will ensure your Royal Purple Velvet Cake layers come out easily after baking.
Step 2: Mix Dry Ingredients
In a medium-sized bowl, whisk together 2 cups of all-purpose flour and 1 cup of cocoa powder until they are completely combined. This step is crucial as it ensures an even distribution of the cocoa flavor throughout the batter. Set this dry mixture aside as you’ll be integrating it into the wet ingredients shortly.
Step 3: Cream Butter and Sugar
In a large mixing bowl, use an electric mixer to cream together 1 cup of softened unsalted butter and 2 cups of granulated sugar. Beat them on medium speed for about 3 minutes, or until the mixture becomes light and fluffy. This step creates a light texture for your Royal Purple Velvet Cake, setting the foundation for moistness.
Step 4: Add Eggs and Vanilla
Add 3 large eggs to the butter-sugar mixture, one at a time, mixing well after each addition to fully incorporate. Next, blend in 2 teaspoons of vanilla extract. This sequencing ensures that each egg is properly mixed without deflating the batter, contributing to the overall rise and richness of the cake.
Step 5: Incorporate Dry Ingredients and Buttermilk
Gradually add the whisked dry ingredients to the creamed butter and eggs, alternating with 1 cup of buttermilk. Start and end with the dry mix, stirring gently until just combined. Avoid overmixing at this stage, as it can lead to a dense cake texture. The batter should be smooth and relatively thick, showcasing your beautiful purple color soon.
Step 6: Color the Batter
Once your batter is mixed, add purple food coloring gradually, mixing until you achieve your desired vibrant hue. If using liquid food coloring, remember that a little goes a long way. This step is what makes your Royal Purple Velvet Cake visually striking, so enjoy watching it transform into a rich purple batter!
Step 7: Activate Baking Soda
In a small bowl, combine 1 teaspoon of baking soda with 1 tablespoon of white vinegar. Watch as the mixture fizzes—this reaction aerates your batter, creating a lighter final cake. Carefully fold this bubbly mix into your purple batter until evenly distributed; this is key for an airy texture in your cake layers.
Step 8: Bake the Cakes
Divide the vibrant batter evenly between the prepared cake pans, smoothing the tops for an even bake. Place them in the oven and bake for 25-30 minutes, or until a toothpick inserted into the center comes out clean. Keep an eye on them; they should rise beautifully and have a slight bounce when gently touched.
Step 9: Cool the Cakes
Once baked, remove the pans from the oven and let them cool for about 10 minutes in the pans. Then, carefully transfer the cake layers to a wire rack to cool completely. This cooling phase is vital, ensuring your Royal Purple Velvet Cake does not melt the frosting later on.
Step 10: Make the Frosting
In a mixing bowl, beat together 8 ounces of softened cream cheese and ½ cup of unsalted butter until smooth and creamy. Gradually add 4 cups of powdered sugar, mixing until fluffy. Finally, stir in 1 teaspoon of vanilla extract for a tangy and irresistible frosting that pairs perfectly with your cake.
Step 11: Assemble the Cake
Once the cakes are completely cool, place one layer on a serving plate. Generously spread a layer of creamy frosting on top before adding the second cake layer. Use the remaining frosting to smoothly cover the top and sides of the cake, creating a beautiful finish that enhances the royal theme.
Step 12: Final Touches
Garnish your Royal Purple Velvet Cake with edible flowers, purple sugar sprinkles, or a sprinkle of cocoa powder for an extra touch of elegance. Serve at room temperature, and enjoy the admiration and delight it brings to your gathering!
Storage Tips for Royal Purple Velvet Cake
Fridge: Store the frosted cake in an airtight container in the refrigerator for up to 5 days to maintain its moisture and flavor.
Freezer: Unfrosted layers can be wrapped tightly in plastic wrap and aluminum foil, then frozen for up to 2 months. Thaw in the fridge overnight before frosting.
Reheating: If you prefer your cake slightly warm, place individual slices in the microwave for about 10-15 seconds, but avoid overheating to keep the texture intact.
Room Temperature: For best flavor and texture, serve your Royal Purple Velvet Cake at room temperature, allowing it to sit out for about 30 minutes after refrigeration before enjoyment.
Make Ahead Options
These Royal Purple Velvet Cakes are perfect for meal prep enthusiasts! You can bake the cake layers up to 3 days in advance. Simply allow them to cool completely, wrap them tightly in plastic wrap, and store in the refrigerator or freeze for longer storage (up to 2 months). For the frosting, prepare it up to 24 hours ahead and refrigerate in an airtight container; just give it a quick whisk to restore its creamy texture before frosting your cake. When you’re ready to serve, assemble the cake with the chilled frosting, and enjoy restaurant-quality results with minimal effort!
Expert Tips for Royal Purple Velvet Cake
- Egg Temperature Matters: Ensure your eggs are at room temperature; this helps them blend seamlessly into the batter, resulting in a fluffier cake.
- Mind the Mixing: Avoid overmixing once you add the flour to keep your Royal Purple Velvet Cake light and airy; stir just until combined.
- Cool Before Frosting: Let the cake layers cool completely before applying the frosting to prevent melting and sliding.
- Slow Sugar Addition: Gradually beat in the powdered sugar while making the frosting to avoid a messy sugar cloud and ensure a smooth texture.
- Gel Color Advantage: Use gel food coloring for a bolder shade and less liquid in your batter; it enhances the cake’s vibrant purple hue beautifully.
What to Serve with Royal Purple Velvet Cake
Elevate your dessert experience by pairing delightful accompaniments with this vibrant cake, ensuring a memorable dining occasion.
-
Fresh Berries: Juicy raspberries or blueberries complement the cake’s sweetness with a refreshing tartness, adding a beautiful color contrast on the plate. Pairing bright, tangy berries enhances the overall flavor profile, making every bite more exciting.
-
Vanilla Ice Cream: A scoop of creamy vanilla ice cream creates a luscious contrast to the velvety cake, adding a delightful chill to each slice. The smoothness of the ice cream beautifully balances the rich flavors of the frosting.
-
Coconut Macaroons: These chewy treats offer a tropical flair, contrasting the airy cake with their chewy texture. Their sweetness and coconut nuttiness create a lovely harmony with the cake’s rich cocoa notes.
-
Coffee or Espresso: A steaming cup of rich coffee brings out the flavors of the cake and adds warmth to your dessert experience. The bitterness of the coffee cuts through the sweetness, making it an ideal sipping partner.
-
Chocolate Ganache Drizzle: A luxurious drizzle of dark chocolate ganache amplifies the indulgence, creating a decadent touch. This addition elevates the dessert, turning each slice into a sumptuous treat.
-
Lemon Sorbet: A light and refreshing lemon sorbet cleanses the palate, providing a zesty contrast that brightens the rich flavors of the cake. Serve a small scoop alongside a slice for a delightful contrast.
Royal Purple Velvet Cake Variations
Feel free to let your creativity shine as you customize this delightful cake to suit your tastes!
-
Gluten-Free: Substitute all-purpose flour with a 1:1 gluten-free flour blend to cater to gluten sensitivities.
-
Vegan Option: Use applesauce or flax eggs in place of eggs, and swap butter with coconut oil for a delicious dairy-free twist.
-
Chocolate Lovers: Replace regular cocoa powder with dark cocoa powder for a deep, rich flavor that chocolate enthusiasts will adore.
-
Frosting Twist: Mix up the frosting by using Swiss meringue buttercream or whipped white chocolate ganache for an elegant finish.
-
Zesty Upgrade: Add the zest of one orange or lemon into the batter for a refreshing citrusy brightness.
-
Nutty Delight: Fold in chopped walnuts or pecans into the batter for a delightful crunch and earthy flavor that pairs perfectly.
-
Color Variations: For a unique twist, try using natural food colorings from beets or other fruits for a different vibrant hue.
If you’re looking for more scrumptious desserts, why not try the delightful Fruity Pebbles Cheesecake or dive into the comforting flavors of Pumpkin Cupcakes Deliciously? Your baking adventures await!
Royal Purple Velvet Cake with Creamy Vanilla Frosting Recipe FAQs
How do I choose the best food coloring for my cake?
When selecting food coloring, I recommend using gel food coloring over liquid coloring for your Royal Purple Velvet Cake. Gel colors are more concentrated, giving you a vibrant hue without adding extra liquid to your batter. Start with a small amount and gradually add until you achieve your desired shade.
What’s the best way to store my Royal Purple Velvet Cake?
To keep your frosted cake fresh, store it in an airtight container in the refrigerator for up to 5 days. For unfrosted layers, wrap them tightly in plastic wrap and aluminum foil, then freeze for up to 2 months. When ready to use, simply thaw in the fridge overnight before frosting. This method helps maintain that lovely moist texture.
Can I make this cake in advance for a special occasion?
Absolutely! You can prepare the cake layers ahead of time. Bake and allow them to cool completely, then wrap the unfrosted layers tightly and place them in the freezer. On the day of your event, simply thaw and frost. This way, you’ll save precious time while still presenting a fresh, beautiful cake!
What if my cake is too dense or doesn’t rise well?
If your cake turns out too dense, it may be due to overmixing after adding flour. Always mix just until incorporated. Also, ensure your baking soda is fresh and properly activated with vinegar. Remember, the batter should be poured into the pans and baked immediately for the best rise and fluffiness.
Can I use alternatives for dietary restrictions?
Yes! You can make this cake gluten-free by using gluten-free all-purpose flour instead of regular flour. For a dairy-free version, substitute the butter with margarine and use a milk-vinegar mixture in place of buttermilk. Always check labels for allergens based on your specific needs.
How long should I let my cake cool before frosting?
Let your cake layers cool in their pans for about 10 minutes, then transfer them to a wire rack to cool completely—approximately an hour or two. This prevents your creamy vanilla frosting from melting off and ensures a delightful presentation!
Indulge in Royal Purple Velvet Cake with Creamy Frosting
Ingredients
Equipment
Method
- Preheat your oven to 350°F (175°C) and prepare your cake pans by greasing and dusting them.
- Whisk together the flour and cocoa powder in a medium bowl.
- Cream the butter and sugar in a large bowl for about 3 minutes until light and fluffy.
- Add the eggs one at a time and then blend in the vanilla extract.
- Gradually combine the dry ingredients with the buttermilk, stirring gently until just mixed.
- Add purple food coloring gradually until you achieve the desired hue.
- Mix baking soda with white vinegar, then fold this bubbly mixture into the batter.
- Divide the batter between the prepared pans and bake for 25-30 minutes.
- Let the cakes cool for about 10 minutes in the pans, then transfer to a wire rack to cool completely.
- Beat together cream cheese and butter, then gradually add powdered sugar and vanilla extract to make the frosting.
- Assemble the cake by layering frosting between cooled cake layers and covering the outside.
- Garnish with edible flowers or sprinkles for a finishing touch.
Leave a Reply