
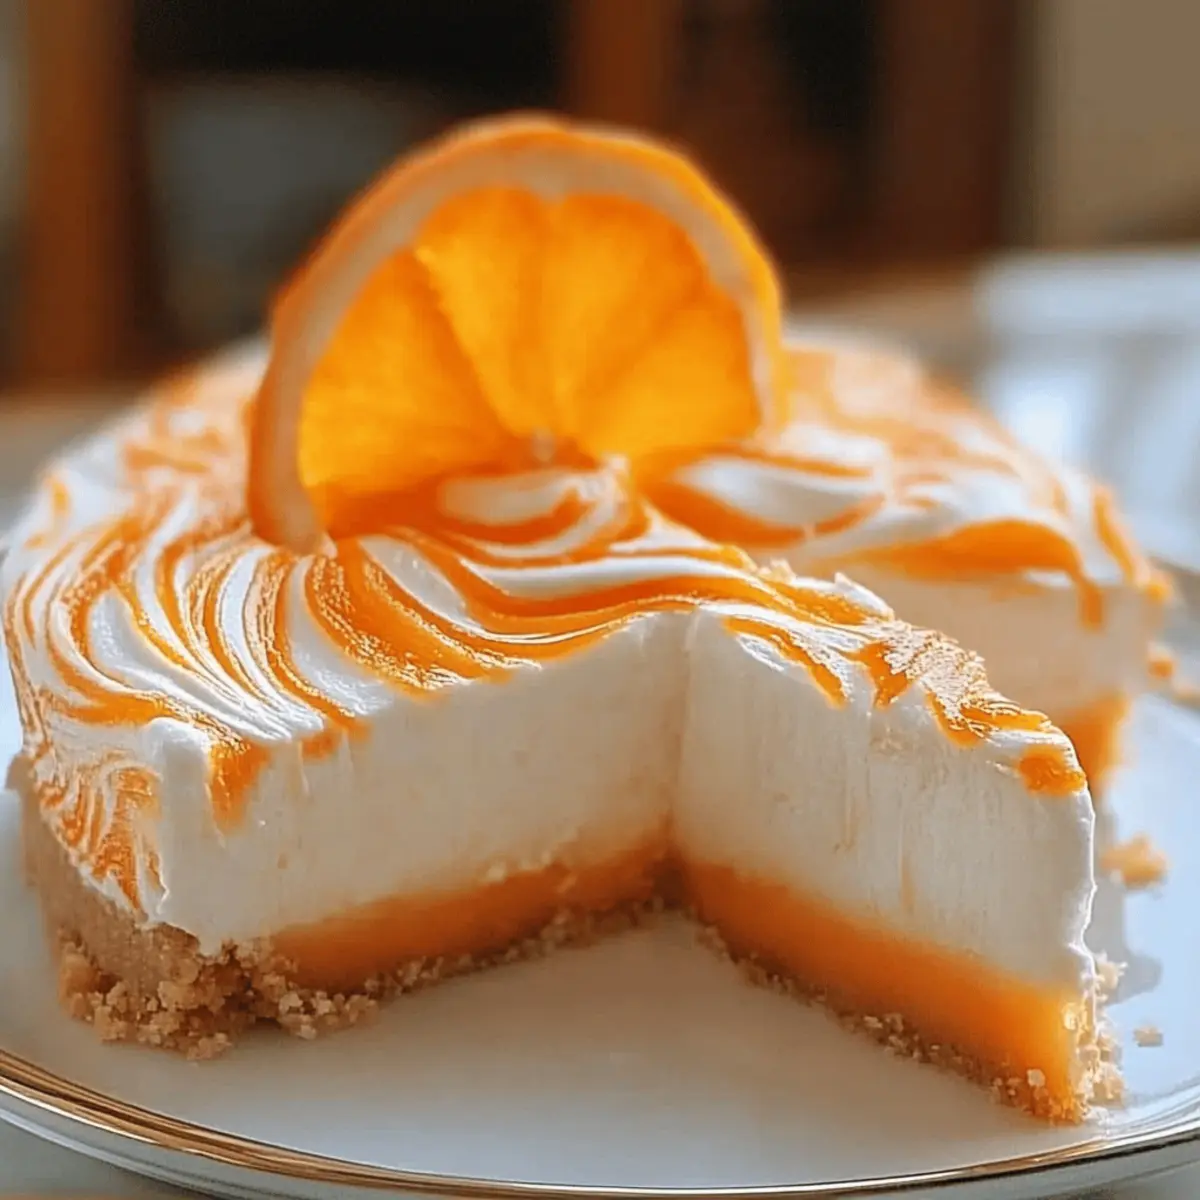
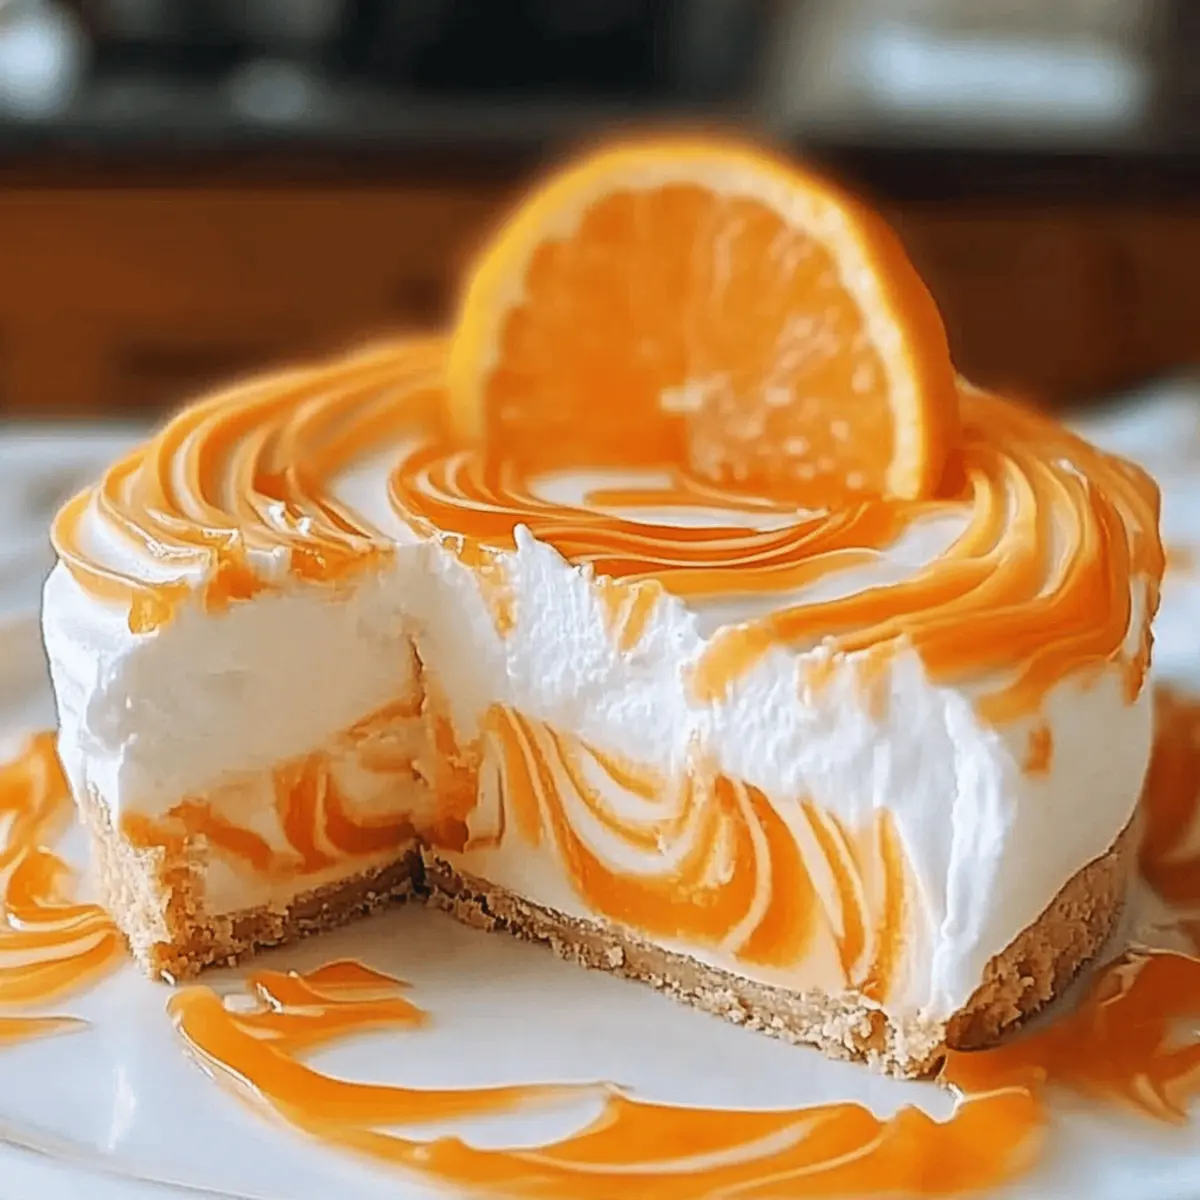
As I was peeling a ripe orange the other day, the zest filled the air and transported me straight to sun-soaked summer afternoons. This delightful memory inspired my latest creation: a No-Bake Orange Creamsicle Cheesecake. Imagine a dessert that captures that bright, citrusy essence with the creamy decadence of cheesecake—all without turning on the oven. This refreshing treat is not only ridiculously easy to whip up, but it also makes the perfect showstopper for any gathering. Packed with the vibrant taste of fresh oranges, it’s a guaranteed crowd-pleaser that brings smiles with every slice. Intrigued? Let’s dive into making this dreamy dessert together!

Why Is This Cheesecake a Must-Try?
Effortless Preparation: This No-Bake Orange Creamsicle Cheesecake is incredibly easy to make, perfect for both beginner and seasoned home cooks looking for a delightful dessert without the hassle of baking.
Vibrant Citrus Flavor: The bright notes of fresh orange juice and zest transport you straight to summer, making each bite a refreshing experience.
Crowd-Pleasing Delight: Whether it’s a family dinner or a summer gathering, this cheesecake is guaranteed to impress guests and leave them asking for seconds!
Customizable Options: Feel free to experiment with substitutions, like swapping orange for your favorite citrus or adding a luxurious layer of chocolate ganache.
Make-Ahead-Friendly: Prepare this dessert in advance and let it chill overnight, freeing up your time on the day of the event.
Unique Presentation: Garnish with fresh orange slices for an eye-catching appeal, making it not just delicious but also stunning when served.
No-Bake Orange Creamsicle Cheesecake Ingredients
• Here’s everything you need to create this delightful cheesecake!
For the Crust
- Graham Cracker Crumbs – Offers a sweet and crunchy base; you can use gluten-free crumbs for a gluten-free option.
- Unsalted Butter – Helps bind the crust together; be sure to melt it before mixing.
For the Cheesecake Filling
- Cream Cheese – The star of the show, providing rich creaminess; make sure it’s softened for easy blending.
- Powdered Sugar – Sweetens the mixture and helps achieve a smooth texture; feel free to substitute with a sugar alternative if desired.
- Heavy Whipping Cream – Adds a light and fluffy texture; whip until stiff peaks form for best results.
- Fresh Orange Juice – Infuses bright, zesty flavor; freshly squeezed is highly recommended for optimal taste.
- Orange Zest – Intensifies the orange flavor and adds aromatic notes; zest finely with a microplane for best results.
- Vanilla Extract – Enhances overall flavor; opt for pure vanilla extract for an authentic taste.
- Unflavored Gelatin – Essential for setting the cheesecake without baking; be sure to bloom it in cold water before use.
- Cold Water – Used to dissolve the gelatin, ensuring even distribution throughout the cheesecake.
Optional Garnish
- Orange Slices/Zest – Adds a beautiful touch and enhancement of citrus flavor; they make for an elegant presentation.
Ready to start creating your No-Bake Orange Creamsicle Cheesecake? Let’s get mixing!
Step‑by‑Step Instructions for No-Bake Orange Creamsicle Cheesecake
Step 1: Prepare the Crust
In a mixing bowl, combine the graham cracker crumbs and melted butter until the mixture resembles wet sand. Press this mixture firmly into the bottom of a 9-inch springform pan, ensuring an even layer. Use the back of a measuring cup to press down and create a tight crust. Set aside while you prepare the filling.
Step 2: Soften Cream Cheese
In a large mixing bowl, beat the softened cream cheese using an electric mixer on medium speed until it becomes smooth and creamy. This should take about 2-3 minutes. Scrape down the sides of the bowl as needed to ensure that all the cream cheese is whipped evenly, forming a perfect base for your No-Bake Orange Creamsicle Cheesecake.
Step 3: Add Powdered Sugar
Gradually add the powdered sugar to the cream cheese mixture, continuing to beat on medium speed until well combined and fluffy. This process should take 1-2 minutes. You’ll notice the mixture becoming both creamier and sweeter, creating the ideal balance for your cheesecake filling.
Step 4: Incorporate Additional Ingredients
Add in the heavy whipping cream, fresh orange juice, orange zest, and vanilla extract to the cream cheese mixture. Beat on high speed for about 3-4 minutes until light and fluffy peaks form. The mixture will become airy and smooth, infused with vibrant citrus notes that embody the essence of the No-Bake Orange Creamsicle Cheesecake.
Step 5: Prepare Gelatin
In a small bowl, sprinkle the unflavored gelatin over cold water and allow it to bloom for about 5 minutes. Once bloomed, heat it briefly in the microwave for around 10-15 seconds until fully dissolved. Stir thoroughly to ensure there are no lumps; this mixture will help set your cheesecake beautifully.
Step 6: Combine Gelatin with Mixture
Let the dissolved gelatin cool slightly, then gradually fold it into the fluffy cheesecake filling. Use a spatula for gentle folding, ensuring that the gelatin is evenly distributed without deflating the mixture. This crucial step will provide the cheesecake with its sturdy yet creamy texture.
Step 7: Pour into Crust
Carefully pour the cheesecake filling over the prepared crust, spreading it evenly with a spatula. Smooth the top to create an appetizing surface for your No-Bake Orange Creamsicle Cheesecake. Tap the pan lightly on the counter to remove any air bubbles that may have formed.
Step 8: Chill
Cover the cheesecake with plastic wrap and place it in the refrigerator. Chill for at least 4 hours, though overnight is best for achieving the perfect set. The longer it sits, the firmer and more flavorful it will be, allowing all those delicious ingredients to meld beautifully.
Step 9: Unmold
Once set, carefully run a knife around the edges of the springform pan to loosen the cheesecake. Gently release the sides, making sure to hold the base steady as you remove the outer ring. Your No-Bake Orange Creamsicle Cheesecake should slide out smoothly, revealing a lovely presentation.
Step 10: Garnish and Serve
For a burst of color and flavor, garnish the top of the cheesecake with fresh orange slices or a sprinkle of orange zest before serving. Slice into pieces and watch as your delicious No-Bake Orange Creamsicle Cheesecake brings smiles to everyone’s faces!
No-Bake Orange Creamsicle Cheesecake Customizations
Feel free to get creative with your No-Bake Orange Creamsicle Cheesecake—after all, the best memories are made in the kitchen!
-
Citrus Swap: Swap fresh orange juice for lemon or lime juice for a refreshing twist. The zesty shift will awaken your taste buds and give a new vibe to your dessert!
-
Chocolate Lovers: Drizzle melted chocolate ganache over the top for an indulgent layer. The rich and creamy chocolate will perfectly juxtapose the bright citrus, making it a decadent delight.
-
Greek Yogurt Boost: Substitute half the cream cheese with Greek yogurt for a tangy kick. This not only lightens the cheesecake but adds a delightful creaminess that you’ll adore.
-
Herbal Infusion: Add a hint of fresh mint or basil to the filling for an unexpected flavor kick. The herbs enhance the citrus notes beautifully and create an unforgettable experience.
-
Nutty Crunch: Sprinkle crushed nuts on top before serving for added texture. Almonds or pistachios will offer a delightful contrast to the creamy cheesecake, making every bite interesting.
-
Dairy-Free Option: Use coconut cream in place of heavy whipping cream and a non-dairy cream cheese alternative. It’s a tropical twist that keeps the cheesecake delicious and creamy.
-
Spicy Kick: Mix in a dash of cayenne pepper or cinnamon to the filling for a surprising layer of warmth. The heat will add complexity to the dessert without overpowering its citrus essence.
-
Layered Delights: Create a layered cheesecake by alternating between orange and lemon cheesecake fillings. The vibrant colors and flavors will make your dessert a showstopper at any gathering!
Ready to make this incredible dessert even more personal? Dive into the world of flavors and let your creativity shine. If you’re looking for inspiration on how to make accommodating treats, check out our ideas for easy gluten-free desserts or indulgent chocolate treats!
Make Ahead Options
This No-Bake Orange Creamsicle Cheesecake is a fantastic choice for busy cooks looking to save time! You can prepare the cheesecake up to 24 hours in advance and refrigerate it until it’s time to serve. Simply follow the recipe up to the chilling step, then cover the cheesecake tightly with plastic wrap to ensure it retains its freshness and prevents any unwanted odors. On the day you plan to serve, just garnish with fresh orange slices or zest, and it’s ready to impress your guests with its delightful, creamy texture and vibrant flavor. It’s as delicious as it is convenient—perfect for spontaneous gatherings or planned get-togethers!
Expert Tips for No-Bake Orange Creamsicle Cheesecake
-
Choose the Right Cheese: Use full-fat cream cheese for a rich and creamy texture; low-fat versions can result in a less satisfying cheesecake.
-
Chill Thoroughly: Allowing the cheesecake to chill overnight not only firms it up but enhances the flavors, making each slice taste even better.
-
Dissolve Gelatin Completely: Ensure the gelatin is fully dissolved, as any lumps can affect the smoothness of your No-Bake Orange Creamsicle Cheesecake.
-
Use Fresh Ingredients: Opt for freshly squeezed orange juice and zest for the most vibrant flavor; bottled alternatives can lack the brightness you desire.
-
Customize the Crust: Experiment with cookie varieties like chocolate or vanilla to create unique taste combinations that complement the cheesecake filling.
-
Monitor Whipping Cream Peaks: When whipping the cream, stop as soon as stiff peaks form; over-whipping can lead to a grainy texture in your cheesecake.
How to Store and Freeze No-Bake Orange Creamsicle Cheesecake
-
Fridge: Keep any leftover cheesecake in an airtight container for up to 3 days. Make sure it’s well covered to retain moisture and flavor.
-
Freezer: For longer storage, you can freeze slices wrapped individually in plastic wrap and then placed in a freezer-safe container for up to 2 months.
-
Thawing: To enjoy frozen cheesecake, move it to the fridge for several hours or overnight to thaw slowly instead of defrosting at room temperature, which preserves texture.
-
Reheating: There’s no need to reheat this cheesecake; just slice and serve it chilled for a refreshing dessert that’s always ready to delight!
What to Serve with No-Bake Orange Creamsicle Cheesecake
The perfect summer dessert deserves delightful companions that enhance its vibrant flavors and refreshing personality.
-
Light Berry Salad: Fresh strawberries and blueberries complement the cheesecake’s creamy texture while adding a burst of natural sweetness and a hint of tartness.
-
Minty Green Tea: A chilled herbal green tea, infused with mint, refreshes the palate between bites and balances the rich, citrusy cheesecake beautifully.
-
Classic Whipped Cream: A dollop of lightly sweetened whipped cream adds a luscious texture on top and enhances the cheesecake’s flavor, making every slice even dreamier.
-
Tropical Fruit Platter: Bright, tropical fruits like pineapple and kiwi provide an exotic twist, echoing the cheesecake’s orange notes while adding a juicy crunch.
-
Chocolate Dipped Biscotti: These crunchy treats bring a perfect contrast to the creamy cheesecake while their subtle hints of cocoa enhance the overall dessert experience.
-
Creamy Vanilla Ice Cream: A scoop of smooth vanilla ice cream melts alongside the cheesecake’s chilly richness for an indulgent dessert moment that feels luxurious.
-
Refreshing Lemonade: Serve cool, homemade lemonade to balance the flavors—its tartness beautifully contrasts the sweetness of the cheesecake, making it irresistibly refreshing.
-
Almond Biscotti: The nutty crunch pairs beautifully with the smooth cheesecake while adding a delightful texture that elevates each bite into something special.

No-Bake Orange Creamsicle Cheesecake Recipe FAQs
How do I choose the right oranges for this cheesecake?
Absolutely! For the best flavor, look for oranges that are firm, heavy for their size, and have a vibrant color. A few small blemishes on the skin are acceptable, but avoid any oranges with dark spots all over, as these may indicate overripeness.
What’s the best way to store leftovers of the No-Bake Orange Creamsicle Cheesecake?
To keep your cheesecake fresh, store any leftovers in an airtight container in the refrigerator for up to 3 days. Ensure that the container is tightly sealed to prevent any odors from other foods from affecting the flavors of your cheesecake.
Can I freeze the No-Bake Orange Creamsicle Cheesecake?
Yes, you can! To freeze, wrap individual slices in plastic wrap, then place them into an airtight, freezer-safe container. This way, they’ll stay fresh for up to 2 months. When you’re ready to enjoy, simply move a slice to the refrigerator to thaw overnight for the best texture and flavor.
What should I do if my cheesecake isn’t setting properly?
If your No-Bake Orange Creamsicle Cheesecake is not setting as expected, it might be due to insufficiently dissolved gelatin. To remedy this, you can dissolve an additional 1 teaspoon of gelatin in cold water, heat it until fully melted, and fold it into the cheesecake mixture. Then, return it to the fridge to chill for several hours. This way, you’ll achieve that wonderful firm texture we all love!
Are there any allergens in this cheesecake recipe?
Yes, this recipe contains common allergens like dairy (cream cheese, heavy cream, butter) and gluten (graham crackers). If you’re preparing the cheesecake for someone with allergies, consider using gluten-free graham crackers and checking labels for any dairy substitutes you might need, such as coconut cream or dairy-free cream cheese alternatives.
What are some variations to suit different dietary preferences?
The more the merrier when it comes to modifications! You can swap out fresh orange juice for other citrus juices like lemon or lime for a nice zing. For a vegan version, look for plant-based cream cheese and whipped topping, and replace gelatin with agar-agar, which is a great alternative for gelling. Feel free to mix and match ingredients to create your perfect No-Bake Orange Creamsicle Cheesecake!
No-Bake Orange Creamsicle Cheesecake for Effortless Bliss
Ingredients
Equipment
Method
- In a mixing bowl, combine the graham cracker crumbs and melted butter until the mixture resembles wet sand. Press this mixture firmly into the bottom of a 9-inch springform pan.
- In a large mixing bowl, beat the softened cream cheese until smooth and creamy, about 2-3 minutes. Scrape down the sides as needed.
- Gradually add the powdered sugar to the cream cheese mixture, beating until well combined and fluffy, about 1-2 minutes.
- Add in the heavy whipping cream, fresh orange juice, orange zest, and vanilla extract. Beat on high speed for 3-4 minutes until light and fluffy peaks form.
- In a small bowl, sprinkle the unflavored gelatin over cold water and let bloom for 5 minutes. Heat in the microwave for 10-15 seconds until dissolved.
- Let the dissolved gelatin cool slightly, then gradually fold into the cheesecake filling using a spatula, ensuring even distribution.
- Pour the cheesecake filling over the prepared crust, spreading evenly and smoothing the top. Tap the pan lightly on the counter to remove air bubbles.
- Cover with plastic wrap and refrigerate for at least 4 hours, preferably overnight, for the best set.
- Once set, run a knife around the edges of the springform pan to loosen the cheesecake and gently release the sides.
- Garnish the top with fresh orange slices or a sprinkle of orange zest before serving. Slice and enjoy!
Leave a Reply