
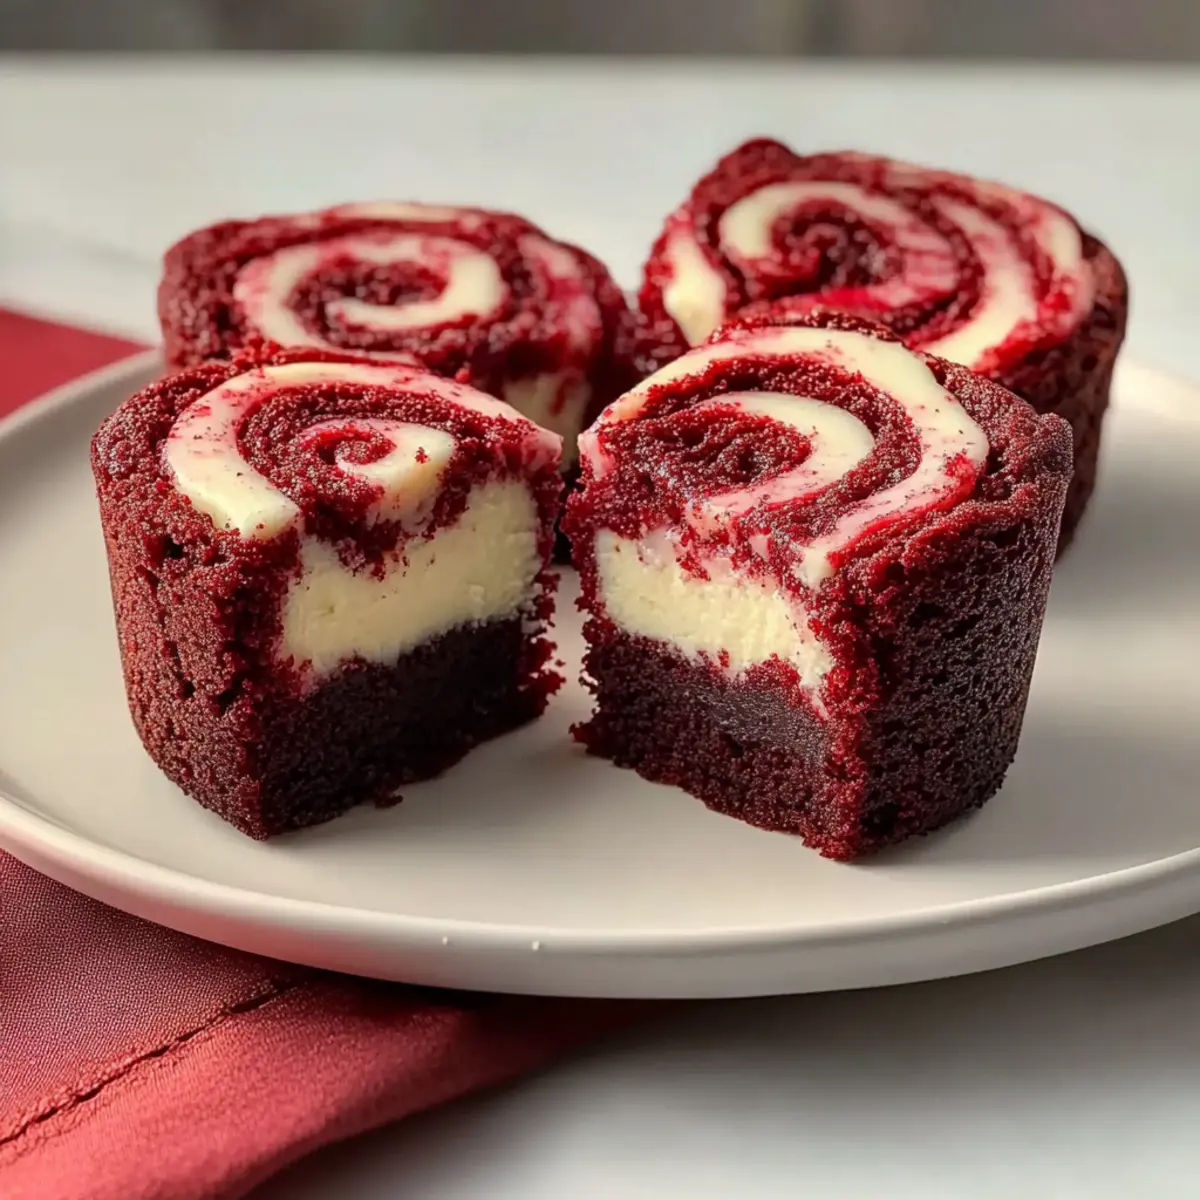
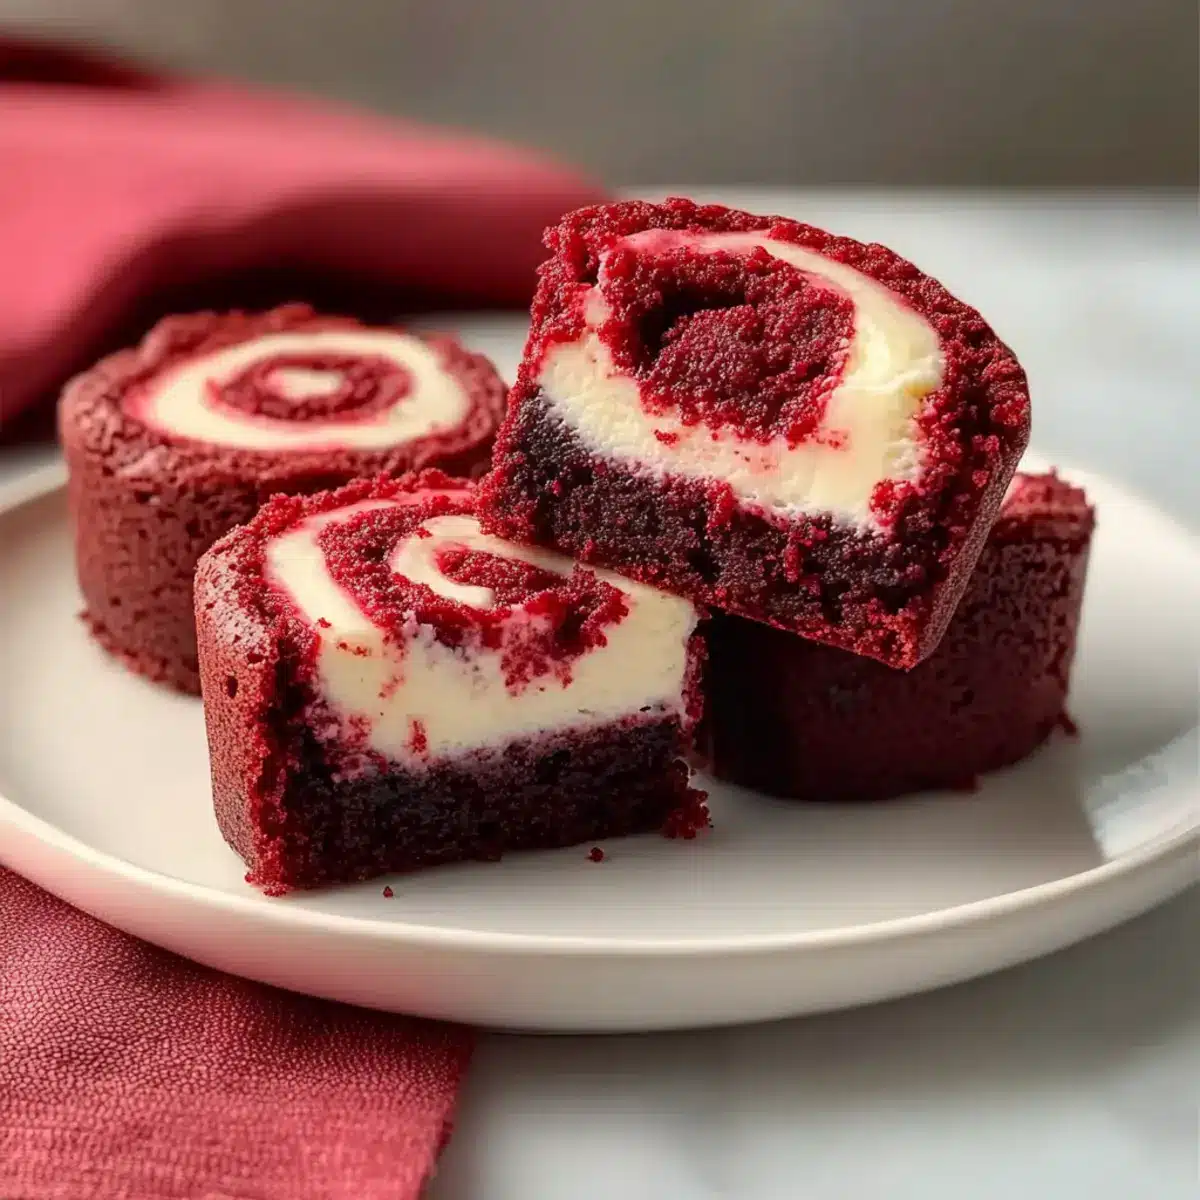
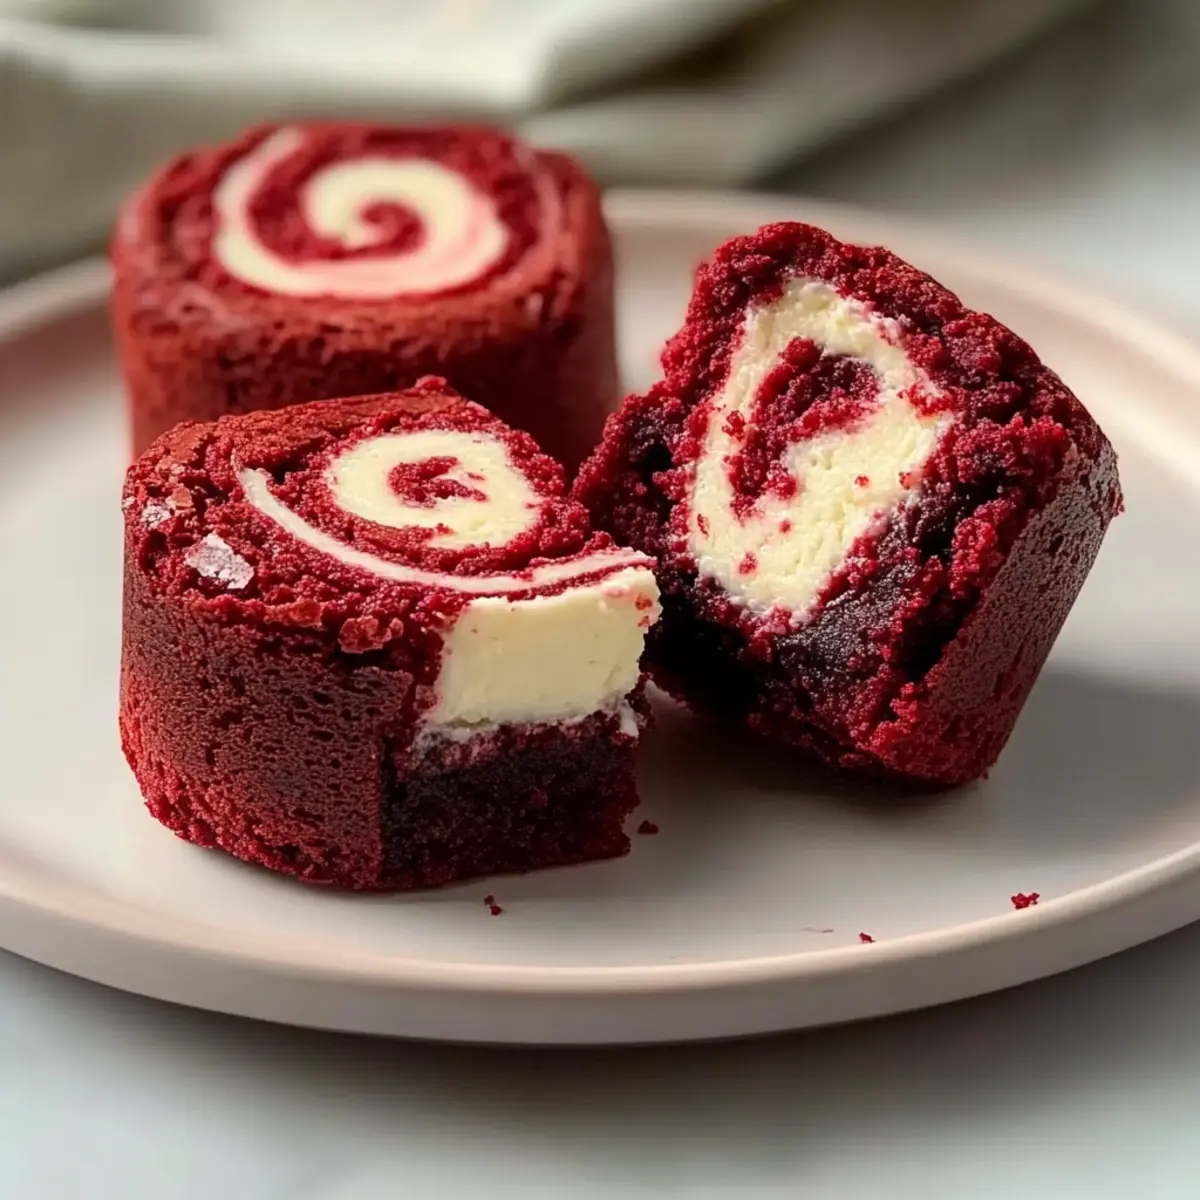
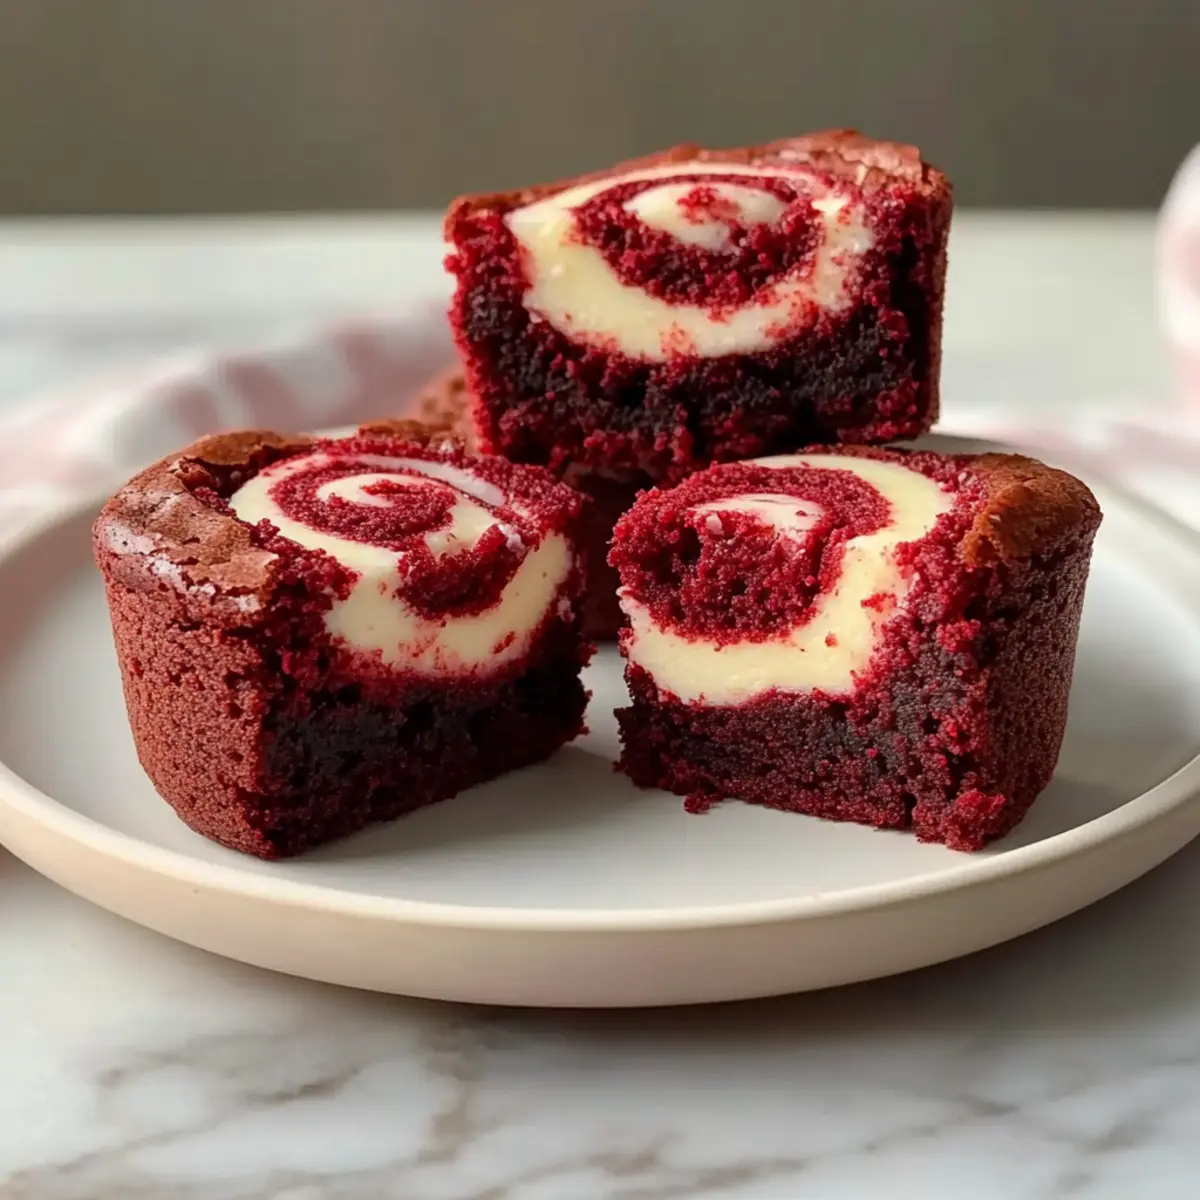
The moment you take a bite of these Homemade Red Velvet Brownie Bites, you’ll understand why they have a special place in dessert lovers’ hearts. Combining a rich and fudgy chocolate base with a luxurious cream cheese swirl, these treats are not only visually stunning but incredibly easy to make. In just 15 minutes of prep, you can whip up a batch that’s perfect for family gatherings or a cozy evening at home—bringing a touch of indulgence without all the fuss. Whether you’re a seasoned baker or still finding your way in the kitchen, these brownie bites are sure to impress and melt in your mouth. Curious about how to make these delightful bites? Let’s dive in!
Why are these brownie bites irresistible?
Decadent Flavors: The rich chocolate base combined with a tangy cream cheese swirl creates a taste sensation that will have everyone reaching for seconds.
Quick and Easy: With just 15 minutes of prep time, you can have these delightful bites ready to go, making them perfect for busy evenings or unexpected guests.
Versatile Treat: These brownie bites are not only a crowd-pleaser but also easily customizable. Try adding chocolate chips or switching up the flavor of the cream cheese swirl for a unique twist!
Perfect for Sharing: Ideal for parties or cozy gatherings, these bites serve beautifully and make a wonderful addition to any dessert table. Pair them with fresh berries or a glass of cold milk for the perfect serving!
A Touch of Tradition: With roots in southern U.S. culture, these red velvet treats add a touch of nostalgia to your baking repertoire, making every bite a celebration.
Homemade Red Velvet Brownie Bites Ingredients
• Get ready to bake with these delightful ingredients!
For the Brownie Base
- Unsalted Butter (9 tbsp) – Adds richness and moisture; substitute with margarine for a dairy-free option.
- Sugar (1 1/4 cups) – Sweetens the brownie base; coconut sugar can be used for a healthier alternative.
- Cocoa Powder (1/4 cup) – Provides chocolate flavor and color; choose natural cocoa for a brighter hue.
- Vanilla Extract (1/2 tsp) – Enhances flavor; vanilla bean paste brings an even more intense vanilla essence.
- Red Food Coloring (1 tbsp) – Gives the signature red color; gel-based or liquid food coloring works well.
- Salt (1/8 tsp) – Balances sweetness and enhances flavor.
- Espresso Powder (1/4 tsp) – Deepens chocolate flavor without a coffee taste; can be omitted if desired.
- Vinegar (1/2 tsp) – Reacts with cocoa to deepen color and flavor; leave out if needed but enhances texture.
- Eggs (2) – Provides structure and moisture.
- All-Purpose Flour (3/4 cup) – Gives structure; substitute with gluten-free flour for a gluten-free option.
For the Cream Cheese Swirl
- Cream Cheese (9 oz) – Forms the cheesecake swirl; dairy-free cream cheese can be used for a non-dairy alternative.
- Sugar (3 tbsp) – Sweetens the cream cheese mixture; powdered sugar can be used for a smoother texture.
- Vanilla Extract (1/2 tsp) – Enhances flavor of cream cheese filling.
- Egg Yolk (1) – Adds richness to the cream cheese mixture.
Get everything ready, and prepare to wow your family and friends with these homemade red velvet brownie bites!
Step‑by‑Step Instructions for Homemade Red Velvet Brownie Bites
Step 1: Preheat the Oven
Begin by preheating your oven to 350°F (175°C). While your oven heats, take a mini muffin pan and grease it thoroughly to prevent any sticking during baking. A well-greased pan ensures easy removal of your delicious homemade red velvet brownie bites once they are perfectly baked.
Step 2: Prepare the Brownie Batter
In a medium bowl, melt 9 tablespoons of unsalted butter. Once melted, whisk in 1 1/4 cups of sugar, 1/4 cup of cocoa powder, 1/2 teaspoon of vanilla extract, 1 tablespoon of red food coloring, 1/8 teaspoon of salt, 1/4 teaspoon of espresso powder, and 1/2 teaspoon of vinegar. Incorporate the two eggs one at a time, mixing until you have a smooth and rich brownie batter.
Step 3: Add the Flour
Gently fold in 3/4 cup of all-purpose flour into your brownie mixture, being careful not to overmix. The goal is to combine the ingredients until just blended, so stop as soon as there are no visible streaks of flour. This will keep your brownie bites fudgy and tender, enhancing the enjoyment of the red velvet brownie bites.
Step 4: Make the Cream Cheese Swirl
In a separate bowl, beat 9 ounces of cream cheese with 3 tablespoons of sugar and 1/2 teaspoon of vanilla extract until the mixture is smooth and creamy. Then, fold in 1 egg yolk until well incorporated. This creamy swirl will provide a delightful contrast to the brownie base, making your bites even more irresistible.
Step 5: Layer the Batter
Using a spoon, fill each greased mini muffin cup halfway with the brownie batter. Next, add about a teaspoon of the cream cheese mixture on top of the brownie batter, then spoon more brownie batter over the cream cheese layer until each cup is nearly full. This layering technique creates mesmerizing swirls in your homemade red velvet brownie bites.
Step 6: Create the Swirl
Take a toothpick and gently swirl the brownie batter and cream cheese mixture together in each muffin cup. Be careful not to overmix; you want to see distinct layers for that attractive presentation. This step makes your bites not only taste amazing but also look beautiful when they come out of the oven.
Step 7: Bake to Perfection
Place the muffin pan in the preheated oven and bake for 12 minutes. Keep an eye on your red velvet brownie bites; they are done when the tops feel set yet the centers remain slightly fudgy. This slight underbaking is crucial for a rich, gooey texture.
Step 8: Cool and Enjoy
Once baked, let the brownie bites cool in the pan for 5 minutes before carefully transferring them to a wire rack. This cooling time allows them to firm up slightly, making it easier to remove them without crumbling. Allow them to cool completely before digging in and enjoying your delightful homemade red velvet brownie bites!
Homemade Red Velvet Brownie Bites Variations
Feel free to give your brownie bites a personal twist that will delight your taste buds and impress your family!
-
Choco-Loaded: Add ½ cup of chocolate chips to the brownie batter for an extra rich chocolate flavor that everyone will love.
-
Healthier Option: Use coconut sugar instead of regular sugar for a more natural sweetness that’s still scrumptious. You can also check out my Healthy Peanut Bites for more inspiration!
-
Nutty Surprise: Fold in ½ cup of finely chopped nuts, such as pecans or walnuts, into the brownie batter for a delightful crunch that complements the soft texture.
-
Flavorful Swirls: Try using almond or mint extract in the cream cheese layer for a refreshing twist that adds another dimension of flavor.
-
Salted Caramel Drizzle: After baking, drizzle warm brownie bites with salted caramel sauce for a decadent finish that takes them to the next level.
-
Spice It Up: Add a pinch of cinnamon or cayenne pepper to the brownie base for a surprising depth of flavor and a little kick!
-
Fruity Flair: Serve with a side of fresh berries for a pop of color and a refreshing contrast to the rich chocolate flavors. Pairing with berries enhances the treat’s appeal!
-
Serving Style: For a fun presentation, serve your brownie bites alongside a scoop of vanilla ice cream or cream cheese frosting to create an indulgent dessert experience. Consider pairing with Cheesy Parmesan Mozzarella Bites for a delightful party platter!
Expert Tips for Homemade Red Velvet Brownie Bites
-
Avoid Overbaking: Remove the bites when they’re still slightly underdone; this ensures a fudgy texture that everyone will love.
-
Grease Well: Thoroughly greasing the muffin pan is vital. It prevents any sticking and ensures your homemade red velvet brownie bites come out beautifully.
-
Gentle Swirling: Use gentle swirling motions with a toothpick to maintain distinct cream cheese and brownie layers; this creates a stunning presentation.
-
Cool Time: Let the brownie bites cool in the pan for at least 5 minutes before transferring them to a wire rack. This helps prevent crumbling.
-
Custom Flavor Twists: Feel free to get creative! Consider adding chocolate chips to the batter or using flavored extracts for the cream cheese to elevate your brownie bites.
Storage Tips for Homemade Red Velvet Brownie Bites
Fridge: Keep your brownie bites stored in an airtight container in the fridge for up to 5 days. This helps maintain their delightful fudginess and prevents them from drying out.
Freezer: For longer storage, wrap each brownie bite individually in plastic wrap and place them in a freezer-safe container. They can be frozen for up to 3 months. Thaw at room temperature before enjoying.
Reheating: If you prefer warm brownie bites, simply pop them in the microwave for about 10-15 seconds. This restores their gooey goodness for a delicious treat anytime!
Avoiding Staleness: To prevent your homemade red velvet brownie bites from becoming stale, make sure your container is completely airtight and free from excess moisture.
What to Serve with Homemade Red Velvet Brownie Bites
Indulging in these delightful bites opens the door to a world of delicious pairings that elevate your dessert experience.
- Cold Milk: A classic pairing, cold milk beautifully complements the rich chocolate flavor, balancing the sweetness of the brownies.
- Fresh Berries: Juicy strawberries or raspberries add a burst of freshness, cutting through the richness while providing a pop of color on your serving platter.
- Vanilla Ice Cream: Warm brownie bites topped with smooth vanilla ice cream create a luxurious dessert moment, perfect for satisfying sweet cravings. A dollop of whipped cream can add a wonderful texture contrast as well!
- Coffee: A warm cup of coffee enhances the deep flavors of the brownie bites and offers a cozy contrast to their sweetness. The combination is perfect for afternoon pick-me-ups or after-dinner treats.
- Chocolate Sauce: Drizzling a little chocolate sauce adds an indulgent flair, ideal for chocolate lovers. The additional chocolatey goodness makes each bite even more divine.
- Cream Cheese Frosting: For those looking to amplify the cream cheese flavor, a light drizzle of cream cheese frosting can take these brownie bites to the next level of decadence!
- Sparkling Water: A refreshing glass of sparkling water with lemon or lime slices cleanses the palate, offering a delightful contrast to the rich brownie bites.
- Red Wine: For an adult twist, a glass of fruity red wine pairs beautifully, enhancing the chocolate notes while adding sophistication to your dessert table.
- Caramel Sauce: Pouring warm caramel sauce over your brownie bites adds a sweet, buttery layer that complements their rich flavors perfectly.
- Nutty Toppings: Consider sprinkling crushed nuts, such as walnuts or pecans, on top for an added crunchy texture that contrasts beautifully with the soft, creamy bites.
Make Ahead Options
These Homemade Red Velvet Brownie Bites are perfect for busy home cooks looking to save time. You can prepare the brownie batter and the cream cheese swirl up to 24 hours in advance. Simply cover each mixture tightly with plastic wrap and refrigerate to maintain freshness. When you’re ready to bake, just layer the batter and cream cheese as outlined in the recipe and proceed with baking. This method ensures that your treats remain just as delicious while cutting down on prep time during your busy week. Bake them fresh when you need them, and enjoy the taste of homemade goodness without the fuss!
Homemade Red Velvet Brownie Bites Recipe FAQs
How do I choose the right cocoa powder for my brownie bites?
Selecting the right cocoa powder is crucial! If you want to achieve a vibrant red color, opt for natural cocoa, which provides a brighter hue. On the other hand, Dutch-process cocoa results in a darker, milder taste. Both options will yield delicious results, so choose based on your flavor preference!
What’s the best way to store homemade brownie bites?
To keep your brownie bites fresh, store them in an airtight container in the fridge for up to 5 days. This will help retain their fudgy texture. If you don’t finish them right away, you can also wrap each brownie bite individually in plastic wrap and freeze them for up to 3 months. Just thaw at room temperature before enjoying!
Can I freeze these brownie bites, and how do I do it?
Absolutely! Freezing your homemade red velvet brownie bites is an excellent way to make them last longer. After they’ve cooled completely, wrap each bite in plastic wrap, ensuring there are no air pockets. Place the wrapped bites in a freezer-safe container or bag, and they will stay fresh for up to 3 months. When you’re ready to indulge, just let them thaw at room temperature!
What should I do if my brownie bites turn out too dry?
If your brownie bites end up a bit dry, it might be due to overbaking or not having enough moisture in the batter. To prevent this next time, stick to the baking time (12 minutes) and check for that slightly underdone center—trust me, that’s where the fudgy goodness lies! If they do turn out dry, consider serving them warm with a scoop of ice cream or a drizzle of chocolate sauce to bring back moisture and add extra flavor.
Are there any dietary considerations for these brownie bites?
Yes! If you have dietary restrictions, you can easily adapt this recipe. To make it gluten-free, substitute the all-purpose flour with a gluten-free flour blend. For a dairy-free version, use margarine instead of butter and substitute dairy-free cream cheese in the swirl. Always check for allergies related to eggs, as they contribute significantly to the texture and moisture of the bites!
Decadent Homemade Red Velvet Brownie Bites with Creamy Swirl
Ingredients
Equipment
Method
- Preheat your oven to 350°F (175°C) and grease a mini muffin pan thoroughly.
- Melt 9 tablespoons of unsalted butter in a medium bowl. Whisk in 1 1/4 cups of sugar, 1/4 cup of cocoa powder, 1/2 tsp of vanilla extract, 1 tbsp of red food coloring, 1/8 tsp of salt, 1/4 tsp of espresso powder, and 1/2 tsp of vinegar. Incorporate 2 eggs one at a time.
- Gently fold in 3/4 cup of all-purpose flour until just blended, avoiding overmixing.
- In a separate bowl, beat 9 oz of cream cheese with 3 tbsp of sugar and 1/2 tsp of vanilla extract until smooth. Fold in 1 egg yolk.
- Fill each greased mini muffin cup halfway with brownie batter, then add a teaspoon of cream cheese mixture, followed by more brownie batter.
- Use a toothpick to gently swirl the brownie batter and cream cheese mixture together in each cup.
- Bake for 12 minutes, until the tops feel set but centers remain slightly fudgy.
- Once baked, let cool in the pan for 5 minutes before transferring to a wire rack to cool completely.
Leave a Reply