
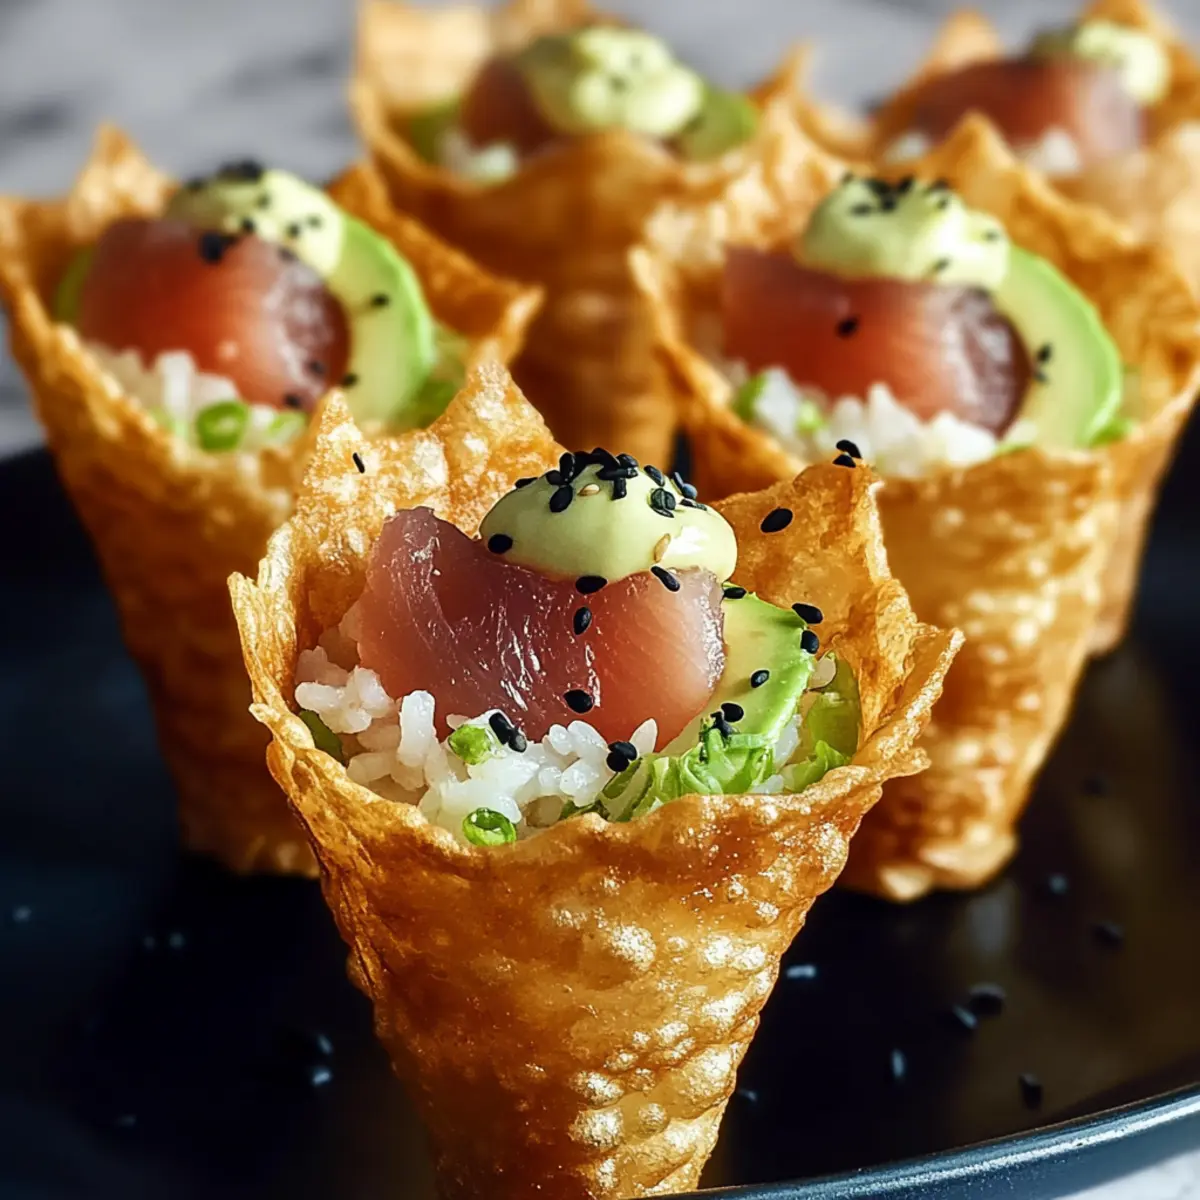
As I was exploring new culinary adventures in my kitchen, I stumbled upon a delightful twist that combines my love for sushi with an unexpected format. Enter the Creative Sushi Wonton Cones—an innovative handheld appetizer that takes beloved sushi flavors and wraps them in a crispy, golden wonton shell. Perfect for entertaining or when you just want to impress at your next gathering, these cones are not only a feast for the eyes but also an engaging way to enjoy seafood. With quick prep and customizable fillings, each bite offers a mouthwatering balance of textures and tastes—making this dish a sure crowd-pleaser. Curious to create your own sushi masterpiece? Let’s dive into how these delightful cones come together!
Why Try Creative Sushi Wonton Cones?
Creative, this recipe reimagines sushi into fun, handheld cones that are sure to catch the eye. Crunchy texture from the fried wonton wrappers perfectly contrasts the creamy avocado and fresh fish. Customizable fillings mean you can tailor each cone to suit every guest’s taste, whether they prefer tuna or a veggie alternative. Quick prep makes it easy to whip up for gatherings or weeknight dinners. Crowd-pleasing, these bites are not only delicious but also invite engaging conversations as everyone assembles their unique cones. Dive into this delightful experience and impress your loved ones with this playful take on sushi!
Creative Sushi Wonton Cone Ingredients
• Get ready to create these fun, flavorful bites!
For the Cones
- Wonton wrappers – The crispy outer shell that adds visual appeal and crunch.
- Coconut oil (for frying) – This oil adds a hint of tropical flavor; vegetable oil can work as a substitute if needed.
For the Sushi Rice
- Sushi rice (short-grain, sticky) – Essential for that true sushi texture; make sure to season it right for balanced flavor.
- Rice vinegar – This is crucial for seasoning the rice; in a pinch, you can swap it with lemon juice.
- Sugar – Adds a hint of sweetness; feel free to use honey or agave syrup as natural alternatives.
- Salt – A key ingredient for enhancing flavors; sea salt works best!
For the Fillings
- Avocado – Provides creaminess and healthy fats; you can also use hummus for a vegan option.
- Tuna steak (sushi-grade) – A delightful source of protein; delicious substitutes include salmon, shrimp, or even tofu for a vegetarian option.
- Kewpie mayonnaise – This creamy dressing elevates the tuna mixture; regular mayonnaise can be used, but the flavor might differ.
- Tomato ketchup or sauce – Adds a touch of sweetness and depth; consider replacing it with sweet chili sauce for an exciting twist.
- Sriracha (optional) – For those who love a bit of heat; can be omitted or swapped for another hot sauce if you prefer less spice.
- Lime zest – Infuses freshness and aroma; you can replace it with lemon zest, but expect a flavor variation.
For Garnish
- Furikake or black sesame seeds – These add both flavor and a pop of visual appeal; you may also use chopped nori or sesame seeds if desired.
Each component plays a vital role in crafting these Creative Sushi Wonton Cones, ensuring every bite is an unforgettable experience!
Step‑by‑Step Instructions for Creative Sushi Wonton Cones
Step 1: Prepare Wonton Cones
Begin by preheating your oil in a deep frying pan to about 175 °C (350 °F). While the oil heats, gently wrap each wonton wrapper around a cream horn or cone mold, ensuring to press the edges firmly to seal. This will create a delightful crispy shell for your Creative Sushi Wonton Cones.
Step 2: Fry Wontons
Carefully place the wrapped wonton cones into the hot oil, frying them for 2-3 minutes or until they achieve a beautiful golden-brown color. Turn them occasionally for even frying. Once perfectly crisp, use a slotted spoon to transfer the cones to a plate lined with paper towels to drain excess oil, ensuring they stay delightfully crunchy.
Step 3: Cook Sushi Rice
While the cones cool, prepare the sushi rice. Rinse 1 cup of short-grain sushi rice under cold water until the water runs clear, then cook it according to package instructions. Once cooked, mix in 2 tablespoons of rice vinegar, 1 tablespoon of sugar, and a pinch of salt. Allow the rice to cool to room temperature, enhancing the flavor profile for your Creative Sushi Wonton Cones.
Step 4: Make Tuna Mixture
In a mixing bowl, cube or flake 8 ounces of sushi-grade tuna. Combine the tuna with 2 tablespoons of Kewpie mayonnaise, 1 tablespoon of tomato sauce, optional sriracha to taste, and the zest of 1 lime. Mix thoroughly until the ingredients are well incorporated, adjusting seasoning as necessary to prepare a flavorful filling for your Creative Sushi Wonton Cones.
Step 5: Assemble Cones
Once your components are ready, begin assembling the cones. Take a fried wonton cone and layer it with a generous scoop of sushi rice, followed by a few slices of creamy avocado. Top the filling with the tuna mixture for an explosion of flavors, transforming the cone into a delightful handheld treat.
Step 6: Garnish and Serve
To elevate your Creative Sushi Wonton Cones, finish by sprinkling a dash of furikake or black sesame seeds on top. Arrange the cones on a serving platter, showcasing their vibrant colors, and serve immediately to enjoy the contrast of the crispy wonton and fresh fillings.
Expert Tips for Creative Sushi Wonton Cones
-
Temperature Matters: Maintain the oil temperature around 175 °C (350 °F) for frying. Too hot will burn the cones, while too cool leads to soggy shells.
-
Optimum Crispiness: Drain the fried cones well on paper towels after frying. This ensures they retain their delightful crunch when served.
-
Fresh Tuna: Chill your sushi-grade tuna until you’re ready to mix it with other ingredients. Keeping it fresh is key to flavorful Creative Sushi Wonton Cones.
-
Prep Ahead: To streamline your assembly process, prepare the sushi rice and tuna mixture in advance. Avoid assembling cones too early to keep them crispy.
-
Customize Fillings: Feel free to experiment with different fillings or sauces based on personal preference. Every guest can enjoy their own unique twist on your Creative Sushi Wonton Cones!
What to Serve with Sushi Wonton Cones?
A delightful array of accompaniments enhances the interactive experience of your sushi cones, inviting flavor exploration.
-
Crispy Seaweed Salad: This refreshing dish brings an umami twist, perfectly complementing the seafood in your cones. Its slight crunch contrasts beautifully with the creamy avocado and tender fish.
-
Miso Soup: A warm bowl of miso soup is a comforting pairing, adding depth and a savory note. The light broth balances the flavors and creates a soothing dining experience.
-
Pickled Ginger: This tangy addition cleanses the palate between bites, enhancing the flavorful profiles of the tuna and avocado in each cone. Its vibrant taste keeps the meal refreshing and lively.
-
Edamame: Steamed edamame sprinkled with sea salt offers a satisfying, protein-packed side. The green pods provide a bright, fresh flavor that complements the savory notes of the cones.
-
Cucumber-Avocado Salad: A light salad with crisp cucumbers and creamy avocado dresses up the table while echoing the ingredients in the cones. Toss it with a sesame dressing for added flavor.
-
Iced Green Tea: This refreshing beverage integrates perfectly with the meal, cleansing your palate while enhancing the elegant sushi experience. Its earthy notes pair beautifully with all accompanying flavors.
-
Mango Sticky Rice: For dessert, this sweet tropical treat brings a delightful finish. The sweet, creamy rice paired with fresh mango offers a satisfying contrast to the savory cones.
-
Spicy Mayonnaise Dipping Sauce: Drizzle a small amount of spicy mayo on the cones or serve it on the side for an extra kick. Its creaminess pairs wonderfully with the fresh ingredients, enhancing each mouthful.
Make Ahead Options
These Creative Sushi Wonton Cones are perfect for meal prep and can save you time during busy weeknights! You can prepare the sushi rice and tuna mixture up to 24 hours in advance, storing them separately in the refrigerator to maintain freshness and prevent sogginess. Fry the wonton cones and keep them crispy for up to 3 days in an airtight container at room temperature. When you’re ready to serve, simply assemble the cones by layering the prepped sushi rice and tuna mixture, adding fresh avocado, and garnishing with furikake. This way, you’ll have delightful, restaurant-quality sushi cones ready to impress with minimal last-minute effort!
Creative Sushi Wonton Cone Variations
Get ready to personalize your conical creations with fun twists and substitutes that elevate your Creative Sushi Wonton Cones into new flavor realms!
- Seafood Swap: Replace the tuna with salmon or scallops for a different seafood delight. Each option brings a unique texture and taste.
- Vegan Delight: Use marinated tofu or chickpeas as a protein alternative. This will create a wholesome dish for plant-based eaters that’s equally satisfying.
- Veggie-Packed: Load up with crunchy veggies like shredded carrots or cucumber for a refreshing twist. This not only adds color but also enhances the nutritional aspect.
- Daring Heat: Try spicy mayo or jalapeños in your filling for an extra kick! This twist transforms the cones into a fiery treat for heat lovers.
- Herb Fusion: Enhance flavors with fresh herbs like cilantro or basil in the tuna mixture. This addition makes each cone vibrant and aromatic.
- Zesty Lingering Notes: Add a splash of citrus, such as yuzu juice or a sprinkle of zest, for an unforgettable fresh burst in every bite.
- Savory Dipping: Serve with a side of soy-wasabi or ponzu sauce for an exciting dip. This unexpected pairing will keep your guests coming back for more!
- Crunchy Topping: Sprinkle some crushed rice crackers or panko breadcrumbs on top for added crunch and delightful texture that complements your cones beautifully.
As you venture into creating your own Creative Sushi Wonton Cones, don’t hesitate to experiment with these variations! They’ll transform your appetizer game while ensuring every gathering is filled with joy and flavor.
Storage Tips for Creative Sushi Wonton Cones
-
Room Temperature: Serve the creative sushi wonton cones immediately after assembly for the best texture and flavor. They are best enjoyed fresh, within 1 hour of serving.
-
Fridge: If you have leftovers, store the fried wonton shells and the fillings separately. The wonton shells can last up to 2 days, while the tuna mixture should be kept in an airtight container for up to 2 days as well.
-
Freezer: The fried wonton cones can be frozen for about 1 month. Wrap them tightly in plastic wrap and place them in a freezer bag. Reheat in the oven to restore crispiness!
-
Reheating: When ready to eat, reheat the fried wonton cones in the oven at 180 °C (350 °F) for about 10 minutes until warmed through and crispy. Assemble and fill with the tuna mixture just before serving for the best flavor experience with these creative sushi wonton cones.
Creative Sushi Wonton Cones Recipe FAQs
How do I select ripe avocado for my cones?
Absolutely! When choosing an avocado, look for one that is slightly soft to the touch but not mushy. A ripe avocado should yield to gentle pressure, indicating creaminess inside. If it has dark spots all over or is overly soft, it’s best to avoid it. The perfect avocado adds delicious creaminess to your sushi wonton cones!
What is the best way to store leftover sushi wonton cones?
Very good question! To maintain freshness, store the fried wonton shells and fillings separately. The wonton shells can be kept at room temperature for several hours after frying; for longer storage, they should go into an airtight container and last about 2 days in the fridge. Keep the tuna mixture in the fridge in a sealed container for up to 2 days as well.
Can I freeze the wonton cones?
Yes, you can! To freeze the fried wonton cones, wrap each one tightly in plastic wrap and place them in a freezer bag. They can be stored in the freezer for about 1 month. When you’re ready to enjoy them again, preheat your oven to 180 °C (350 °F) and bake the frozen cones for about 10 minutes until they’re warmed through and crispy. Assemble with the fillings just before serving for a delightful experience!
What should I do if my wonton wrappers are cracking or breaking?
Oh no! If your wonton wrappers are cracking, it may be because they’re either too dry or too cold. When using wrappers, make sure to keep them covered with a damp cloth to retain moisture. If they have been in the fridge, let them sit at room temperature for a few minutes before using. If they still break, you might want to try gently steaming them for a few seconds to make them more pliable.
Are there any dietary considerations with this recipe?
Definitely! If you’re serving the sushi wonton cones to guests, be mindful of dietary restrictions. For those with seafood allergies, consider using cooked shrimp, tofu, or vegetables as filling alternatives. Additionally, ensure that any sauce used is free from allergens like gluten, if necessary. You can also swap out Kewpie mayonnaise for a vegan alternative to accommodate plant-based guests.
How long does it take to prepare this recipe?
Preparing these Creative Sushi Wonton Cones takes about 30-40 minutes in total. This includes the time to heat the oil, cook the sushi rice, and assemble the cones. If you prepare the rice and tuna mixture in advance, you can streamline the process and have your delicious treats ready even quicker! Happy cooking!
Creative Sushi Wonton Cones: Fun, Flavorful Bites to Impress
Ingredients
Equipment
Method
- Preheat your oil in a deep frying pan to about 175 °C (350 °F). Gently wrap each wonton wrapper around a cream horn or cone mold, pressing the edges firmly to seal.
- Place the wrapped wonton cones into the hot oil, frying them for 2-3 minutes until golden-brown. Transfer to a plate lined with paper towels to drain excess oil.
- While the cones cool, rinse 1 cup of sushi rice under cold water until clear, then cook according to package instructions. Once cooked, mix in 2 tablespoons of rice vinegar, 1 tablespoon of sugar, and a pinch of salt. Cool to room temperature.
- In a bowl, cube or flake 8 ounces of sushi-grade tuna. Combine with 2 tablespoons of Kewpie mayonnaise, 1 tablespoon of tomato sauce, optional sriracha, and lime zest. Mix until incorporated.
- Assemble the cones by layering with sushi rice, slices of avocado, and top with the tuna mixture.
- Finish by sprinkling furikake or black sesame seeds on top. Serve immediately to enjoy the contrast of crispy wonton and fresh fillings.
Leave a Reply