
As I stood in my kitchen, the faint aroma of melting chocolate wafted through the air, instantly transporting me to my happiest place: dessert heaven. These fudgy no-bake chocolate protein truffles have become my go-to for satisfying sweet cravings without the guilt, and they’re so easy to whip up! Packed with over 5 grams of protein each, they make for a healthy snack that doesn’t compromise on flavor. With just three ingredients, these customizable beauties allow you to play with different protein powders and nut butters, making every batch a new adventure. Whether you’re winding down after a workout or simply treating yourself, trust me—these chocolate protein truffles will keep your taste buds dancing. Ready to discover this delightful and nourishing recipe?

Why are these truffles so irresistible?
Decadent, these chocolate protein truffles blend rich flavors with a nutritious twist that will leave you wanting more. Customizable, you can experiment with your favorite protein powder and nut butter for a unique treat every time. No-bake simplicity means you can whip them up quickly without having to turn on the oven. Perfect for sharing, they make a delightful addition to snack boxes or post-workout cravings. Guilt-free indulgence, each truffle is packed with over 5 grams of protein, ensuring you satisfy your sweet tooth while fueling your body. You might also enjoy these Cinnamon Roll Protein alternatives for another healthy snack option!
Chocolate Protein Truffles Ingredients
For the Truffles
- Protein Powder – This is the key ingredient for a protein-packed punch; choose your favorite flavor to personalize the taste.
- Nut Butter – Acts as the binder and provides creaminess; feel free to substitute with almond, cashew, or sunflower butter for allergy-friendly options.
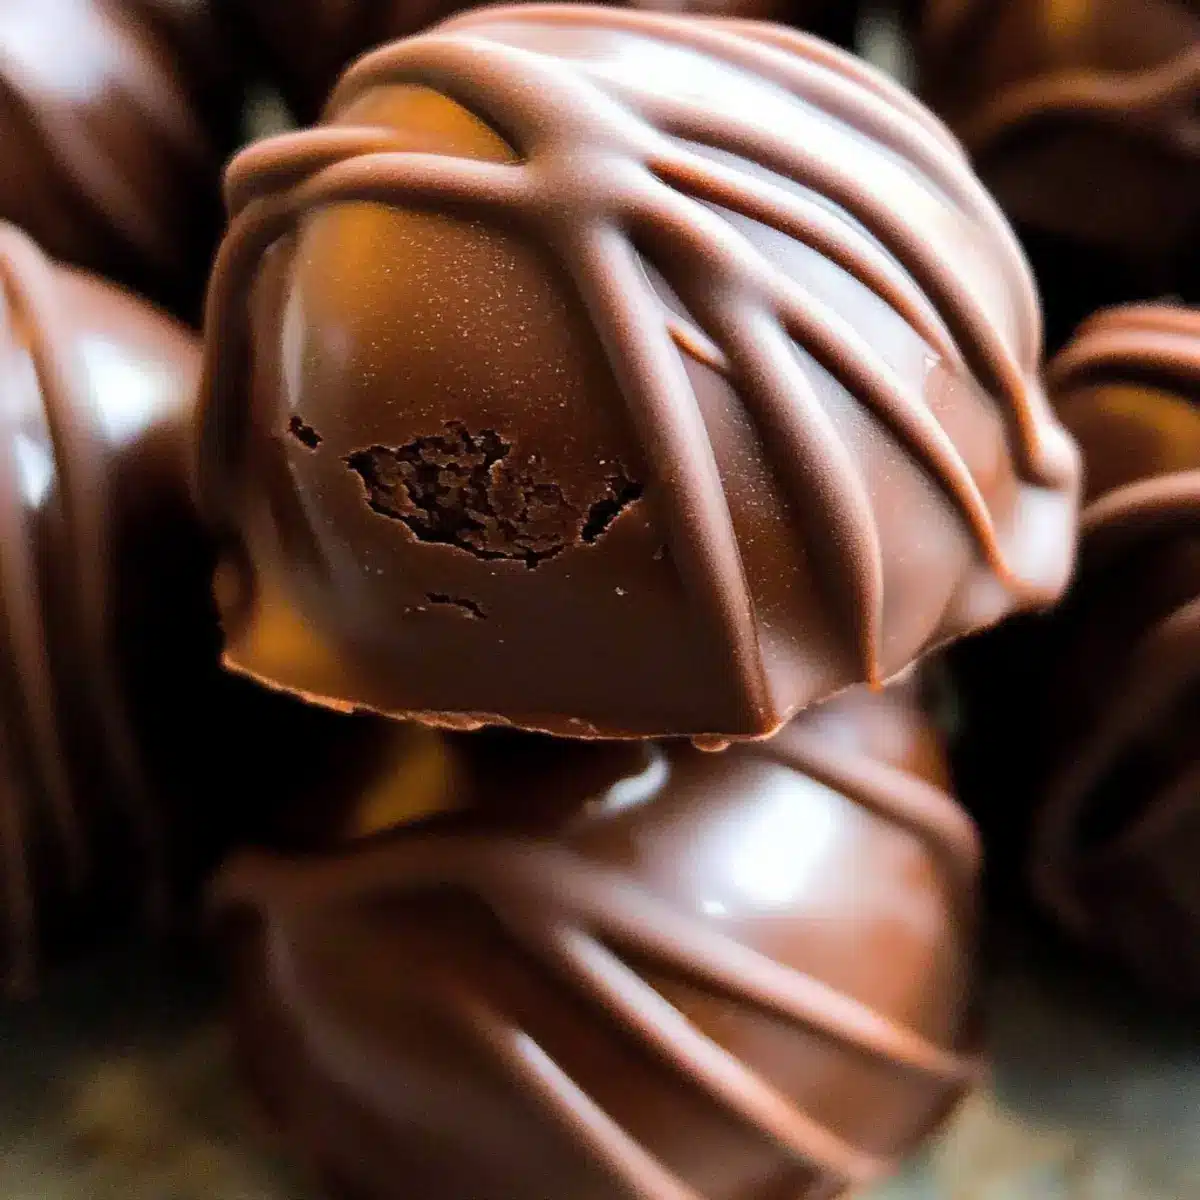
- Chocolate Chips – Used for coating, these add sweetness and a delightful chocolate layer; melt with a little coconut oil for a smooth finish.
For Flavor Variations
- Spices (Cinnamon, Vanilla) – Add a pinch of your favorite spice to elevate the flavor of your truffles.
- Nut Butter Swaps – Experiment with any nut butter you adore; it’s a great way to customize your chocolate protein truffles.
- Dark Chocolate vs. Milk Chocolate – Choose between dark or milk chocolate chips for coating based on your sweetness preference.
Step‑by‑Step Instructions for Chocolate Protein Truffles
Step 1: Warm the Nut Butter
Start by gently warming your chosen nut butter in the microwave for about 15-20 seconds if it’s too thick to mix. This will make it creamy and easier to combine with the other ingredients. Use a microwave-safe bowl, ensuring it doesn’t overheat. You’re looking for a smooth texture to help your chocolate protein truffles come together seamlessly.
Step 2: Combine Ingredients
In a mixing bowl or food processor, combine the warmed nut butter with your protein powder. Stir the ingredients together until a dough-like consistency forms, which should take about 1-2 minutes of mixing. You want a smooth, cohesive mixture that holds together well; this forms the base of your delicious chocolate protein truffles.
Step 3: Adjust the Texture
If the mixture feels too wet, gradually add more protein powder, about a tablespoon at a time, mixing thoroughly. If it appears too dry and crumbly, drizzle in a small amount of coconut oil and mix until you reach a dough that can easily hold its shape. This step is crucial for achieving the perfect consistency for rolling your chocolate protein truffles.
Step 4: Shape the Truffles
With clean hands or using a small cookie scoop, take portions of the dough and roll them into bite-sized balls, roughly the size of a tablespoon. Aim for a smooth surface on each truffle, which should take about 10 minutes for all the dough. Place the shaped truffles on a parchment-lined tray, ensuring they’re evenly spaced for easy dipping later.
Step 5: Melt the Chocolate
For the chocolate coating, place your chocolate chips in a microwave-safe bowl and heat in 30-second intervals, stirring in between, until fully melted and smooth, usually 1-2 minutes total. If desired, add a teaspoon of coconut oil to achieve a glossy finish. Be careful not to overheat the chocolate to avoid burning, giving your chocolate protein truffles that perfect dip.
Step 6: Coat the Truffles
Dip each truffle into the melted chocolate using a fork, ensuring it’s fully covered. Gently tap the fork on the side of the bowl to remove excess chocolate, then place each coated truffle back on the parchment-lined tray. Repeat this process until all truffles are coated, leaving them looking tempting and delicious.
Step 7: Chill to Set
Once all your chocolate protein truffles are coated, place the tray in the refrigerator. Allow them to chill for 30-60 minutes, or until the chocolate coating has fully set. This cooling period ensures the truffles firm up, resulting in that irresistible fudgy texture that makes these snacks so delightful.
Step 8: Store and Enjoy
After the chocolate has set, transfer the chocolate protein truffles to an airtight container for storage. These truffles can be kept at room temperature for a week, in the fridge for two weeks, or can even be frozen for up to three months. Enjoy these delicious, nutritious treats anytime you need a protein-packed snack!

Make Ahead Options
These fudgy no-bake chocolate protein truffles are perfect for meal prep enthusiasts! You can prepare the dough up to 24 hours in advance by shaping the truffles and placing them on a parchment-lined tray in the refrigerator. This not only saves you time during the busy week but also allows the flavors to meld beautifully. To further streamline your process, you can melt the chocolate coating ahead of time and store it in the fridge. When you’re ready to serve, simply re-melt the chocolate if needed and dip the truffles, letting them set for about 30 minutes. This way, you’ll enjoy delicious, protein-packed snacks without any last-minute fuss!
Expert Tips for Chocolate Protein Truffles
-
Texture Control: Start with less nut butter to prevent overly wet dough. Balance with protein powder or coconut oil as needed for perfect consistency.
-
Melting Chocolate: Heat chocolate chips gently in intervals, stirring frequently to avoid burning. The goal is a velvety coating for your truffles.
-
Chill Time: Allow adequate chilling time after coating. This helps the chocolate set properly and gives your truffles that irresistible fudgy texture.
-
Storage Savvy: Store truffles in an airtight container. They last a week at room temperature, two weeks in the fridge, or three months in the freezer.
-
Flavor Enhancements: Don’t hesitate to add spices like cinnamon or vanilla extract to elevate the flavor of your chocolate protein truffles.
Chocolate Protein Truffles Variations
Feel free to get creative with these truffles, transforming them into whatever your heart desires!
-
Nut Butter Swap: Choose almond or cashew butter for a different flavor. Each nut butter adds a unique twist to the creamy texture.
-
Vegan Option: Use plant-based protein powder and sunflower seed butter for a delicious vegan-friendly treat. You’ll still get that satisfying taste without any animal products!
-
Spice it Up: Add a dash of cinnamon or a few drops of vanilla extract to elevate the flavor profile. These small additions can jazz up your truffles into something extraordinary.
-
Different Chocolate: Opt for dark chocolate or white chocolate chips for unique coating flavors. Each option adds a distinct sweetness that changes the game entirely.
-
Dried Fruit Addition: Mix in some finely chopped dried fruits like cranberries or apricots for a chewy texture and a pop of color. It’s a great way to sneak in some natural sweetness!
-
Crunch Factor: Fold in some crushed nuts or seeds before rolling for extra crunch. This adds texture and makes your truffles feel even more indulgent.
-
Protein Boost: Use flavored protein powder, like chocolate or vanilla, to enhance the truffles’ taste. It’s a simple way to create different versions each time.
These delightful adaptations can keep your snacking exciting! If you’re in the mood for a refreshing treat, consider pairing these truffles with a delicious Frozen Hot Chocolate that’s bound to impress your taste buds. Enjoy your culinary adventure!
What to Serve with Fudgy No-Bake Chocolate Protein Truffles
Treat yourself to a delightful assortment of flavors that enhances your chocolate indulgence and fortifies your healthy snacking.
- Crisp Apple Slices: These juicy, refreshing slices add a crunchy contrast, making each bite a perfect blend of sweet and nutritious.
- Creamy Greek Yogurt: Rich in protein, a dollop of Greek yogurt complements the truffles’ texture while adding a tangy flavor boost.
- Nutty Granola: Sprinkle some nutty granola on top for an added crunch; the toasted oats harmonize beautifully with the fudgy sweetness.
- Banana Bread: Moist and flavorful, a slice of banana bread makes a satisfying companion, adding a homey touch and extra fiber.
- Dark Chocolate Covered Almonds: A sophisticated pairing, these provide a delightful crunch and rich chocolate flavor to enhance the truffles’ chocolatey goodness.
- Iced Herbal Tea: A chilled glass of herbal tea offers a refreshing palate cleanser that balances the sweetness of the truffles with herbal notes.
- Fruit Smoothie: Blend up a fruit smoothie for a nutrient-packed drink that complements your protein truffles while providing a delightful fruity contrast.
- Nut Butter Dipping Sauce: A drizzle of your favorite nut butter on the side invites you to savor each truffle for a richer taste experience.
- Dark Chocolate Espresso: For coffee lovers, a shot of dark chocolate espresso complements the dessert vibe while giving an extra hit of energy.
- Coconut Macaroons: Chewy and sweet, these treats create a delightful flavor match, with coconut’s tropical touch perfectly balancing chocolate richness.
Storage Tips for Chocolate Protein Truffles
Room Temperature: Store truffles in an airtight container at room temperature for up to 1 week. This keeps them soft and fudgy, ready for a quick snack.
Fridge: For longer storage, place the truffles in the refrigerator, where they can last for up to 2 weeks. This option helps maintain their freshness and texture.
Freezer: Freeze chocolate protein truffles in an airtight container for up to 3 months. Just thaw in the fridge overnight before enjoying.
Reheating: If you’ve stored them in the fridge or freezer, let truffles come to room temperature before eating for the best flavor and texture experience.
Chocolate Protein Truffles Recipe FAQs
What type of protein powder should I use?
Choosing the right protein powder is crucial! I recommend using a flavor you genuinely enjoy, like vanilla or chocolate. Unsweetened protein powders are great to prevent any artificial aftertaste, especially if you’re mindful about sugar intake.
How long can I store the chocolate protein truffles?
These delightful truffles can be stored at room temperature in an airtight container for up to a week, staying soft and fudgy. For prolonged freshness, keep them in the fridge for about two weeks. If you wish to freeze them, they can last up to three months—just thaw in the refrigerator overnight before indulging!
Can I freeze chocolate protein truffles?
Absolutely! To freeze, carefully place the truffles in a single layer on a parchment-lined tray and freeze them for about an hour. Once frozen, transfer the truffles to an airtight container or a zip-top bag, separating layers with parchment paper. This helps prevent sticking. They’ll stay good for up to three months!
What should I do if the dough is too wet or dry?
If you find your truffle mixture isn’t shaping up as expected, don’t fret! If it’s too wet, gradually add more protein powder, a tablespoon at a time, until a dough forms. Conversely, if it’s too dry, a drizzle of coconut oil can help smooth things out. Mixing until you achieve a cohesive dough is key—aim for a balance you love!
Are these truffles pet-friendly?
Not quite! While enjoyable for humans, chocolate can be toxic to dogs, so it’s best to keep these truffles away from your furry friends. If you’re looking for an alternative pet-friendly treat, consider making peanut butter balls that are safe for dogs!
Can I customize the flavor of my truffles?
The more the merrier! You can customize these chocolate protein truffles in so many ways. Change up the nut butter to almond, cashew, or sunflower for a unique twist. You can also play with flavored protein powders, or add a dash of cinnamon or vanilla extract to elevate flavors further. Mix and match to create your perfect bite!

Decadent Chocolate Protein Truffles You’ll Crave Daily
Ingredients
Equipment
Method
- Warm the Nut Butter: Gently warm your chosen nut butter in the microwave for 15-20 seconds to make it creamy.
- Combine Ingredients: In a bowl or food processor, mix the nut butter with protein powder until a dough-like consistency forms, about 1-2 minutes.
- Adjust the Texture: If too wet, add more protein powder; if too dry, drizzle in coconut oil to achieve a dough that holds shape.
- Shape the Truffles: Roll the dough into bite-sized balls and place on a parchment-lined tray for easy dipping.
- Melt the Chocolate: Heat chocolate chips in a microwave-safe bowl, stirring every 30 seconds until smooth and melted.
- Coat the Truffles: Dip each truffle in melted chocolate, tapping off excess before placing back on the tray.
- Chill to Set: Refrigerate the coated truffles for 30-60 minutes until the chocolate has set.
- Store and Enjoy: Transfer truffles to an airtight container; they last up to a week at room temperature or longer in the fridge or freezer.
Leave a Reply