
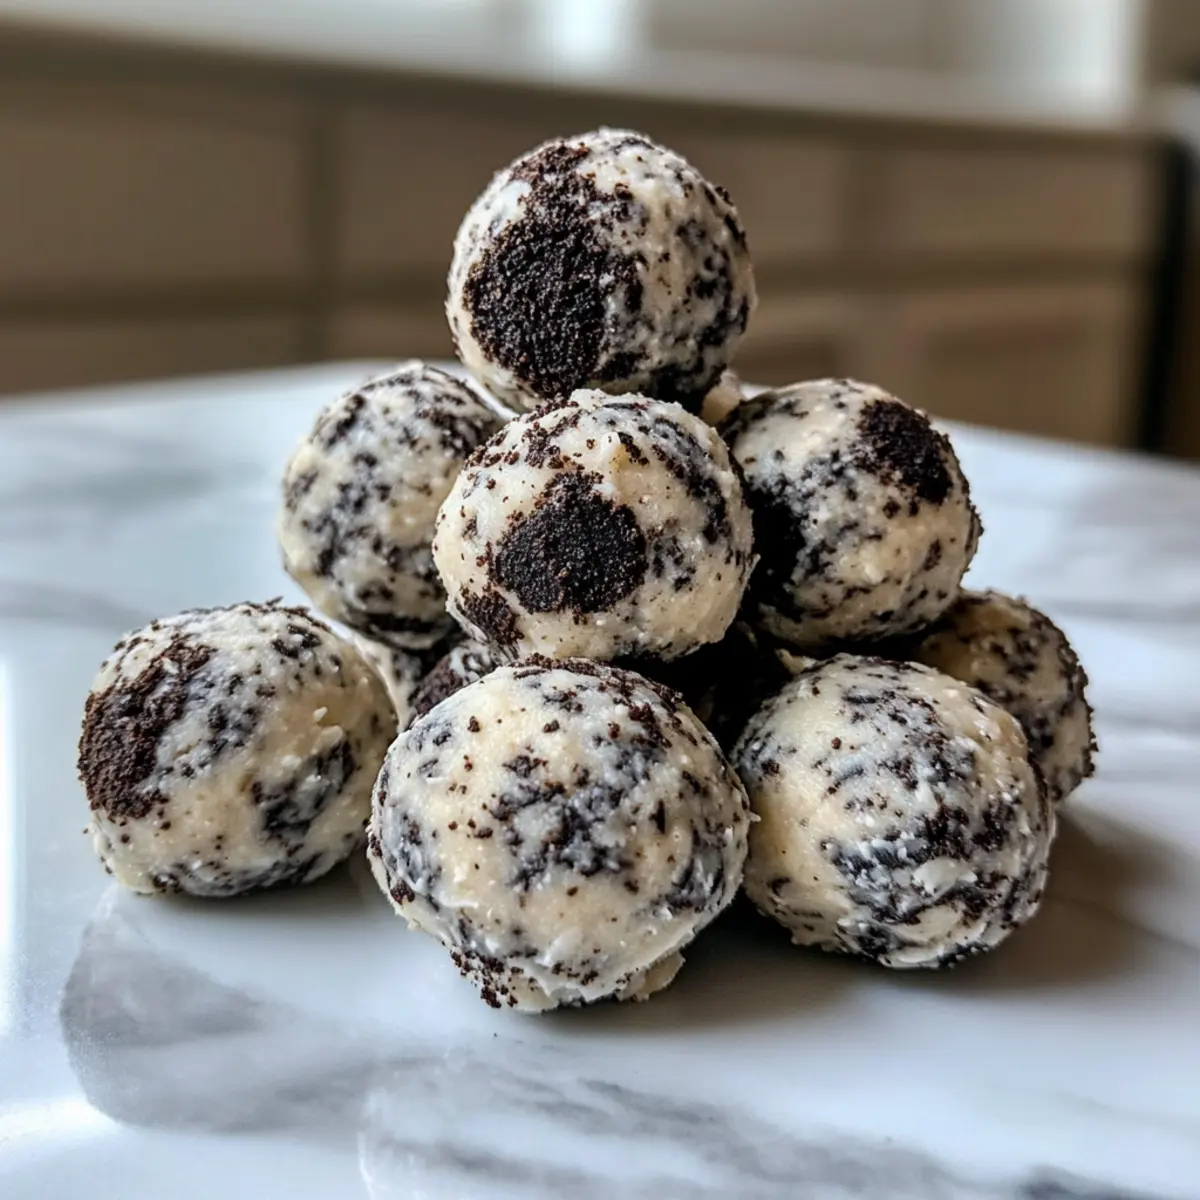
You might not expect to whip up something so indulgent in a flash, but these No-Bake Cream Cheese Oreo Protein Balls prove otherwise! Packed with the rich, creamy delight of cookies and cream cheesecake, they give you a sweet fix without the guilt. What I love most about this simple recipe is that it combines a protein boost with a dessert-like flavor, making it perfect for a quick snack or a post-workout treat. Plus, you can customize it to suit your taste or dietary needs, whether that means swapping out cookies, choosing vegan options, or adding your favorite mix-ins. Curious to find out how easy it is to create these little bites of happiness? Let’s get started!
Why Make Cream Cheese Oreo Protein Balls?
Indulgence at Your Fingertips: These no-bake Cream Cheese Oreo Protein Balls combine the decadence of cheesecake with the practicality of a protein boost, satisfying both your sweet tooth and nutritional needs.
Quick & Easy: With just a few simple steps, you’ll have a delicious snack ready to enjoy, making them perfect for busy lifestyles.
Customizable: Feel free to experiment with different cookies or protein powders to make this treat uniquely yours. Whether you’re craving peanut butter or chocolate, the choices are endless!
Healthy & Delicious: Each ball is a guilt-free indulgence, boasting around 100 calories and 10 grams of protein, making them an ideal snack for all fitness levels.
Perfect for Sharing: Not only are these protein balls a great treat for yourself, but they’re also a hit at gatherings or packed in lunchboxes, making you the star of any event!
Try them alongside other favorites like Cinnamon Roll Protein or Peppermint Ice Cream for an extra burst of flavor!
Cream Cheese Oreo Protein Balls Ingredients
For the Base
- Oreo Cookies – Provides that iconic cookies and cream flavor; substitute with lower-calorie or gluten-free cookies if desired.
- Cream Cheese – Adds a creamy richness; low-fat or vegan cream cheese options can work beautifully.
For the Protein Boost
- Protein Powder – Choose your favorite flavor for a protein kick; vanilla or chocolate blends well with the cookie flavors.
- Milk – Helps bind the mixture and achieve a perfect texture; any dairy or plant-based milk is a good choice!
For Flavor Enhancement
- Vanilla Extract – A touch of this elevates the flavor profile; it’s optional, but recommended for that extra depth.
- Salt – Just a pinch can balance the sweetness without being overpowering.
Optional Mix-Ins
- Chia Seeds – For added fiber and nutrients; mix in a tablespoon to boost health benefits.
- Chocolate Chips – Add in to amplify the sweet experience; semi-sweet or dark chocolate pairs especially well.
These Cream Cheese Oreo Protein Balls come together effortlessly, blending indulgence with nutritional value for an unbeatable snack!
Step‑by‑Step Instructions for Cream Cheese Oreo Protein Balls
Step 1: Crush the Oreos
Start by crushing the Oreo cookies into fine crumbs. You can do this by placing them in a zip-top bag and rolling over them with a rolling pin or using a food processor for a quicker method. Aim for fine crumbs, but leave a few small chunks for added texture. This should take about 2-3 minutes.
Step 2: Soften the Cream Cheese
Next, soften your cream cheese to room temperature for easy blending. If you’re short on time, cut the cream cheese into small cubes and microwave it in 10-second bursts until it’s spreadable but not melted—this usually takes about 20-30 seconds. This step ensures your Cream Cheese Oreo Protein Balls will have a smooth consistency.
Step 3: Mix the Base Ingredients
In a mixing bowl, combine the softened cream cheese with the crushed Oreos until well-blended. Use a spatula or a mixer to combine these ingredients, ensuring the mixture is smooth and uniform. This should take about 2-3 minutes. You’ll know it’s ready when you can no longer see the white of the cream cheese.
Step 4: Add the Protein Powder
Gradually incorporate your choice of protein powder into the mixture, stirring thoroughly to combine. If the mixture appears too dry, add milk one tablespoon at a time until you achieve a pliable dough-like consistency. This process will take around 2-4 minutes. The final mix should be moldable but not overly sticky.
Step 5: Include Optional Mix-Ins
If desired, stir in any additional mix-ins, such as chia seeds or chocolate chips, to elevate the texture and flavor of your Cream Cheese Oreo Protein Balls. Mix until everything is evenly distributed throughout the dough, which should take about 1-2 minutes. Feel free to experiment with different flavors to suit your taste!
Step 6: Form the Balls
Scoop about one tablespoon of the mixture and roll it into a ball shape in your hands. Continue this process until all the mixture is used up, placing each ball on a parchment-lined tray. This step should take around 5-7 minutes. You should end up with a delightful array of protein balls, ready for chilling.
Step 7: Chill for Firmness
Place the tray of cream cheese Oreo protein balls in the refrigerator for at least one hour, or pop them in the freezer for 30 minutes for a quicker option. Chilling allows them to firm up and hold their shape better. You’ll know they’re ready when they feel firm to the touch.
Step 8: Optional Coating
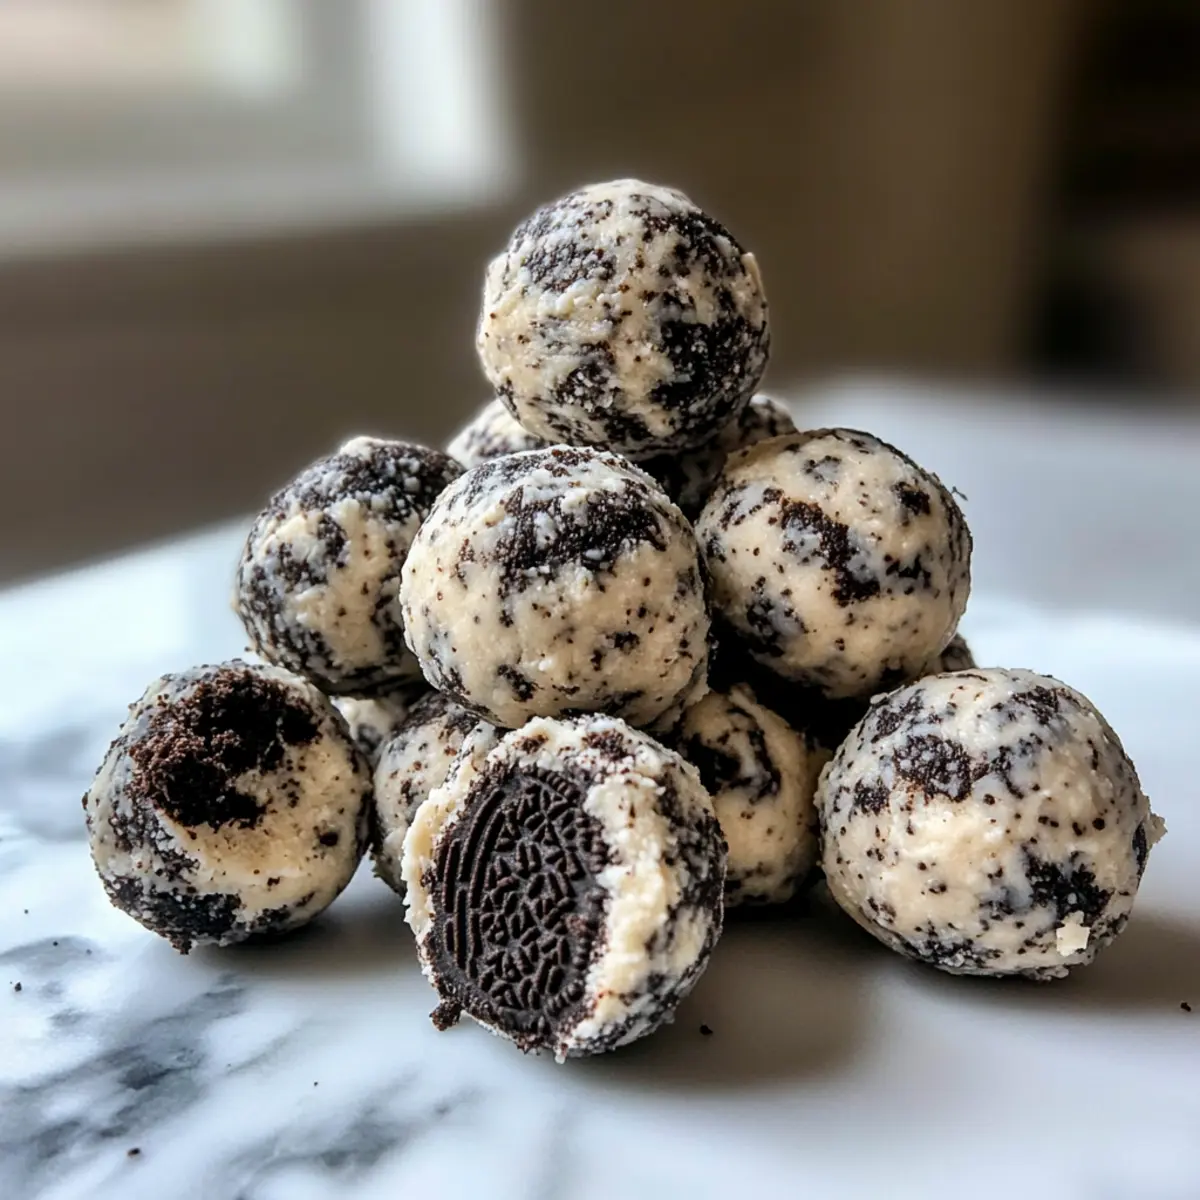
For a bakery-style finish, you can roll the chilled protein balls in extra crushed Oreo crumbs or your favorite toppings. This step adds an appealing touch and extra flavor, making your Cream Cheese Oreo Protein Balls irresistibly delicious. Feel free to get creative—this takes about 2-3 minutes!
What to Serve with Cream Cheese Oreo Protein Balls
Elevate your snacking experience with delightful pairings that enhance the taste of these creamy, indulgent bites.
-
Fresh Fruit Salad: A vibrant blend of seasonal fruits offers a refreshing contrast to the rich protein balls, balancing sweetness and acidity beautifully. Consider a mix of berries, citrus, and melons for a colorful treat.
-
Greek Yogurt Parfait: Layer your favorite yogurt with granola and fruits for a creamy, crunchy companion. The tangy yogurt amplifies the flavors of the protein balls while adding a nutritious boost.
-
Nut Butter Dips: Pair these protein balls with a side of almond or peanut butter for an extra protein punch and a deliciously nutty flavor contrast. It’s a perfect match for those who love a creamy texture.
-
Dark Chocolate Bites: Complement the sweet creaminess with a touch of indulgent dark chocolate. The slight bitterness of dark chocolate pairs exquisitely with the sweet and creamy protein balls, making each bite feel luxurious.
-
Sparkling Water with Lime: Refresh your palate with fizzy sparkling water infused with lime. The zesty citrus notes cut through the creaminess of the protein balls, offering a light and effervescent experience.
-
Ice Cream Float: Treat yourself by adding your protein balls to a glass of your favorite iced beverage topped with a scoop of vanilla ice cream. The creamy ice cream adds an indulgent twist, turning your snack into a decadent dessert.
The mix of flavors and textures with these pairings complements the Cream Cheese Oreo Protein Balls, providing a well-rounded culinary adventure!
Storage Tips for Cream Cheese Oreo Protein Balls
Fridge: Store your Cream Cheese Oreo Protein Balls in an airtight container in the refrigerator for up to 5 days. This keeps them fresh and ready to enjoy anytime!
Freezer: For longer storage, freeze the protein balls in a single layer on a parchment-lined tray, then transfer to an airtight container. They can last in the freezer for up to 2 months without losing flavor.
Thawing: When you’re ready to indulge, take the protein balls out of the freezer and let them thaw for about 10-15 minutes before enjoying for optimal texture.
Refrigeration Advice: If they seem too soft after thawing, pop them back in the fridge for a further 30 minutes to regain firmness. Enjoy your tasty, nutritious snack!
Make Ahead Options
These Cream Cheese Oreo Protein Balls are fantastic for meal prep, saving you time during busy weeks! You can easily prepare the mixture up to 24 hours in advance—simply follow the initial steps and roll them into balls, then place them on a parchment-lined tray and refrigerate. This ensures they’re fresh and ready to go at a moment’s notice! For the best quality, store them in an airtight container once chilled. When you’re ready to serve, roll them in crushed Oreos or your desired coating for a lovely finish, and enjoy these delicious treats just as you would if they were freshly made!
Expert Tips
-
Cream Cheese Temperature: Ensure your cream cheese is just softened, not melted. If it’s too warm, your Cream Cheese Oreo Protein Balls may become runny instead of firm.
-
Mix Consistency: If your mixture feels too dry, add milk a tablespoon at a time until it reaches a dough-like consistency. This will help avoid crumbly balls!
-
Cookie Variety: Feel free to experiment with different sandwich cookies. Using flavored options can create unique twists on the classic Cream Cheese Oreo Protein Balls.
-
Chill Thoroughly: Allow ample chilling time for the protein balls to firm up. This step ensures they maintain their shape and texture when serving.
-
Presentation Matters: For a professional touch, roll your protein balls in additional crushed Oreos or cocoa powder to enhance their visual appeal.
Cream Cheese Oreo Protein Balls: Customizable Delights
Feel free to let your creativity run wild as you tailor these protein balls to your taste and dietary preferences!
- Cookie Swap: Replace Oreos with your favorite sandwich cookies, like peanut butter or chocolate, for a unique flavor twist.
- Vegan Option: Use vegan cream cheese and plant-based protein powder to keep this recipe entirely vegan-friendly without sacrificing taste.
- Nutty Add-ins: Fold in chopped nuts or nut butter for extra crunch and a boost of healthy fats. Almond or pecan pieces work beautifully!
- Chocolate Lovers: Substitute chocolate protein powder and add mini chocolate chips to heighten the decadent experience. You’ll feel like you’re indulging in dessert!
- Fruit Fusion: Try mixing in dried fruit like cranberries or chopped dates for added sweetness and chewiness. It’s a delightful surprise in every bite!
- Spice It Up: A sprinkle of cinnamon or cocoa powder can introduce a warm, comforting flavor profile, making these protein balls perfect for any season.
- Boost with Seeds: Adding chia seeds or ground flaxseed not only enhances the nutrition but adds a lovely crunch. Your snack just got supercharged!
- Cool & Creamy: Roll the finished balls in finely crushed nuts or coconut flakes for an extra textural twist and beautiful presentation.
As you embark on this delicious journey, don’t forget to check out Broccoli Potato Cheese for a savory treat that perfectly complements your protein-packed snacks or indulge in the refreshing notes of Orange Creamsicle Cheesecake to satisfy your sweet cravings!
Cream Cheese Oreo Protein Balls Recipe FAQs
What type of Oreos should I use for the Cream Cheese Oreo Protein Balls?
Absolutely, you can use classic Oreos for that iconic cookies and cream flavor! If you’re looking for healthier options, try reduced-fat Oreos or gluten-free cookies. Both substitutes will maintain that delicious sweetness while accommodating different dietary needs.
How should I store leftover Cream Cheese Oreo Protein Balls?
Keep your protein balls in an airtight container in the refrigerator for up to 5 days. This allows them to stay fresh and tasty. If you want to store them longer, you can freeze them for up to 2 months. Just be sure to thaw them for about 10-15 minutes before enjoying for the best texture!
Can I freeze Cream Cheese Oreo Protein Balls?
Yes! To freeze, lay the rolled protein balls in a single layer on a parchment-lined tray. Once they’ve firmed up, transfer them to an airtight container. This method helps prevent them from sticking together and allows them to maintain flavor. They can last in the freezer for 2 months. When you’re ready to munch, simply let them sit at room temperature for about 10-15 minutes to soften.
What should I do if my mixture is too dry?
If your mix feels too crumbly, don’t fret! Gradually add milk, one tablespoon at a time, until the mixture reaches a dough-like consistency. This could take around 3-4 tablespoons in total, depending on your protein powder type. The goal is to have it pliable enough to roll easily without being sticky.
Are Cream Cheese Oreo Protein Balls safe for people with allergies?
That’s a great question! If you or someone you’re serving has allergies, you can definitely adjust the ingredients accordingly. Use vegan cream cheese and a plant-based protein powder to cater to dairy allergies or sensitivities. Always check the packaging of your ingredients to ensure they align with dietary restrictions!
Can I add mix-ins to my Cream Cheese Oreo Protein Balls?
Very! You can stir in various mix-ins, like chia seeds for an extra fibrous boost or chocolate chips for added sweetness. Feel free to get creative with flavors, incorporating your favorites like nuts or even shredded coconut for delightful texture!
Cream Cheese Oreo Protein Balls: No-Bake Ultimate Snack Treat
Ingredients
Equipment
Method
- Crush the Oreo cookies into fine crumbs using a zip-top bag and rolling pin or a food processor, about 2-3 minutes.
- Soften the cream cheese to room temperature; if short on time, microwave in 10-second bursts for 20-30 seconds.
- In a mixing bowl, combine softened cream cheese with crushed Oreos until well-blended, about 2-3 minutes.
- Gradually incorporate protein powder, add milk if needed, and mix until a dough-like consistency is achieved, about 2-4 minutes.
- Stir in optional mix-ins like chia seeds or chocolate chips, mixing until evenly distributed, about 1-2 minutes.
- Shape mixture into balls, placing each on a parchment-lined tray, taking about 5-7 minutes to form all.
- Chill the tray in the refrigerator for at least one hour or freeze for 30 minutes until firm.
- Optionally roll chilled balls in extra crushed Oreos or toppings for added appeal, about 2-3 minutes.
Leave a Reply