
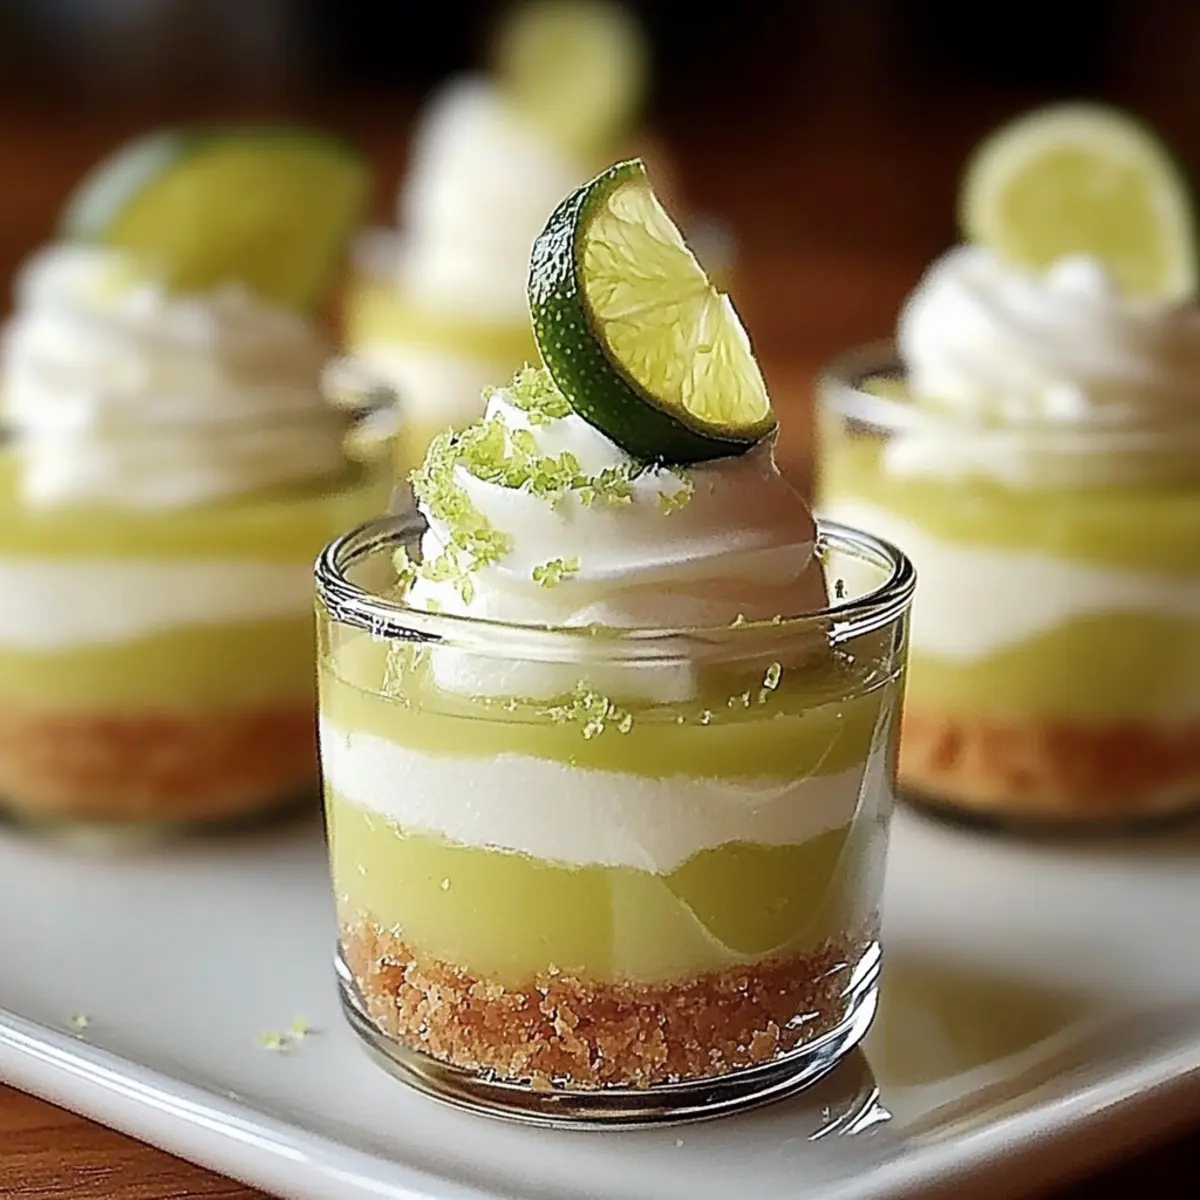
Strolling through a sun-drenched market, the scent of tangy citrus fills the air. It’s the perfect moment of inspiration for crafting a dessert that brightens any occasion. Enter these delightful No-Bake Key Lime Pie Mini Desserts, where creamy lime filling meets a crunchy graham cracker crust. Not only are they quick to prepare, making them an ideal choice for those busy weeknights, but their customizable nature means you can tailor them to any dietary preference or flavor inclination. Imagine serving these charming little bites at your next gathering, earning oohs and aahs from your friends, or savoring them as a personal treat on a warm afternoon. Curious to see how you can bring this zesty delight to life in your kitchen? Let’s dive into the recipe!
Why Are These Mini Desserts So Special?
Endless Customization: These mini desserts allow you to tailor flavors to suit any palate. From fruity layers with berries to gluten-free crust options, there’s something for everyone!
No-Bake Convenience: Enjoy the ease of preparation without heating up your kitchen. They come together in mere minutes, making them perfect for last-minute gatherings or sweet cravings!
Impressive Presentation: With their gorgeous appearance and layered effects, these bites will steal the spotlight at any dessert table, alongside favorites like Mini Cherry Pies and Christmas Peppermint Pie.
Light and Refreshing: These treats offer a zesty balance of flavors and textures that are both satisfying and refreshing, ideal for warm days or special occasions!
Crowd-Pleasing Treats: You’re bound to win hearts when serving these delightful desserts. With their unique taste and vibrant colors, they’re sure to elicit compliments from guests!
Key Lime Pie Mini Desserts Ingredients
For the Crust
• Graham Cracker Crumbs – The base for your crust; consider ginger snaps for a flavorful twist.
• Melted Butter – Binds the crust ingredients together; make sure it’s completely melted for smooth mixing.
• White Sugar – Adds a hint of sweetness to the crust; adjust based on your sweetness preference.
For the Filling
• Reduced-Fat Cream Cheese – Gives a creamy texture to your filling; full-fat adds richness if desired.
• Low-Fat Vanilla Greek Yogurt – Infuses tanginess into the filling; choose dairy-free yogurt for a dairy-free option.
• Fat-Free Sweetened Condensed Milk – Sweetens and thickens the filling nicely; a plant-based condensed milk works too.
• Key Lime Juice – Essential for that iconic citrus flavor; fresh key limes can enhance taste even more.
• Green Food Coloring (optional) – A fun way to brighten your dessert; feel free to skip if you prefer a natural look.
Step‑by‑Step Instructions for Key Lime Pie Mini Desserts
Step 1: Prepare the Crust
In a medium bowl, combine graham cracker crumbs, melted butter, and sugar until evenly moist. You’ll want a consistency that holds together when pressed. Using your fingers or a small spoon, firmly press this mixture into the bottoms of mini dessert glasses, creating a solid layer. Set the crusts aside in the refrigerator to chill while you work on the filling.
Step 2: Make the Filling
In a large mixing bowl, beat together the reduced-fat cream cheese and low-fat vanilla Greek yogurt until completely smooth and creamy, which should take about 2-3 minutes with an electric mixer. In another bowl, whisk together the fat-free sweetened condensed milk and key lime juice, then gently fold this mixture into your cream cheese blend with a rubber spatula until well combined. The key lime pie mini desserts filling should be thick yet pourable.
Step 3: Assemble Desserts
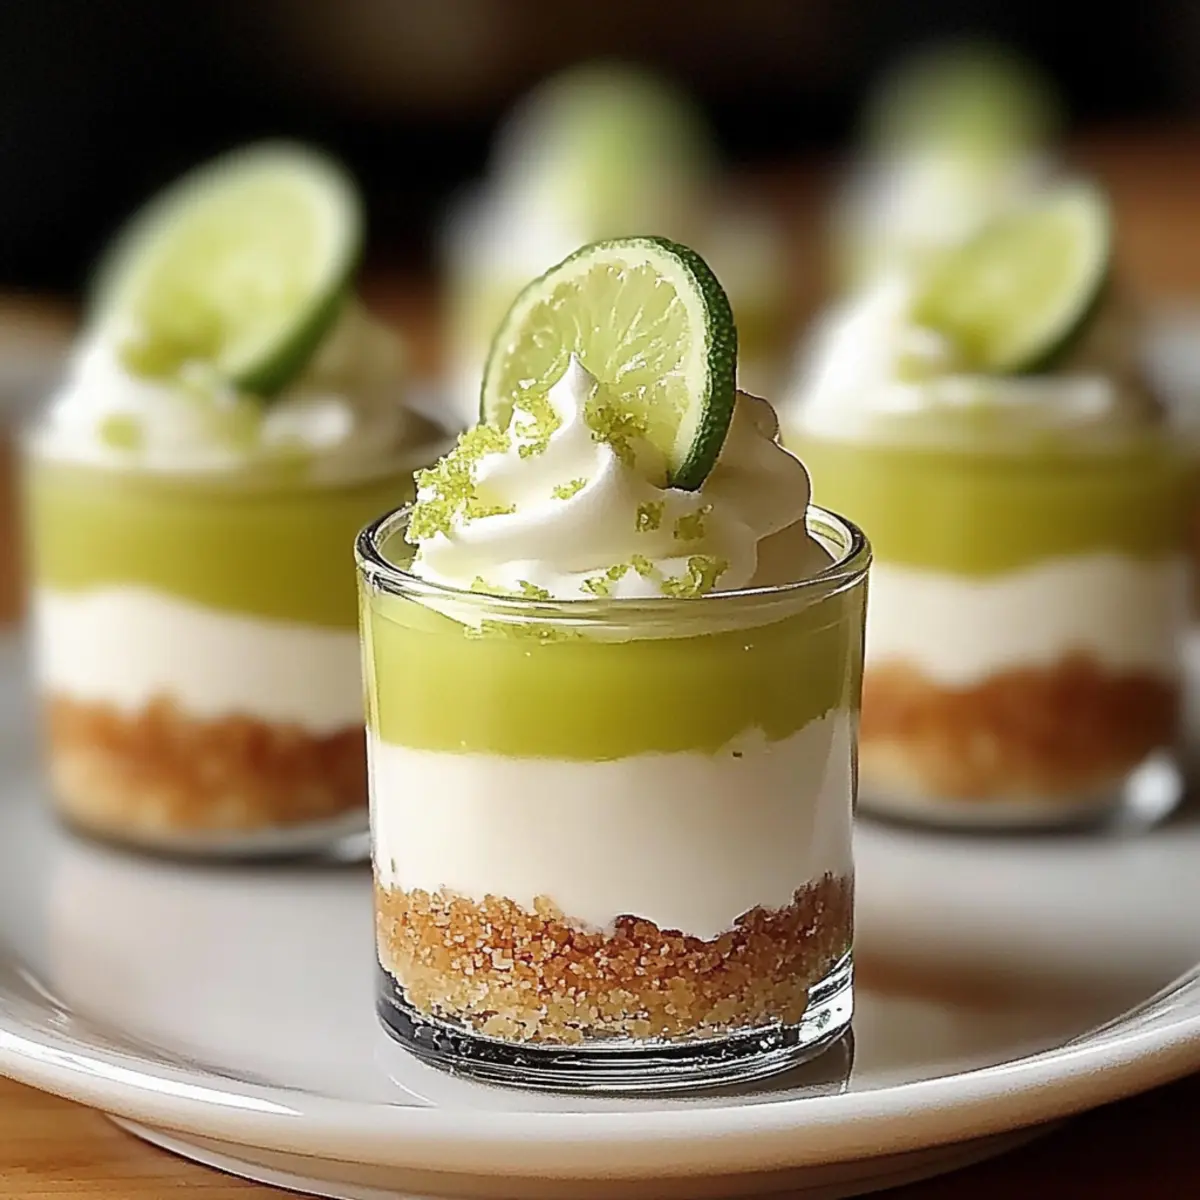
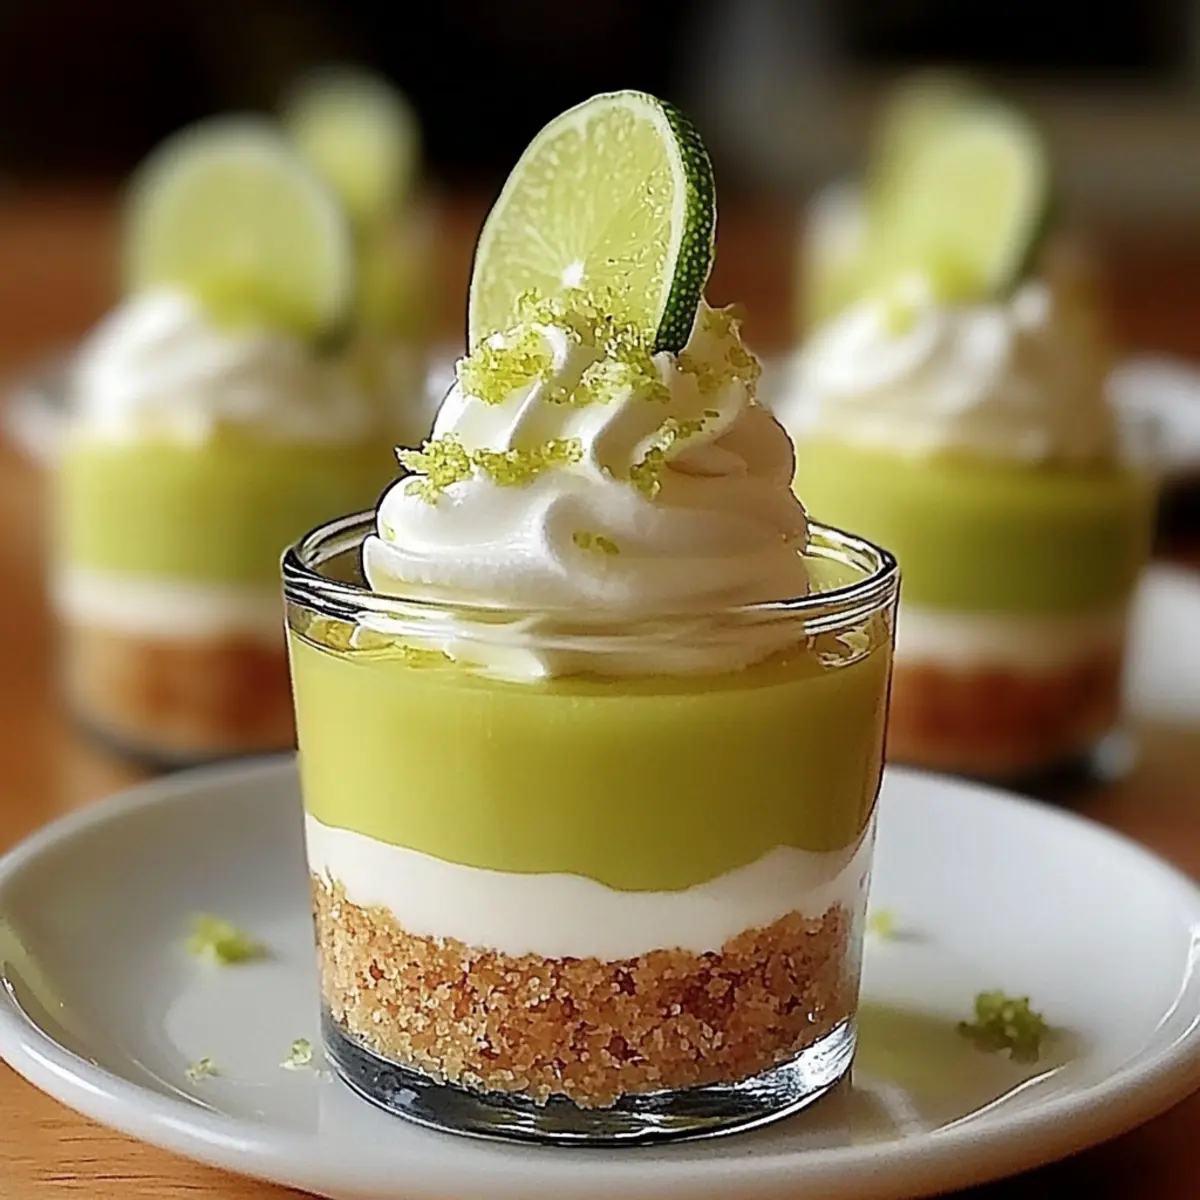
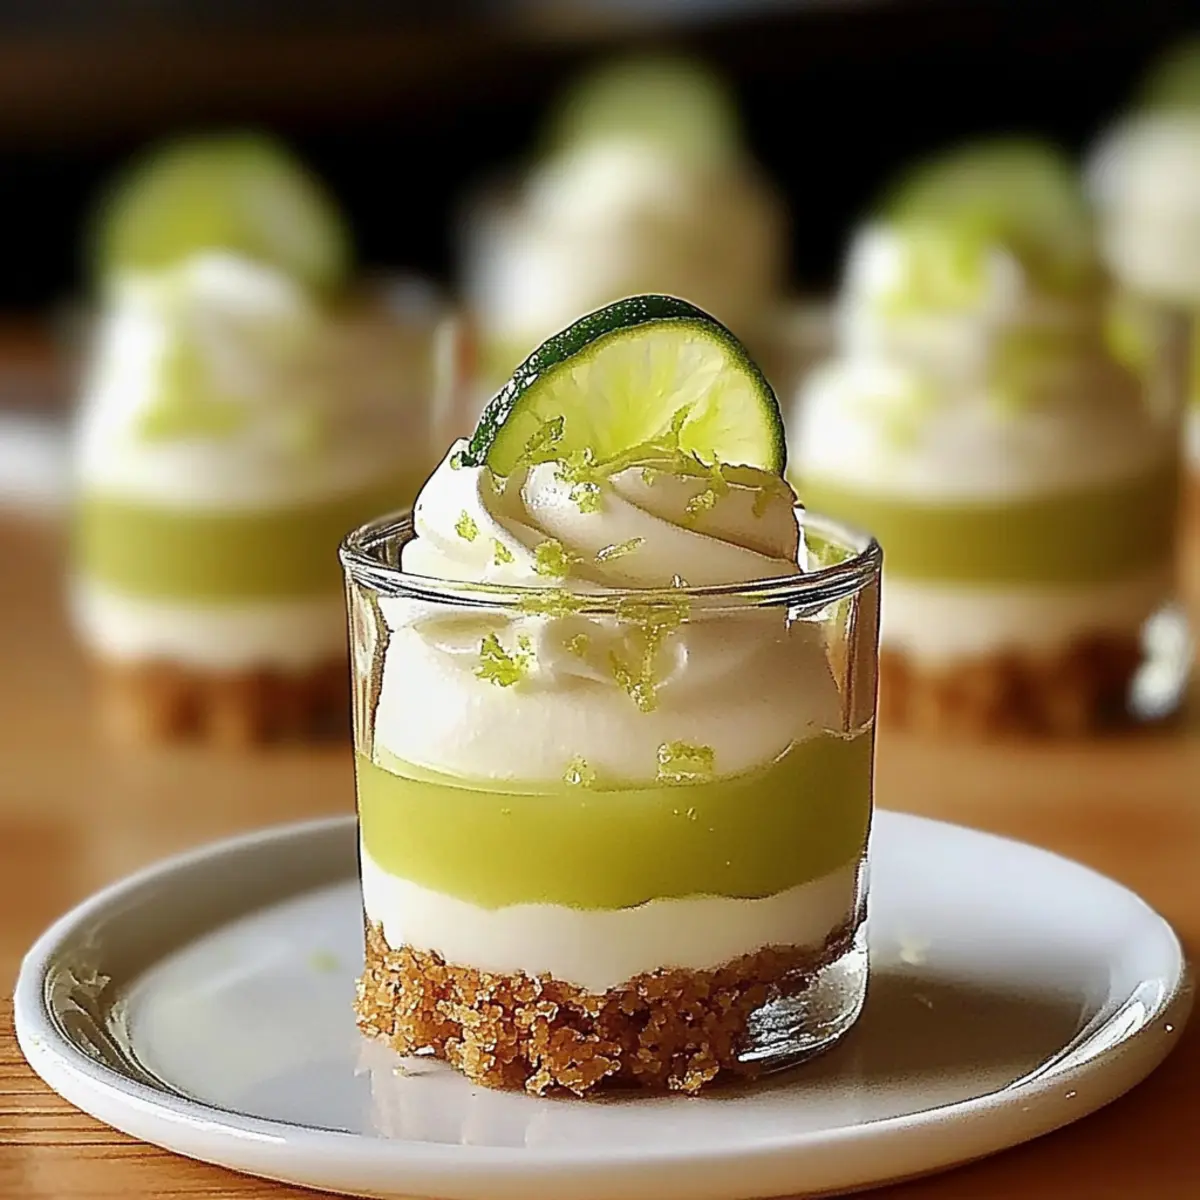
Divide the filling into two portions. If you’d like, add a few drops of green food coloring to one portion to create a vibrant layer, mixing thoroughly. Using piping bags or Ziploc bags with a corner snipped off, alternate layering the fillings in each mini dessert glass, starting with the plain filling followed by the colored one. This layered effect not only looks beautiful but enhances the flavor experience of your key lime pie mini desserts.
Step 4: Chill
Place the assembled mini desserts in the refrigerator and let them chill for at least 2 hours. This crucial step helps the filling set properly so that each bite is smooth and creamy. You’ll know they’re ready when they feel firm to the touch and have melded together beautifully.
Step 5: Garnish
Before serving your delightful key lime pie mini desserts, take them out of the fridge and sprinkle some whipped cream on top. For an extra touch, add a sprinkle of lime zest or some extra graham cracker crumbs for texture. These final garnishes will add a pop of flavor and visual appeal, making your mini desserts even more irresistible!
What to Serve with Key Lime Pie Mini Desserts
Embrace the sunny flavors of a tropical getaway by pairing these refreshing bites with delightful sides and drinks.
- Iced Tea: A glass of sweetened iced tea enhances the mini desserts’ zesty profile, making it a perfect match for summer gatherings.
- Coconut Whipped Cream: Adding a dollop of coconut whipped cream elevates the tropical vibe and provides a luscious texture contrast.
- Fresh Berries: Serve with a side of mixed fresh berries for a burst of juicy sweetness that complements the tartness of the lime.
- Lemonade: The tangy sweetness of lemonade makes for a refreshing drink that harmonizes beautifully with the key lime flavors.
- Mint-Infused Water: For a light drink option, serve mint-infused water; its coolness refreshes the palate between bites.
- Shortbread Cookies: Crunchy, buttery shortbread cookies offer a delightful textural contrast, making for a lovely nibble alongside your mini desserts.
- Fruit Salad: A vibrant fruit salad with seasonal fruits adds freshness and maintains the light-hearted spirit of this tropical treat.
- Mojitos: For an adult twist, serve mojitos; their minty lime balance echoes the flavors of the mini desserts wonderfully.
Make Ahead Options
These No-Bake Key Lime Pie Mini Desserts are perfect for meal prep enthusiasts looking to save time during busy weeks! You can prepare the crust and filling up to 24 hours in advance. Simply make the crust and let it chill in the refrigerator; then, mix the filling and refrigerate it separately to maintain that fresh taste. When you’re ready to serve, layer the filling into your prepped crusts and allow them to chill for at least 2 hours (or until set). This ensures the flavors meld beautifully while keeping the textures just as delightful! Just remember to garnish with whipped cream and lime zest right before serving for that extra touch of freshness and appeal.
How to Store and Freeze Key Lime Pie Mini Desserts
Fridge: Store your mini desserts in an airtight container in the refrigerator for up to 3 days. This helps maintain their refreshing flavor and creamy texture.
Freezer: If you want to keep them longer, freeze the mini desserts for up to 1 month. Wrap each dessert tightly in plastic wrap and place them in a freezer-safe container.
Thawing: When ready to enjoy, thaw the mini desserts in the refrigerator overnight for the best results. This gentle thaw keeps their texture delightful and prevents sogginess.
Reheating: There’s no need to reheat these key lime pie mini desserts; they are best served chilled, straight from the refrigerator!
Expert Tips for Key Lime Pie Mini Desserts
-
Chill Properly: Ensure the mini desserts chill for at least 2 hours. This step is essential for the filling to set and develop optimal flavor.
-
Smooth Filling: Use an electric mixer to blend the cream cheese and yogurt. If mixing by hand, be patient – a creamy texture is key for these key lime pie mini desserts.
-
Layer with Care: Piping the filling creates beautiful layers. Practice your technique to achieve a professional-looking dessert; it’s definitely worth the effort!
-
Taste Test: Prior to assembling, taste the filling and adjust sweetness or tanginess as needed. Personalize your key lime pie mini desserts to suit your preference!
-
Garnish Ideas: Get creative with garnishes! Fresh berries, chopped mint, or thin lime slices can enhance both flavor and visual appeal.
Key Lime Pie Mini Desserts Variations
Feel free to get adventurous and customize your mini desserts with these delightful twists that will tickle your taste buds!
-
Dairy-Free: Replace reduced-fat cream cheese and yogurt with dairy-free alternatives for a creamy filling that everyone can enjoy.
-
Gluten-Free: Use gluten-free graham cracker crumbs or crushed nuts; this ensures everyone at the table can indulge without worry.
-
Berry Bliss: Add layers of fresh strawberries or blueberries in between the lime filling for a fruity pop of color and flavor. The natural sweetness of the berries complements the tartness of the lime beautifully.
-
Coconut Twist: Incorporate shredded coconut into the crust or as a garnish for a tropical vibe. The added texture and flavor bring a sunny twist to the classic dessert, reminiscent of a vacation on the beach.
-
Zesty Infusion: Mix in a little orange or lemon zest to the filling for an extra citrusy zing that elevates the flavor profile. This little touch can create a vibrant and exciting dessert experience.
-
Chocolate Drizzle: Top your mini desserts with a light drizzle of melted dark chocolate for an indulgent contrast to the tangy filling. It’s an unexpected yet delicious combination that chocolate lovers will adore!
-
Frozen Treats: Freeze the assembled mini desserts for an icy treat on hot days. Just allow them to sit for a few minutes at room temperature before serving for the perfect texture.
-
Layered Delight: Experiment with different colored yogurt or fillings, using key lime, mango, or passion fruit, to create striking layers that are as eye-catching as they are tasty. Each bite will be an adventure!
With these creative variations, your Key Lime Pie Mini Desserts can be tailored to fit any occasion, making them even more delightful. Enjoy serving up this charming treat at your next gathering or as a personal indulgence!
Key Lime Pie Mini Desserts Recipe FAQs
Can I substitute ingredients for the crust?
Absolutely! If you want to switch things up, consider using crushed ginger snaps or shortbread cookies instead of graham cracker crumbs. These alternatives will bring unique flavors to the crust, making your key lime pie mini desserts even more special.
How should I store the mini desserts?
Store your key lime pie mini desserts in an airtight container in the refrigerator for up to 3 days. This method helps keep them fresh and maintains their creamy texture. Just make sure to keep them tightly sealed to prevent any unwanted odors from affecting the flavors!
Can I freeze key lime pie mini desserts?
Yes, you can freeze them! Wrap each mini dessert tightly in plastic wrap and place them in a freezer-safe container. They can be frozen for up to 1 month. When you’re ready to enjoy, simply thaw them overnight in the refrigerator to retain their lovely texture.
What if my filling isn’t smooth?
If you find your filling isn’t as smooth as you’d like, don’t worry! Just return to your mixing bowl, and use an electric mixer to blend it for another minute or two. If you’re mixing by hand, be sure to mix thoroughly and patiently to achieve that silky consistency; it really enhances the overall experience of the mini desserts!
Are there any dietary considerations I should keep in mind?
Definitely! If you’re catering to dietary restrictions, you can opt for gluten-free cookies for the crust and dairy-free yogurt to make the filling suitable for those avoiding dairy. Always check labels on your sweetened condensed milk too; there are plant-based alternatives available, allowing everyone to indulge in these lovely key lime pie mini desserts.
Can I add other flavors to the filling?
Very! Experimenting can lead to delightful results. Consider incorporating flavored yogurts, like coconut or lemon, for a fun twist. You can also blend in pureed fruits like strawberries or blueberries for added color and taste – just make sure to maintain the proportions of the original recipe for the best texture.
Sweet & Tangy Key Lime Pie Mini Desserts You'll Adore
Ingredients
Equipment
Method
- In a medium bowl, combine graham cracker crumbs, melted butter, and sugar until evenly moist. Press this mixture into the bottoms of mini dessert glasses and set aside to chill.
- In a large mixing bowl, beat together the reduced-fat cream cheese and low-fat vanilla Greek yogurt until smooth. In another bowl, whisk together the sweetened condensed milk and key lime juice, then fold this into the cream cheese blend.
- Divide the filling into two portions. Optionally add green food coloring to one portion. Using piping bags, alternate layering the fillings in each mini dessert glass.
- Place the assembled mini desserts in the refrigerator for at least 2 hours to chill and set.
- Before serving, sprinkle whipped cream on top and add lime zest or extra graham cracker crumbs.
Leave a Reply