
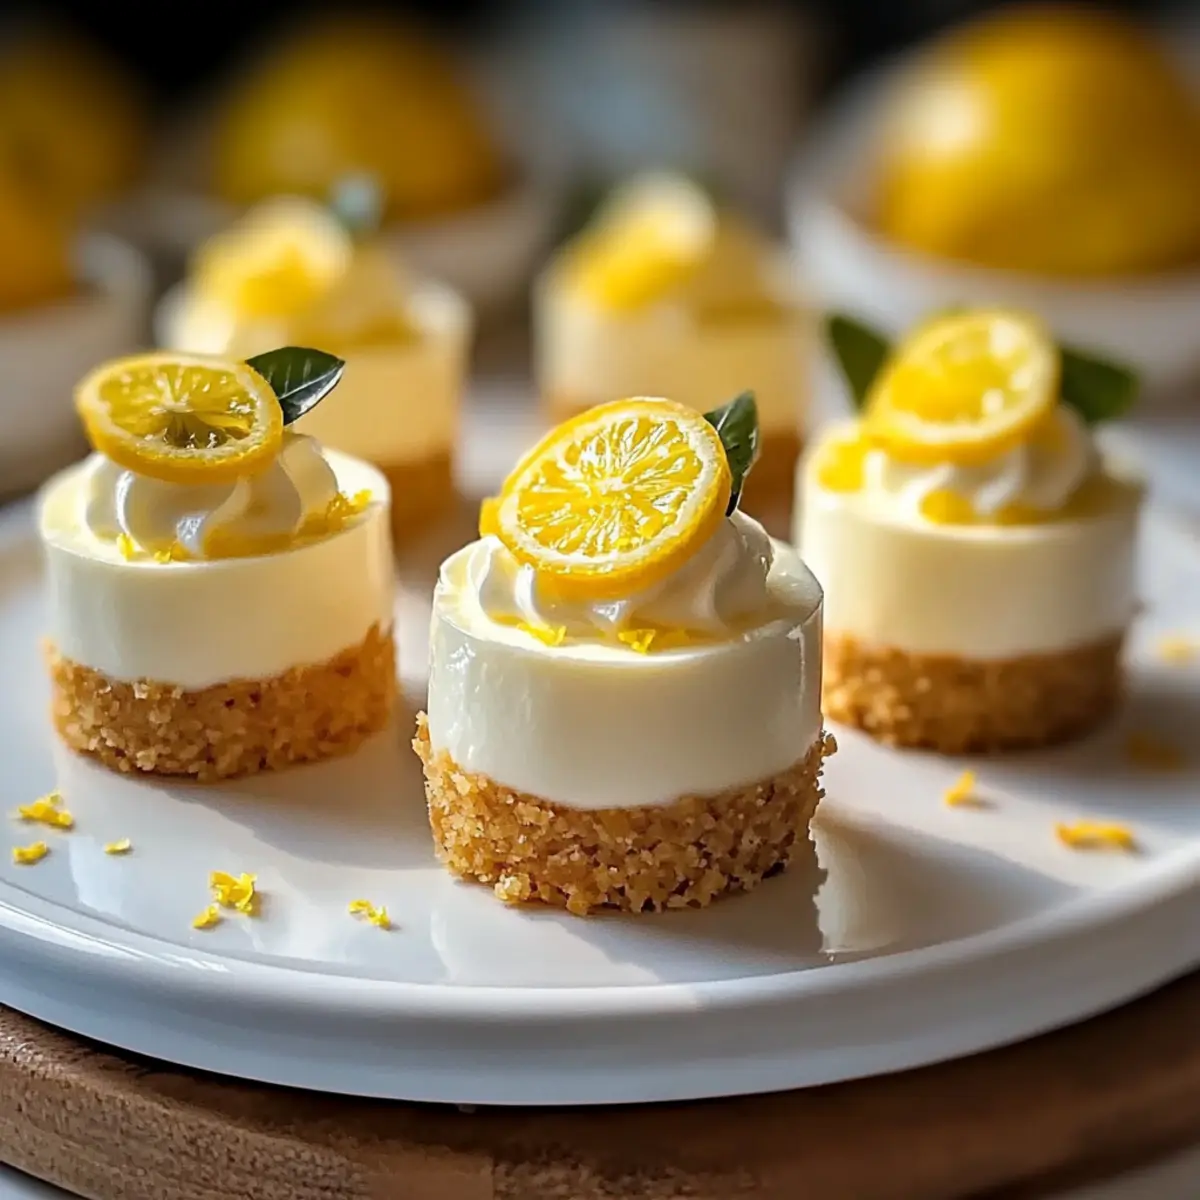
As I stood in my kitchen, the bright sun streaming through the window, I couldn’t help but savor the refreshing scent of lemon zest. There’s something wonderfully uplifting about making Mini Lemon Cheesecakes—a bite-sized dessert that feels like a burst of sunshine on a plate. These creamy delights, cradled in a buttery graham cracker crust, are not only incredibly easy to whip up, but they also offer a wonderful canvas for customization. Want to sprinkle some fresh berries on top or whip up a tangy lemon curd? The options are endless! Plus, their petite size makes them perfect for sharing at gatherings or indulging on a quiet afternoon. Why not treat yourself and your loved ones to a little slice of happiness today? Let’s dive into this sweet adventure together!
Why Are These Mini Cheesecakes A Must-Try?
Irresistible Flavor: The creamy lemon filling combined with the buttery graham cracker crust creates a delightful balance of sweetness and tang.
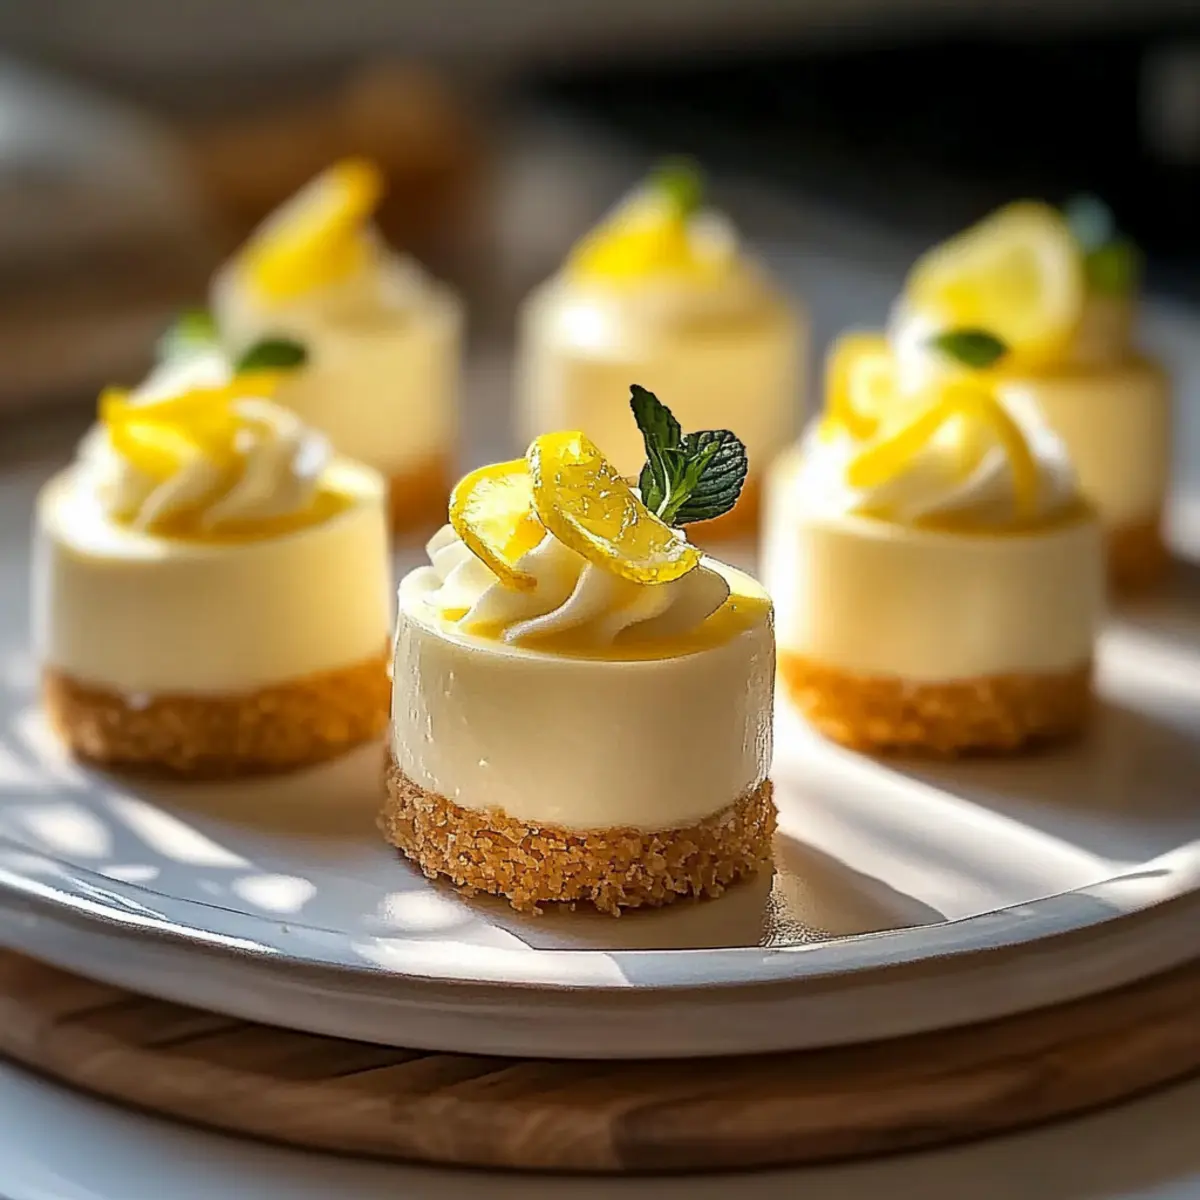
Customizable Joy: Top them with fresh berries or lemon curd for an extra layer of flavor and visual appeal—possibilities are endless!
Easy Preparation: These bite-sized desserts require minimal effort and can be made ahead, perfect for busy schedules or last-minute gatherings.
Perfectly Portable: Their mini size makes serving and sharing a breeze, ideal for picnics or potlucks.
Guilt-Free Indulgence: At approximately 250 calories each, you can enjoy a sweet treat without straying too far from your healthy eating goals!
You’ll love these Mini Lemon Cheesecakes; they’re just as enjoyable as my Crisp Mini Cheesecakes or my Lemon Truffles Zesty options!
Mini Lemon Cheesecake Ingredients
For the Crust
- Graham Cracker Crumbs – Provides structure and a sweet, crunchy base; substitute with crushed cookies for different flavors (e.g., Oreos).
- Melted Butter – Binds the crust ingredients together; unsalted butter is preferred to control salt levels.
For the Filling
- Cream Cheese (16 oz) – The main component for creaminess and tang; ensure it’s softened to prevent lumps.
- Granulated Sugar (½ cup) – Adds sweetness to the cheesecake filling; can be replaced with a sweeter alternative, like honey (adjust quantity appropriately).
- Eggs (2) – Provides structure and helps set the filling; use one egg plus an additional egg white for a lighter texture.
- Sour Cream (¼ cup) – Contributes creaminess and a subtle tang; Greek yogurt can be used as a healthy substitute.
- Lemon Juice (2 tbsp) – Adds the signature tart flavor; freshly squeezed juice offers the best flavor.
- Lemon Zest (1 tsp) – Enhances the lemon flavor profile; more zest can be added for an intense lemon taste.
- Vanilla Extract (1 tsp) – Rounds out the flavor with warmth; use pure vanilla extract for a better result.
These Mini Lemon Cheesecakes offer a delightful blend of flavors and textures, making them an irresistible treat for any occasion!
Step‑by‑Step Instructions for Mini Lemon Cheesecakes
Step 1: Preheat the Oven
Begin by preheating your oven to 325°F (163°C). While it heats, prepare a muffin tin by lining it with paper liners or silicone cups to make for easy removal later. This ensures your Mini Lemon Cheesecakes will bake uniformly, creating that delightful creamy texture we all love.
Step 2: Prepare the Crust
In a medium bowl, combine graham cracker crumbs with melted butter until well mixed. The mixture should resemble wet sand. Spoon this mixture into each muffin cup and press it down firmly using the back of a small glass or your fingers, forming a solid base. This step is essential for creating a sturdy crust that will hold your cheesecakes.
Step 3: Bake the Crusts
Place the crust-filled muffin tin into the preheated oven and bake for about 8 minutes. Once done, check that the crusts are lightly golden around the edges. Allow them to cool slightly in the pan while you prepare the cheesecake filling, as you want to maintain that lovely buttery flavor.
Step 4: Make the Cheesecake Filling
In a large mixing bowl, use an electric mixer to beat the softened cream cheese and granulated sugar together until the mixture is smooth and creamy. This should take about 2-3 minutes. Ensuring your cream cheese is at room temperature helps avoid lumps, creating a velvety filling for your Mini Lemon Cheesecakes.
Step 5: Incorporate the Eggs
Add the eggs to the cream cheese mixture one at a time, mixing well after each addition. This promotes a well-emulsified filling, achieving a light and airy texture. Next, mix in the sour cream, lemon juice, lemon zest, and vanilla extract, blending everything together until it’s completely smooth and thoroughly combined.
Step 6: Fill the Cups
Using a spoon or a small measuring cup, carefully fill each muffin cup with the cheesecake mixture, filling them almost to the top. Smooth the surface if needed. Be sure not to overfill, as the filling will slightly puff during baking, resulting in perfectly proportioned Mini Lemon Cheesecakes.
Step 7: Bake the Cheesecakes
Bake your filled muffin tin in the oven for 18-20 minutes. The centers should be set but still have a slight jiggle when shaken gently. Keep an eye on them to avoid over-baking, which can lead to a drier texture—your goal is creamy perfection!
Step 8: Cool and Chill
After baking, remove the tin from the oven and let the cheesecakes cool in the muffin tin for about 10 minutes. Then, gently transfer them to a wire rack to cool completely. Refrigerate the cheesecakes for at least 2 hours prior to serving. This chilling time allows the flavors to meld beautifully, readying your Mini Lemon Cheesecakes for that first delightful bite.
Mini Lemon Cheesecakes Variations & Substitutions
Feel free to get creative with your Mini Lemon Cheesecakes! These sweet treats are a blank canvas just waiting for your unique touch.
-
Gluten-Free Crust: Substitute graham cracker crumbs with almond flour or gluten-free cookie crumbs for a gluten-free option. This allows everyone to join in on the lemony fun!
-
Dairy-Free Delight: Use vegan cream cheese and coconut oil instead of traditional cream cheese and butter, making it a creamy treat that’s dairy-free without losing flavor.
-
Honey-Sweetened: Swap out granulated sugar for honey in the filling for a natural sweetener change. Just be mindful to adjust the liquid ingredients slightly for the perfect balance!
-
Citrus Variety: Mix it up by incorporating lime or orange zest and juice into your filling for a delightful twist. These variations can introduce exciting new flavor dimensions that brighten the dessert!
-
Chocolate Drizzle: If you or your guests are chocolate lovers, drizzle some melted chocolate on top or even fold cocoa powder into part of the filling for a rich sensation.
-
Berry Bliss: Top your cheesecakes with a medley of fresh berries, such as raspberries or blueberries, for a burst of color, flavor, and a touch of sweetness that complements the tangy lemon.
-
Lemon Curd Swirl: Add a swirl of lemon curd on top of each cheesecake before baking. This not only enhances the lemon flavor but also gives a stunning visual appeal—it’s a feast for the eyes!
Feel free to check out my other recipes such as the Mini Cherry Pies or the delicious Lemon Parmesan Lettuce that might inspire you to experiment further with your favorite flavors!
How to Store and Freeze Mini Lemon Cheesecakes
Fridge: Keep your cheesecakes in an airtight container for up to 5 days. This helps maintain their creamy texture and fresh flavor.
Freezer: For longer storage, freeze the Mini Lemon Cheesecakes in individual portions for up to 3 months. Wrap them tightly in plastic wrap, then place in a freezer-safe container to prevent freezer burn.
Reheating: Thaw frozen cheesecakes in the fridge overnight. You can serve them chilled straight from the fridge or let them sit at room temperature for about 15-20 minutes before enjoying.
Serving Note: If you’re looking for an extra treat, consider adding a fresh dollop of whipped cream or a sprinkle of lemon zest just before serving!
Expert Tips for Mini Lemon Cheesecakes
-
Perfectly Softened Cream Cheese: Make sure your cream cheese is at room temperature; this prevents lumps and ensures a creamy filling for your Mini Lemon Cheesecakes.
-
Avoid Over-Baking: Keep a close watch while baking; pull them out when they still have a slight jiggle in the center for that ideal creamy texture.
-
Use Liners for Easy Serving: Employing cupcake liners in your muffin tin makes removal a breeze and keeps your cheesecakes intact for a stunning presentation.
-
Customize Your Zest: Feel free to add more lemon zest for a bolder lemon flavor, or mix in different citrus zests to create your unique twist on these cheesecakes.
-
Chill Before Serving: Remember to refrigerate the cheesecakes for at least 2 hours before serving; this helps the flavors develop and enhances their texture.
What to Serve with Creamy Mini Lemon Cheesecakes?
Imagine a sunny afternoon where every bite of these delightful cheesecakes dances on your palate, inviting you to indulge in the perfect meal.
-
Fresh Berries: Serve with a mix of strawberries, blueberries, and raspberries for a burst of color and freshness, balancing the sweetness of the cheesecake beautifully. Their juicy texture complements the creaminess perfectly.
-
Citrus Salad: A refreshing citrus salad featuring oranges, grapefruits, and a drizzle of honey adds a bright, zesty contrast to the rich cheesecakes. The natural acidity cuts through the cheesecake’s creaminess, creating a well-rounded dessert experience.
-
Whipped Cream: A dollop of lightly sweetened whipped cream elevates these mini desserts, adding a luxurious touch and a velvety texture that pairs perfectly with the tangy filling.
-
Herbal Tea: A steaming cup of chamomile or mint tea offers a soothing accompaniment, enhancing the fresh lemon notes and providing a calming finish to your meal. The warmth of the tea harmonizes with the cheesecakes, allowing for a serene moment of indulgence.
-
Lemon Curd: A small spoonful of tangy lemon curd on top adds an extra punch of citrus flavor, further intensifying the lemony delight of the cheesecakes. Its smoothness seamlessly melds with the creamy texture, enhancing every bite.
-
Sparkling Water with Mint: Serving these cheesecakes with sparkling water infused with fresh mint brings a refreshing and effervescent touch. It cleanses the palate while making for a light and invigorating beverage option alongside the sweet dessert.
-
Dark Chocolate Shavings: Consider garnishing with dark chocolate shavings for a decadent twist. The rich, slightly bitter chocolate contrasts wonderfully with the tart sweetness of the cheesecakes, creating a delightful balance of flavors.
These pairings will elevate your dessert experience, making these Mini Lemon Cheesecakes a memorable centerpiece for any occasion!
Make Ahead Options
These Mini Lemon Cheesecakes are a perfect dessert for meal prep enthusiasts looking to save time! You can prepare the graham cracker crusts and store them in an airtight container in the refrigerator for up to 3 days. The cheesecake filling can also be made and refrigerated overnight, keeping it fresh and flavorful. When you’re ready to serve, simply fill the pre-made crusts with the filling and bake them according to the recipe instructions. To maintain the quality, ensure the crusts are completely cooled before storing, and refrigerate the cheesecakes after baking for at least 2 hours before serving. This way, you’ll have delicious, crowd-pleasing Mini Lemon Cheesecakes ready with minimal effort for your busy weeknights!
Mini Lemon Cheesecakes Recipe FAQs
How do I choose ripe lemons for my cheesecake?
Absolutely! When selecting lemons, look for ones that are heavy for their size, with smooth and vibrant skin. Avoid any that have dull spots or are overly hard, as these might be less juicy. Freshly squeezed lemon juice offers the brightest flavor, so selecting the ripest lemons ensures that your Mini Lemon Cheesecakes will have that signature tang.
How should I store my mini cheesecakes?
To maintain the deliciousness of your cheesecakes, store them in an airtight container in the refrigerator for up to 5 days. Make sure they are completely cooled before placing them in the container to keep their creamy texture intact. If you’re preparing for an event, you can make them ahead and simply chill!
Can I freeze mini lemon cheesecakes?
Very much! For longer storage, your Mini Lemon Cheesecakes can be frozen for up to 3 months. Here’s how: Individually wrap each cheesecake in plastic wrap, then place them in a freezer-safe container or bag. This will protect them from freezer burn. When you’re ready to enjoy, just thaw them in the fridge overnight.
What should I do if my cheesecake filling is lumpy?
If your filling becomes lumpy, don’t worry! This can happen if the cream cheese isn’t softened enough at room temperature. To fix this, make sure to beat your cream cheese well before adding any other ingredients. If lumps do occur, you can blend the mixture with an immersion blender for a smooth finish.
Are there any dietary considerations for the mini cheesecakes?
Absolutely! If you’re making these for someone with dairy allergies or looking for a lighter option, you can substitute the cream cheese with a dairy-free cream cheese alternative. Additionally, check for gluten-free graham crackers if you need a gluten-free option. Always double-check ingredients to suit personal dietary needs!
Can I customize the flavors of my mini cheesecakes?
The more the merrier! These cheesecakes are fantastic for customization. You can add different citrus zests like lime or orange, or even swirl in some fruit puree for a fruity twist. Get creative—each variation can create a unique twist on your classic Mini Lemon Cheesecakes!
Irresistibly Creamy Mini Lemon Cheesecakes for Sweet Moments
Ingredients
Equipment
Method
- Preheat your oven to 325°F (163°C) and line muffin tin with paper liners.
- Mix graham cracker crumbs with melted butter until resembling wet sand. Press into muffin cups.
- Bake crust for about 8 minutes until lightly golden. Let cool slightly.
- In a mixing bowl, beat cream cheese and granulated sugar until smooth and creamy.
- Add eggs one at a time, mixing well after each. Mix in sour cream, lemon juice, lemon zest, and vanilla until smooth.
- Fill muffin cups with the cheesecake mixture, being careful not to overfill.
- Bake for 18-20 minutes until centers are set with a slight jiggle.
- Cool for about 10 minutes, then transfer to wire rack to cool completely. Refrigerate for at least 2 hours before serving.
Leave a Reply